Hybrik’s API with Postman Tutorial
Hybrik’s Job Management portion of the API is pretty straight forward but if you’re new to calling APIs, you might find Postman more intuitive and convienent than a command line tool such as curl.
Postman is a cross-platform Graphical User Interface tool that makes it easy to build and debug requests. We’ve assembed a pre-built series of examples into a Postman Collection which will let you start tinkering with the Hybrik API in no time.
You can download the example Postman Collection and Environment here, then follow our examples.
Setting up Postman
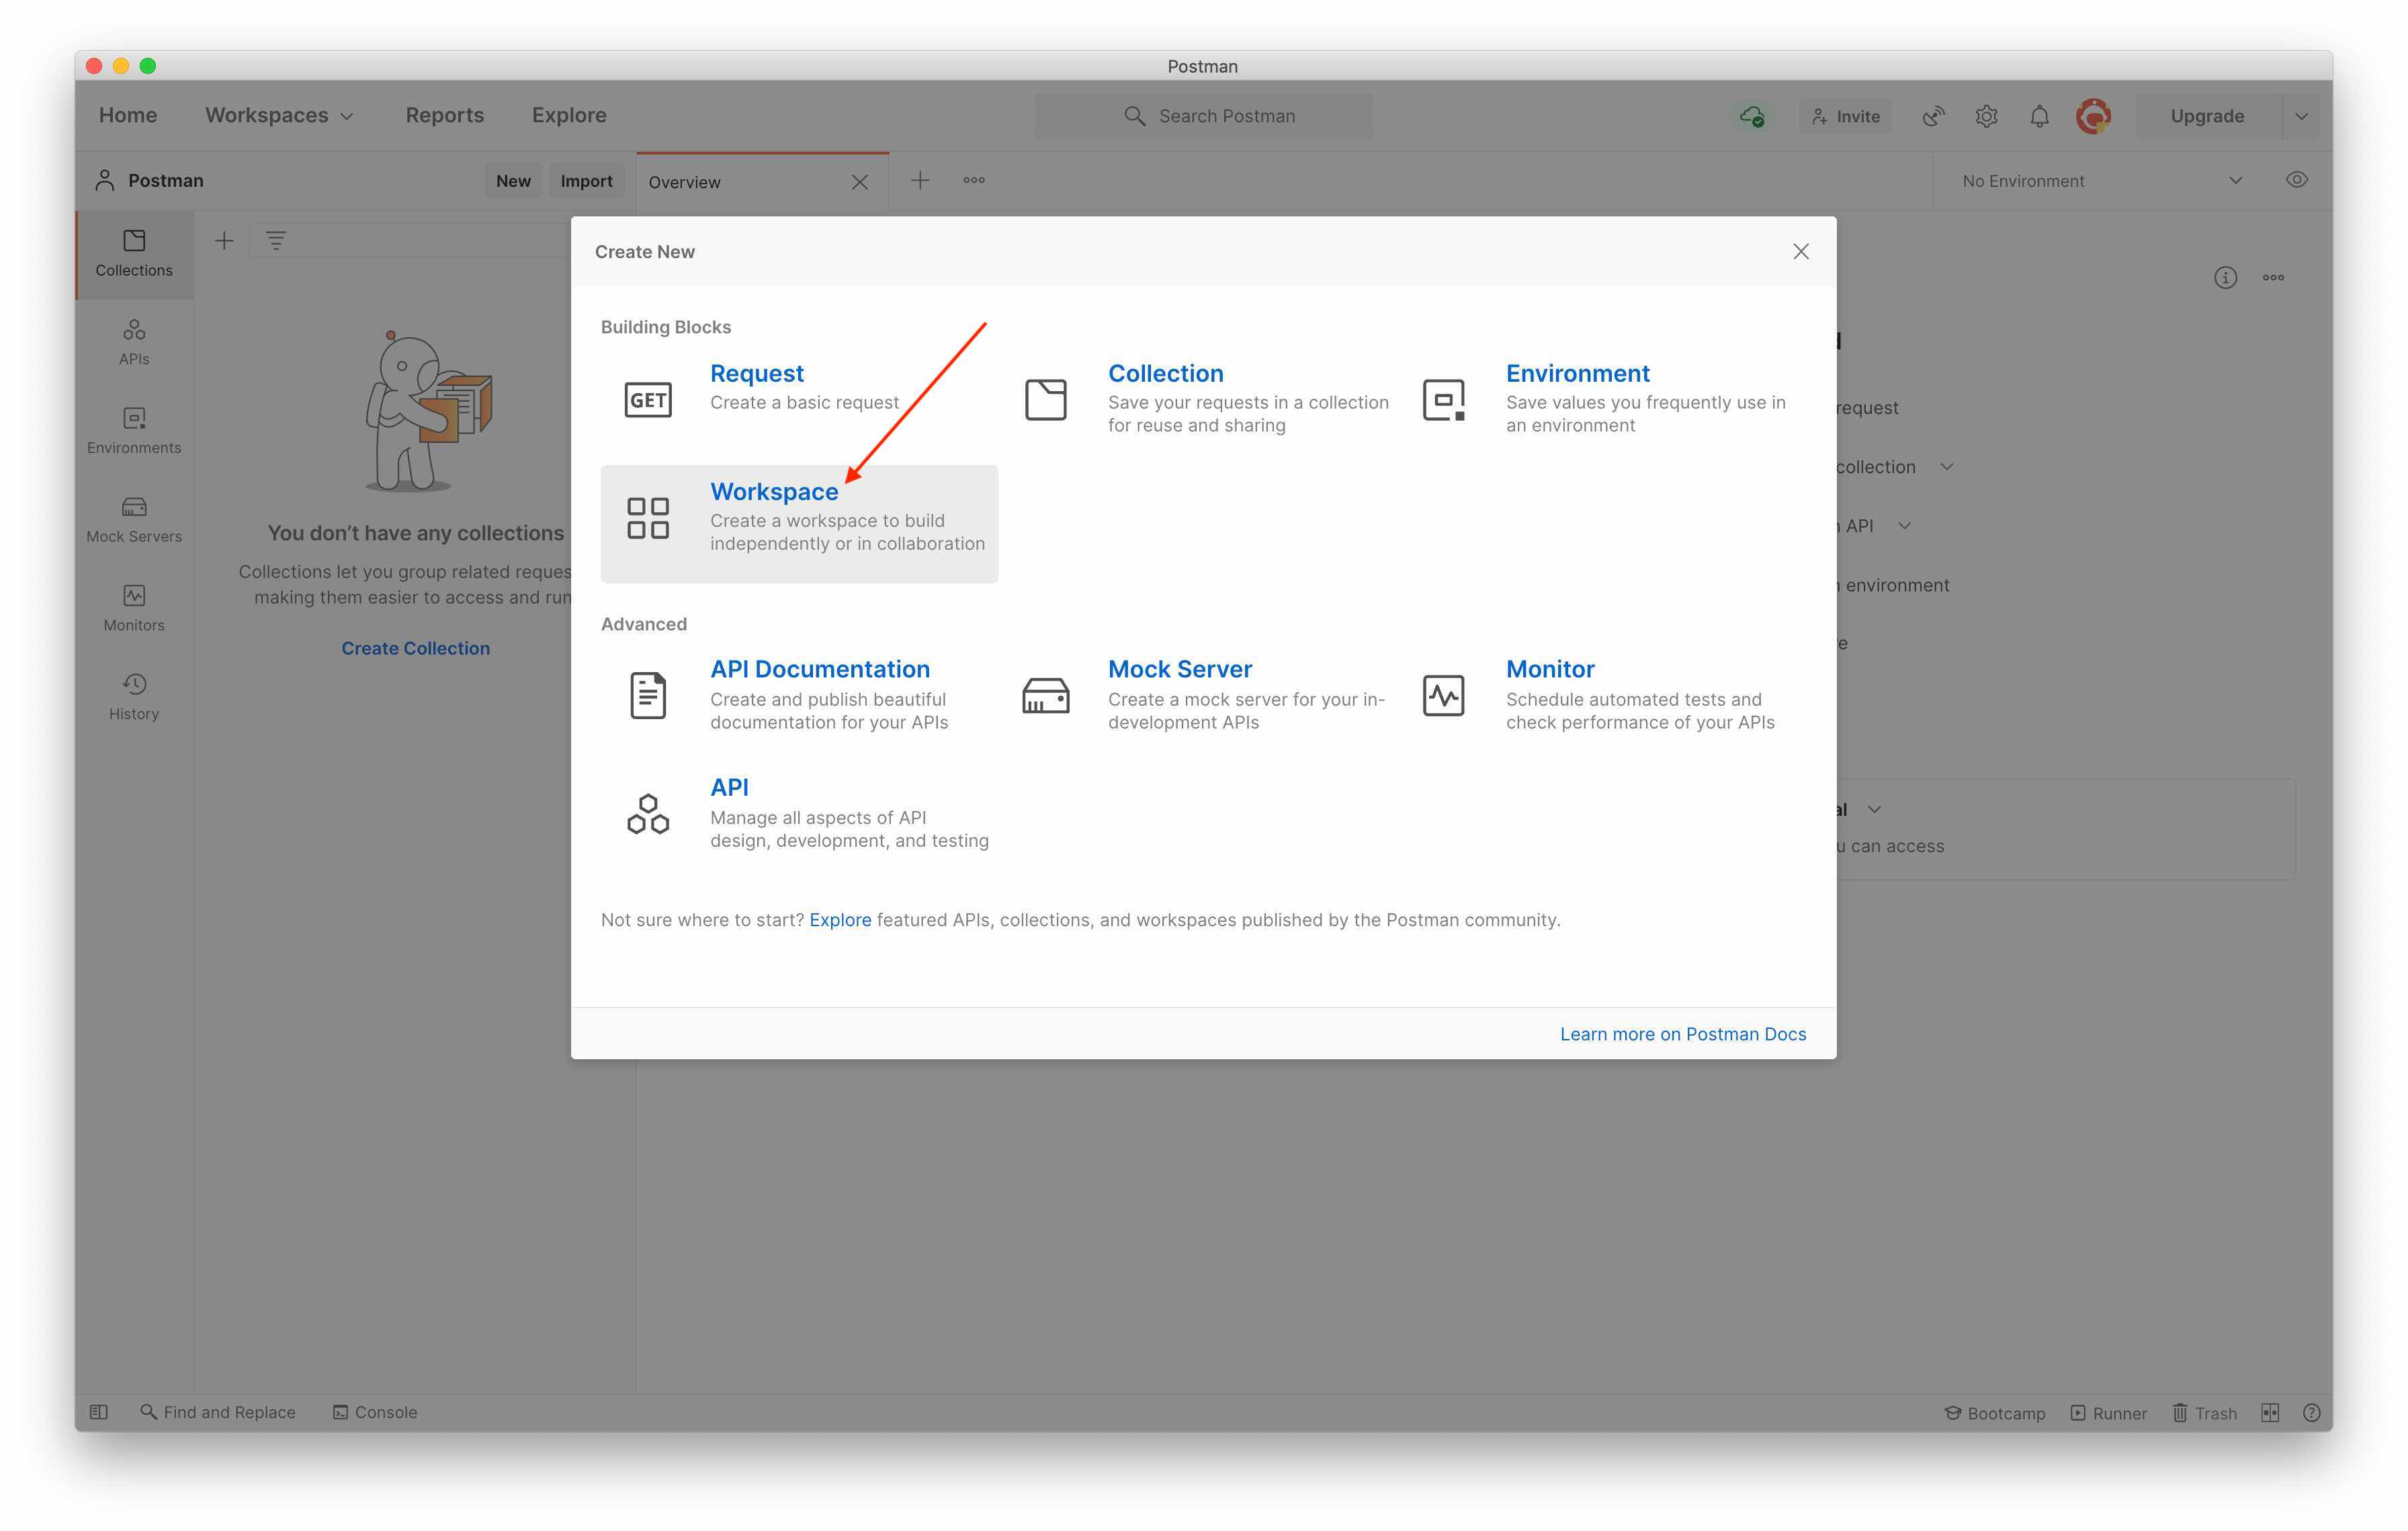
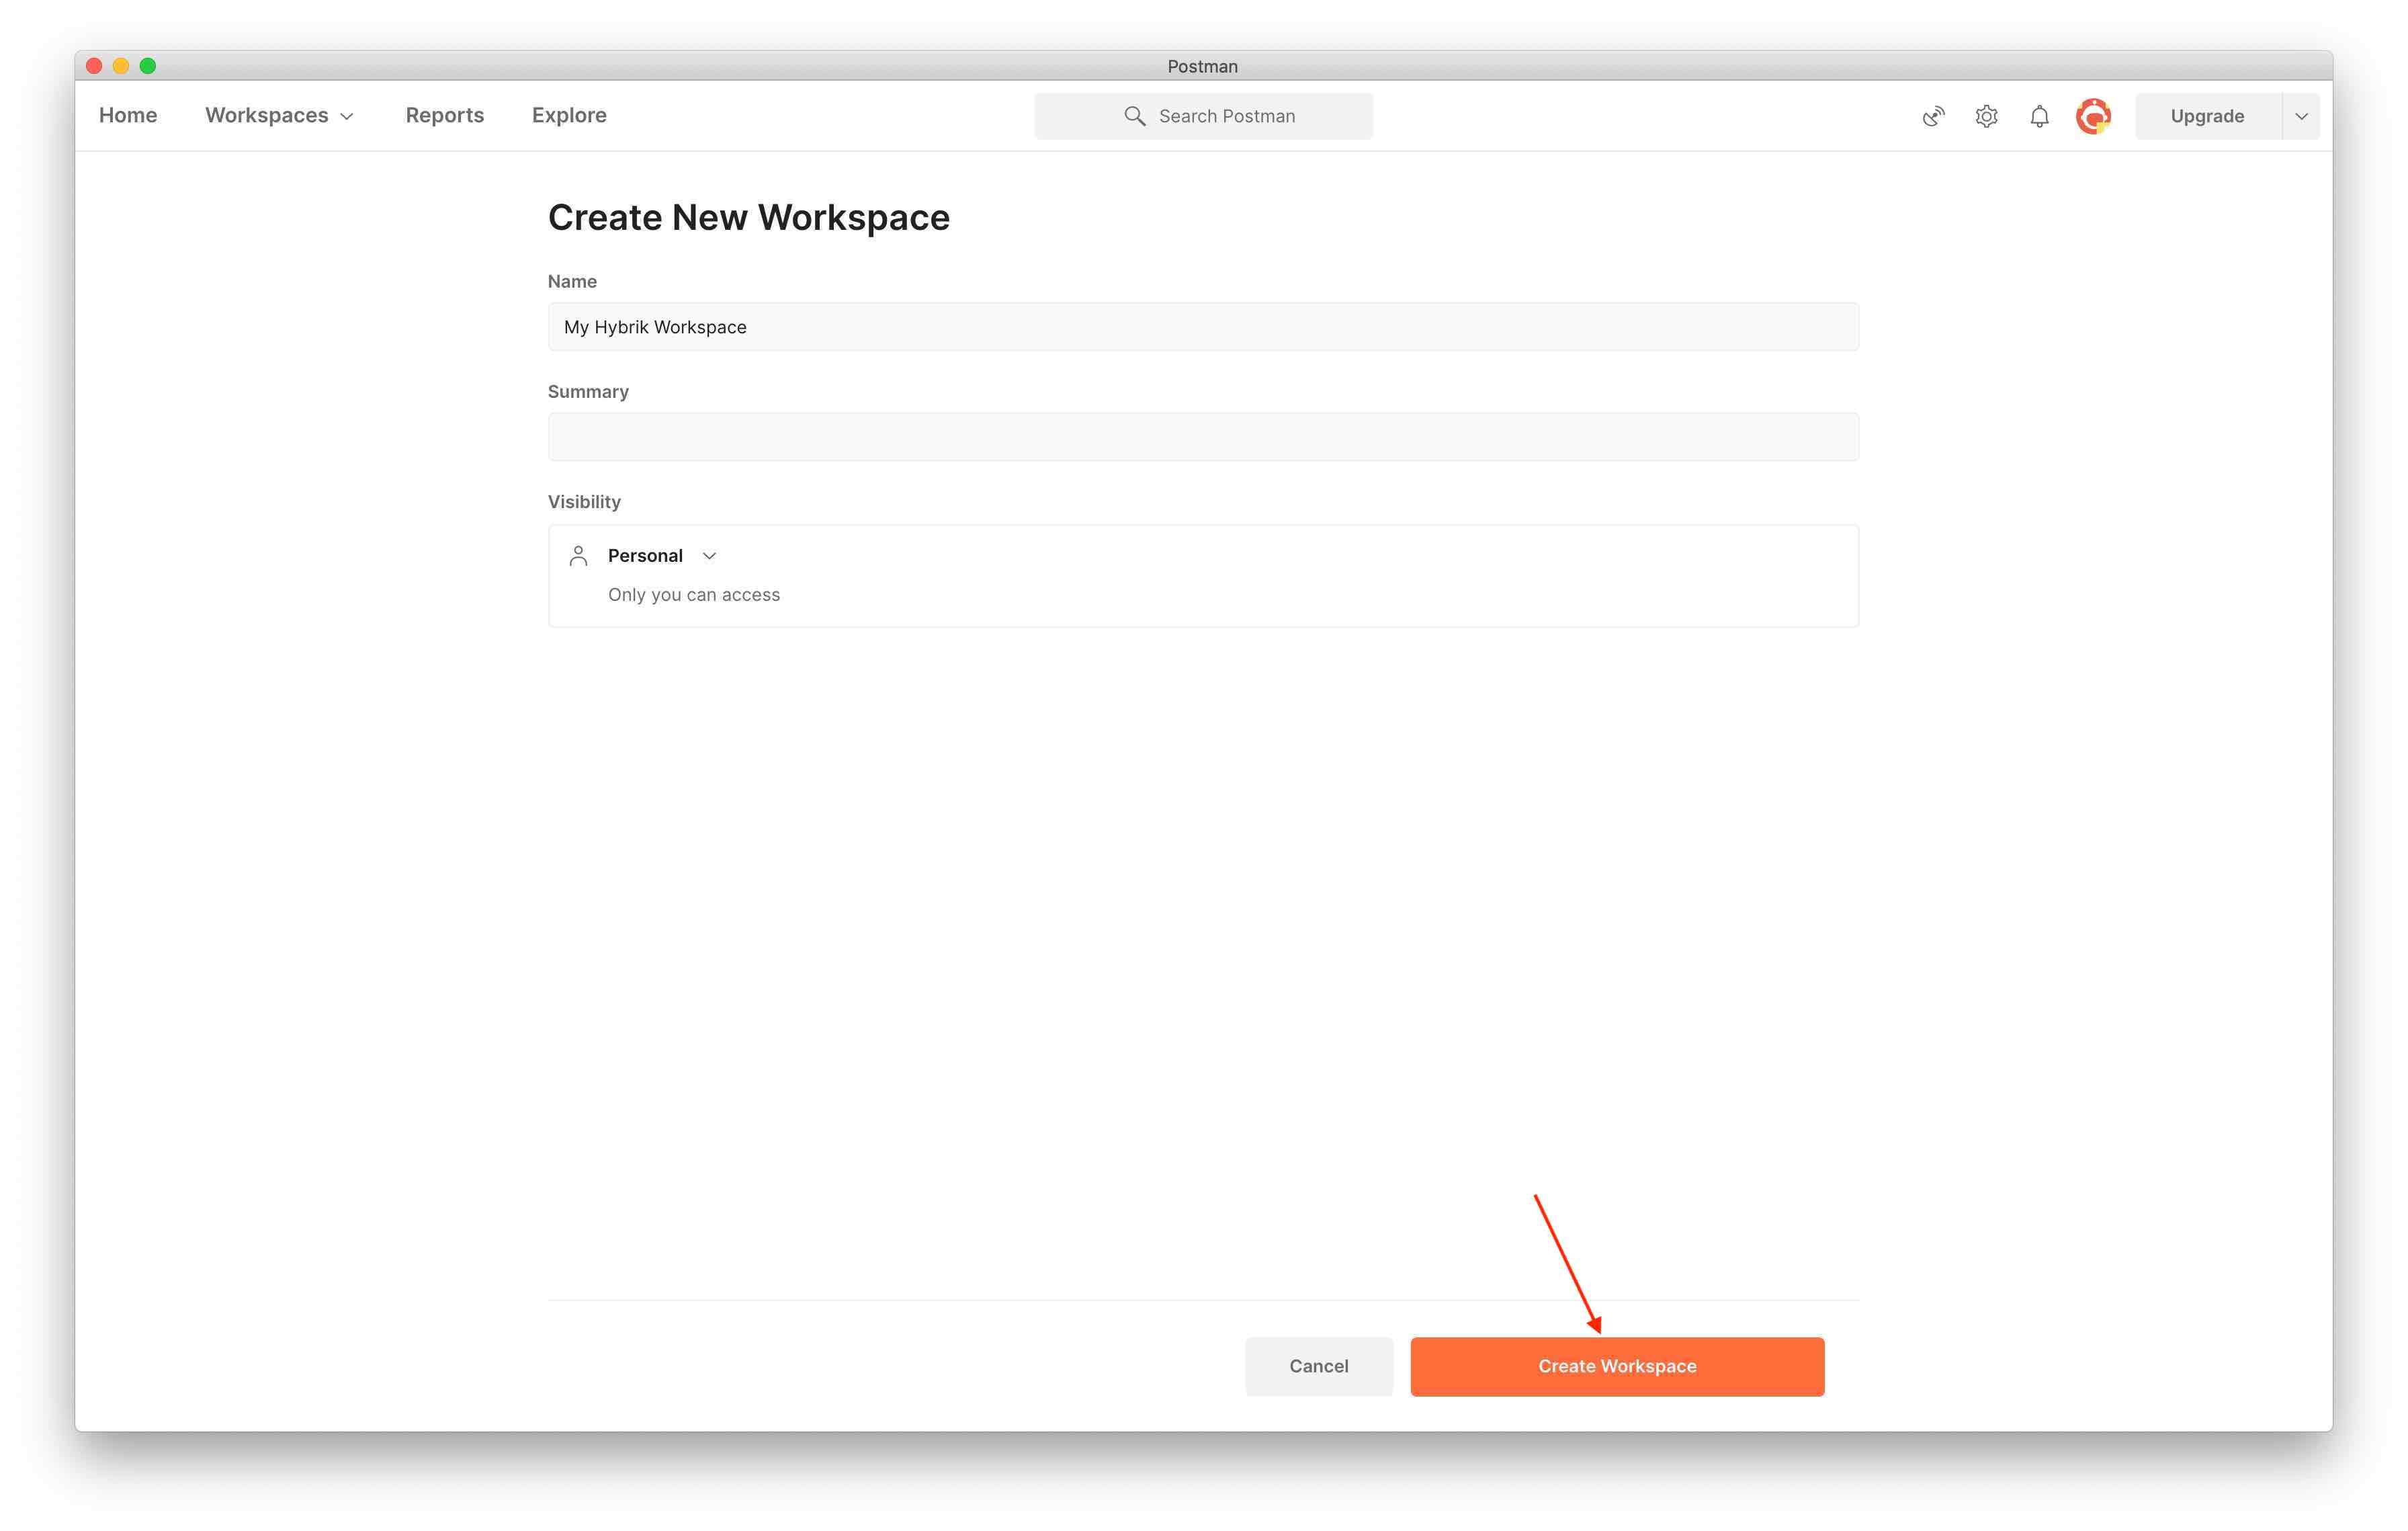
- First, download your own copy of Postman and open the interface and create a new workspace.
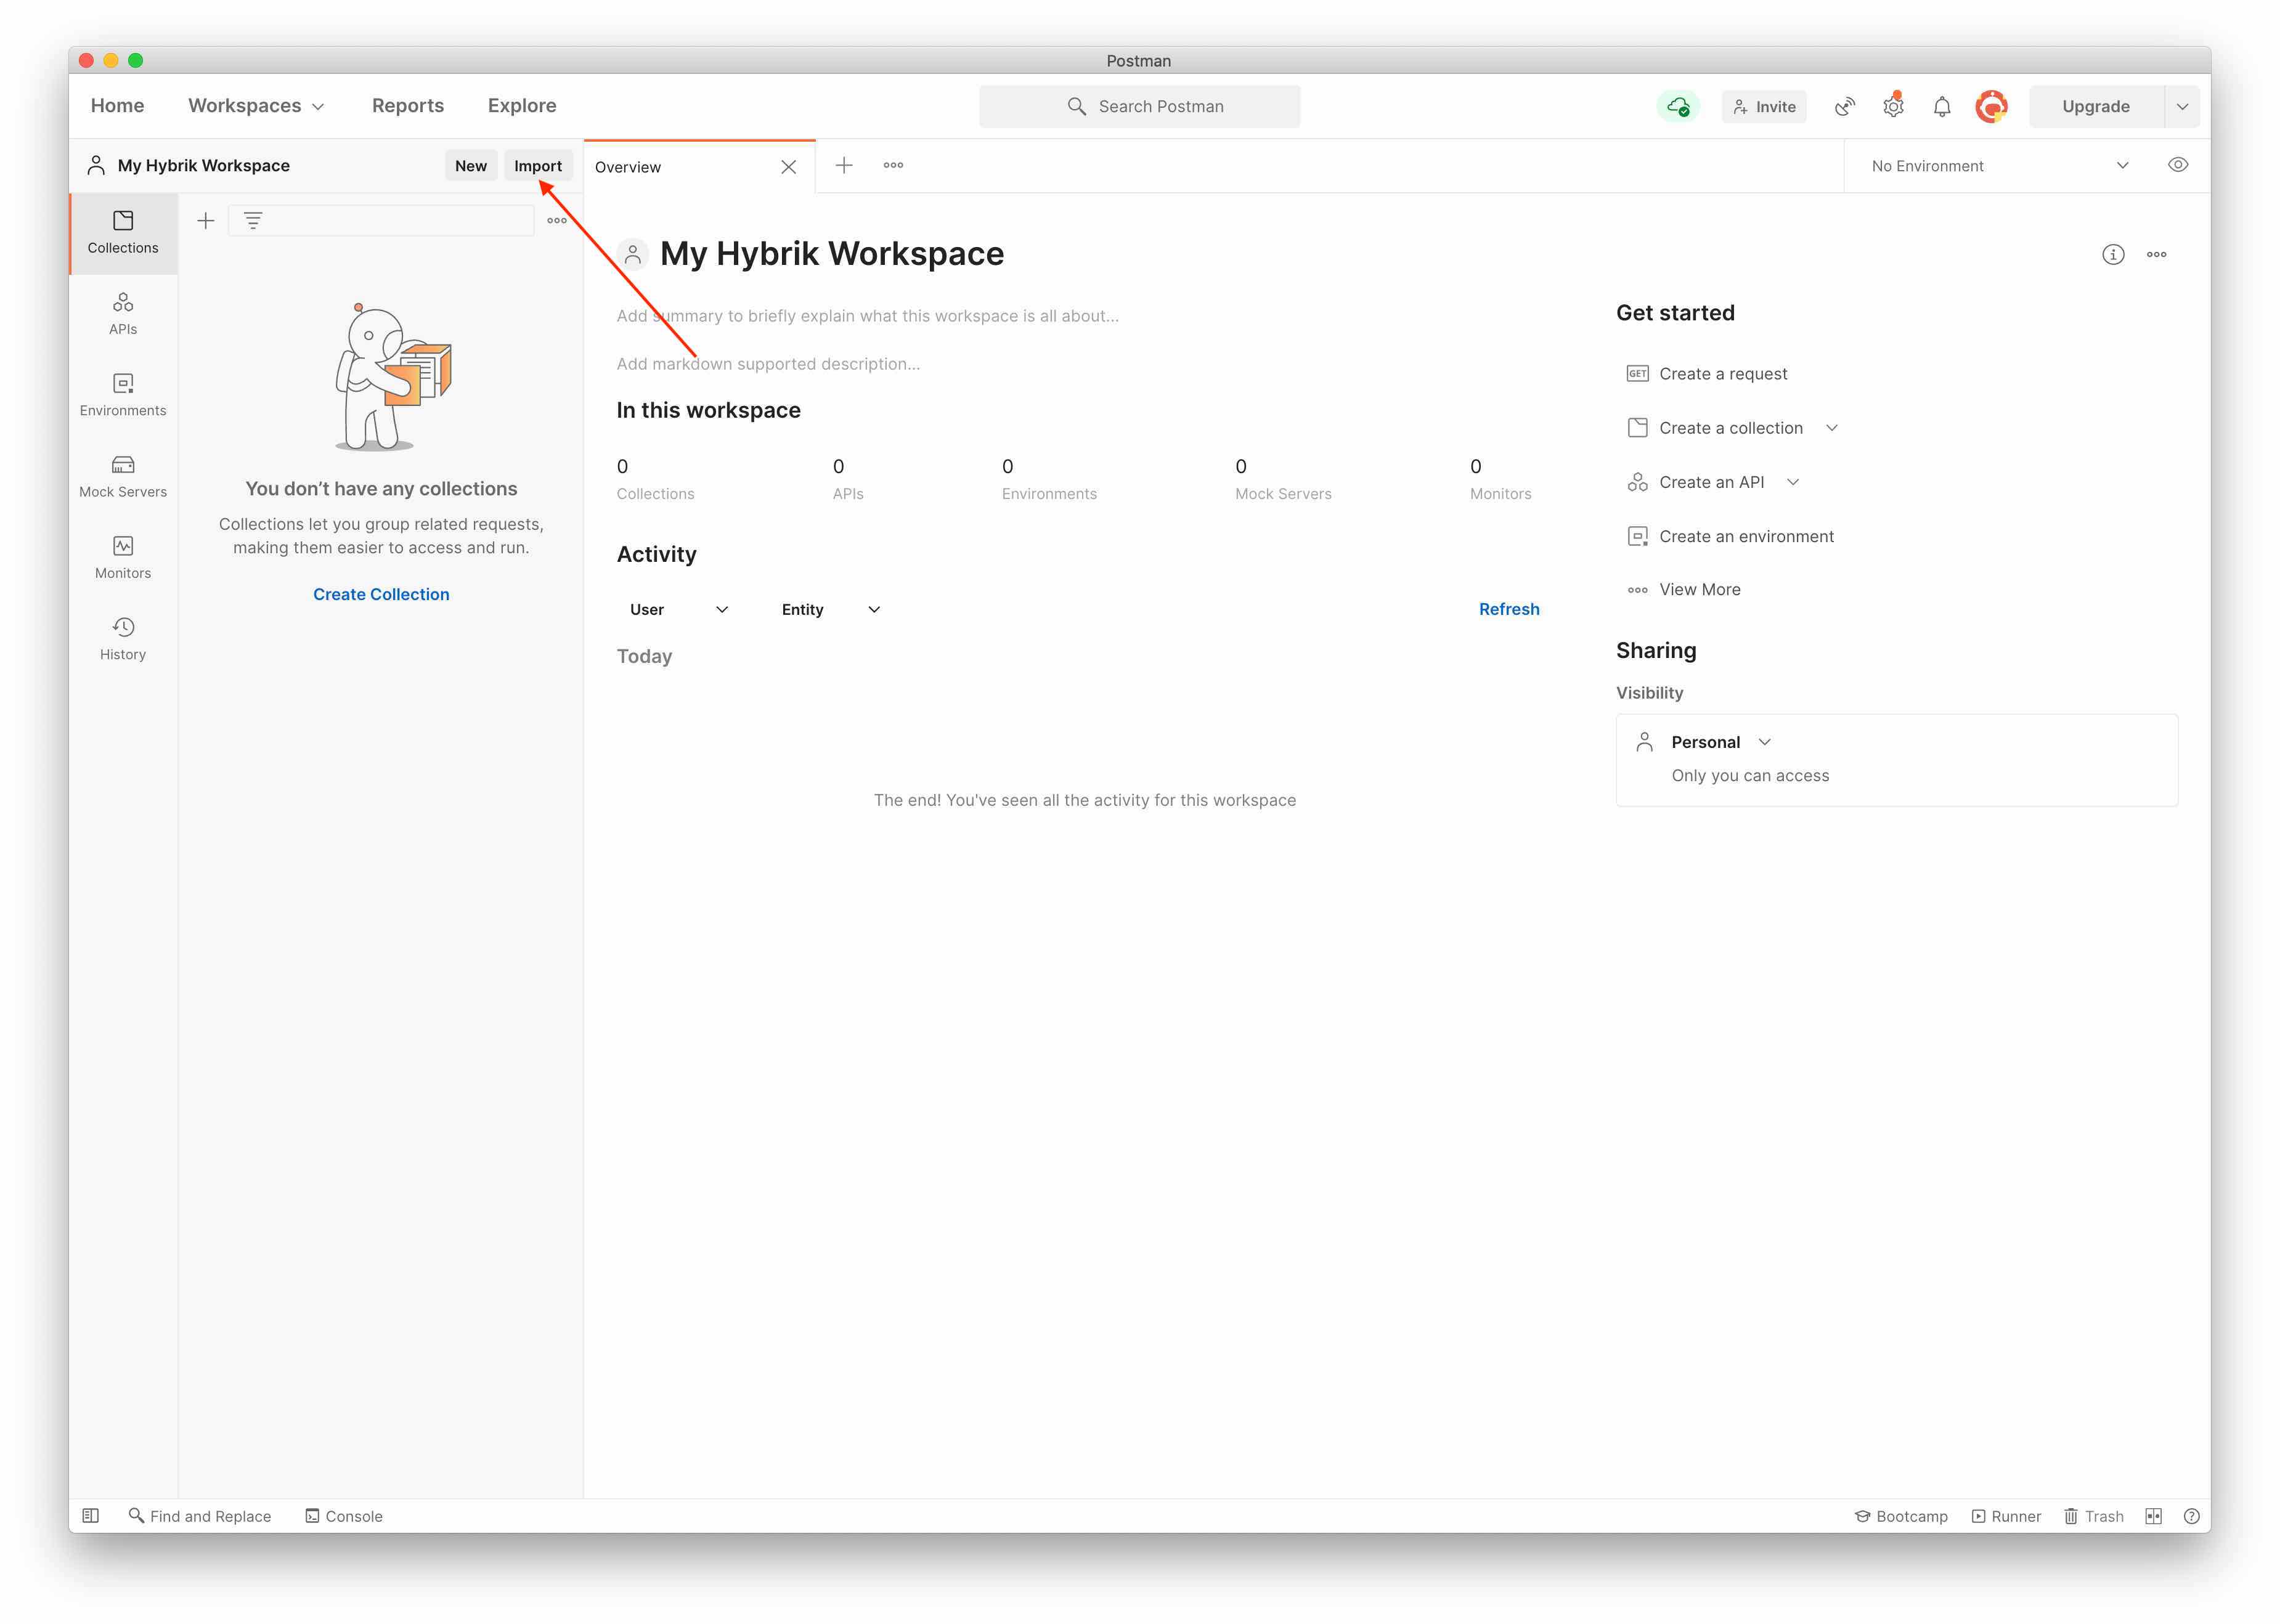
- Next click on the import button.
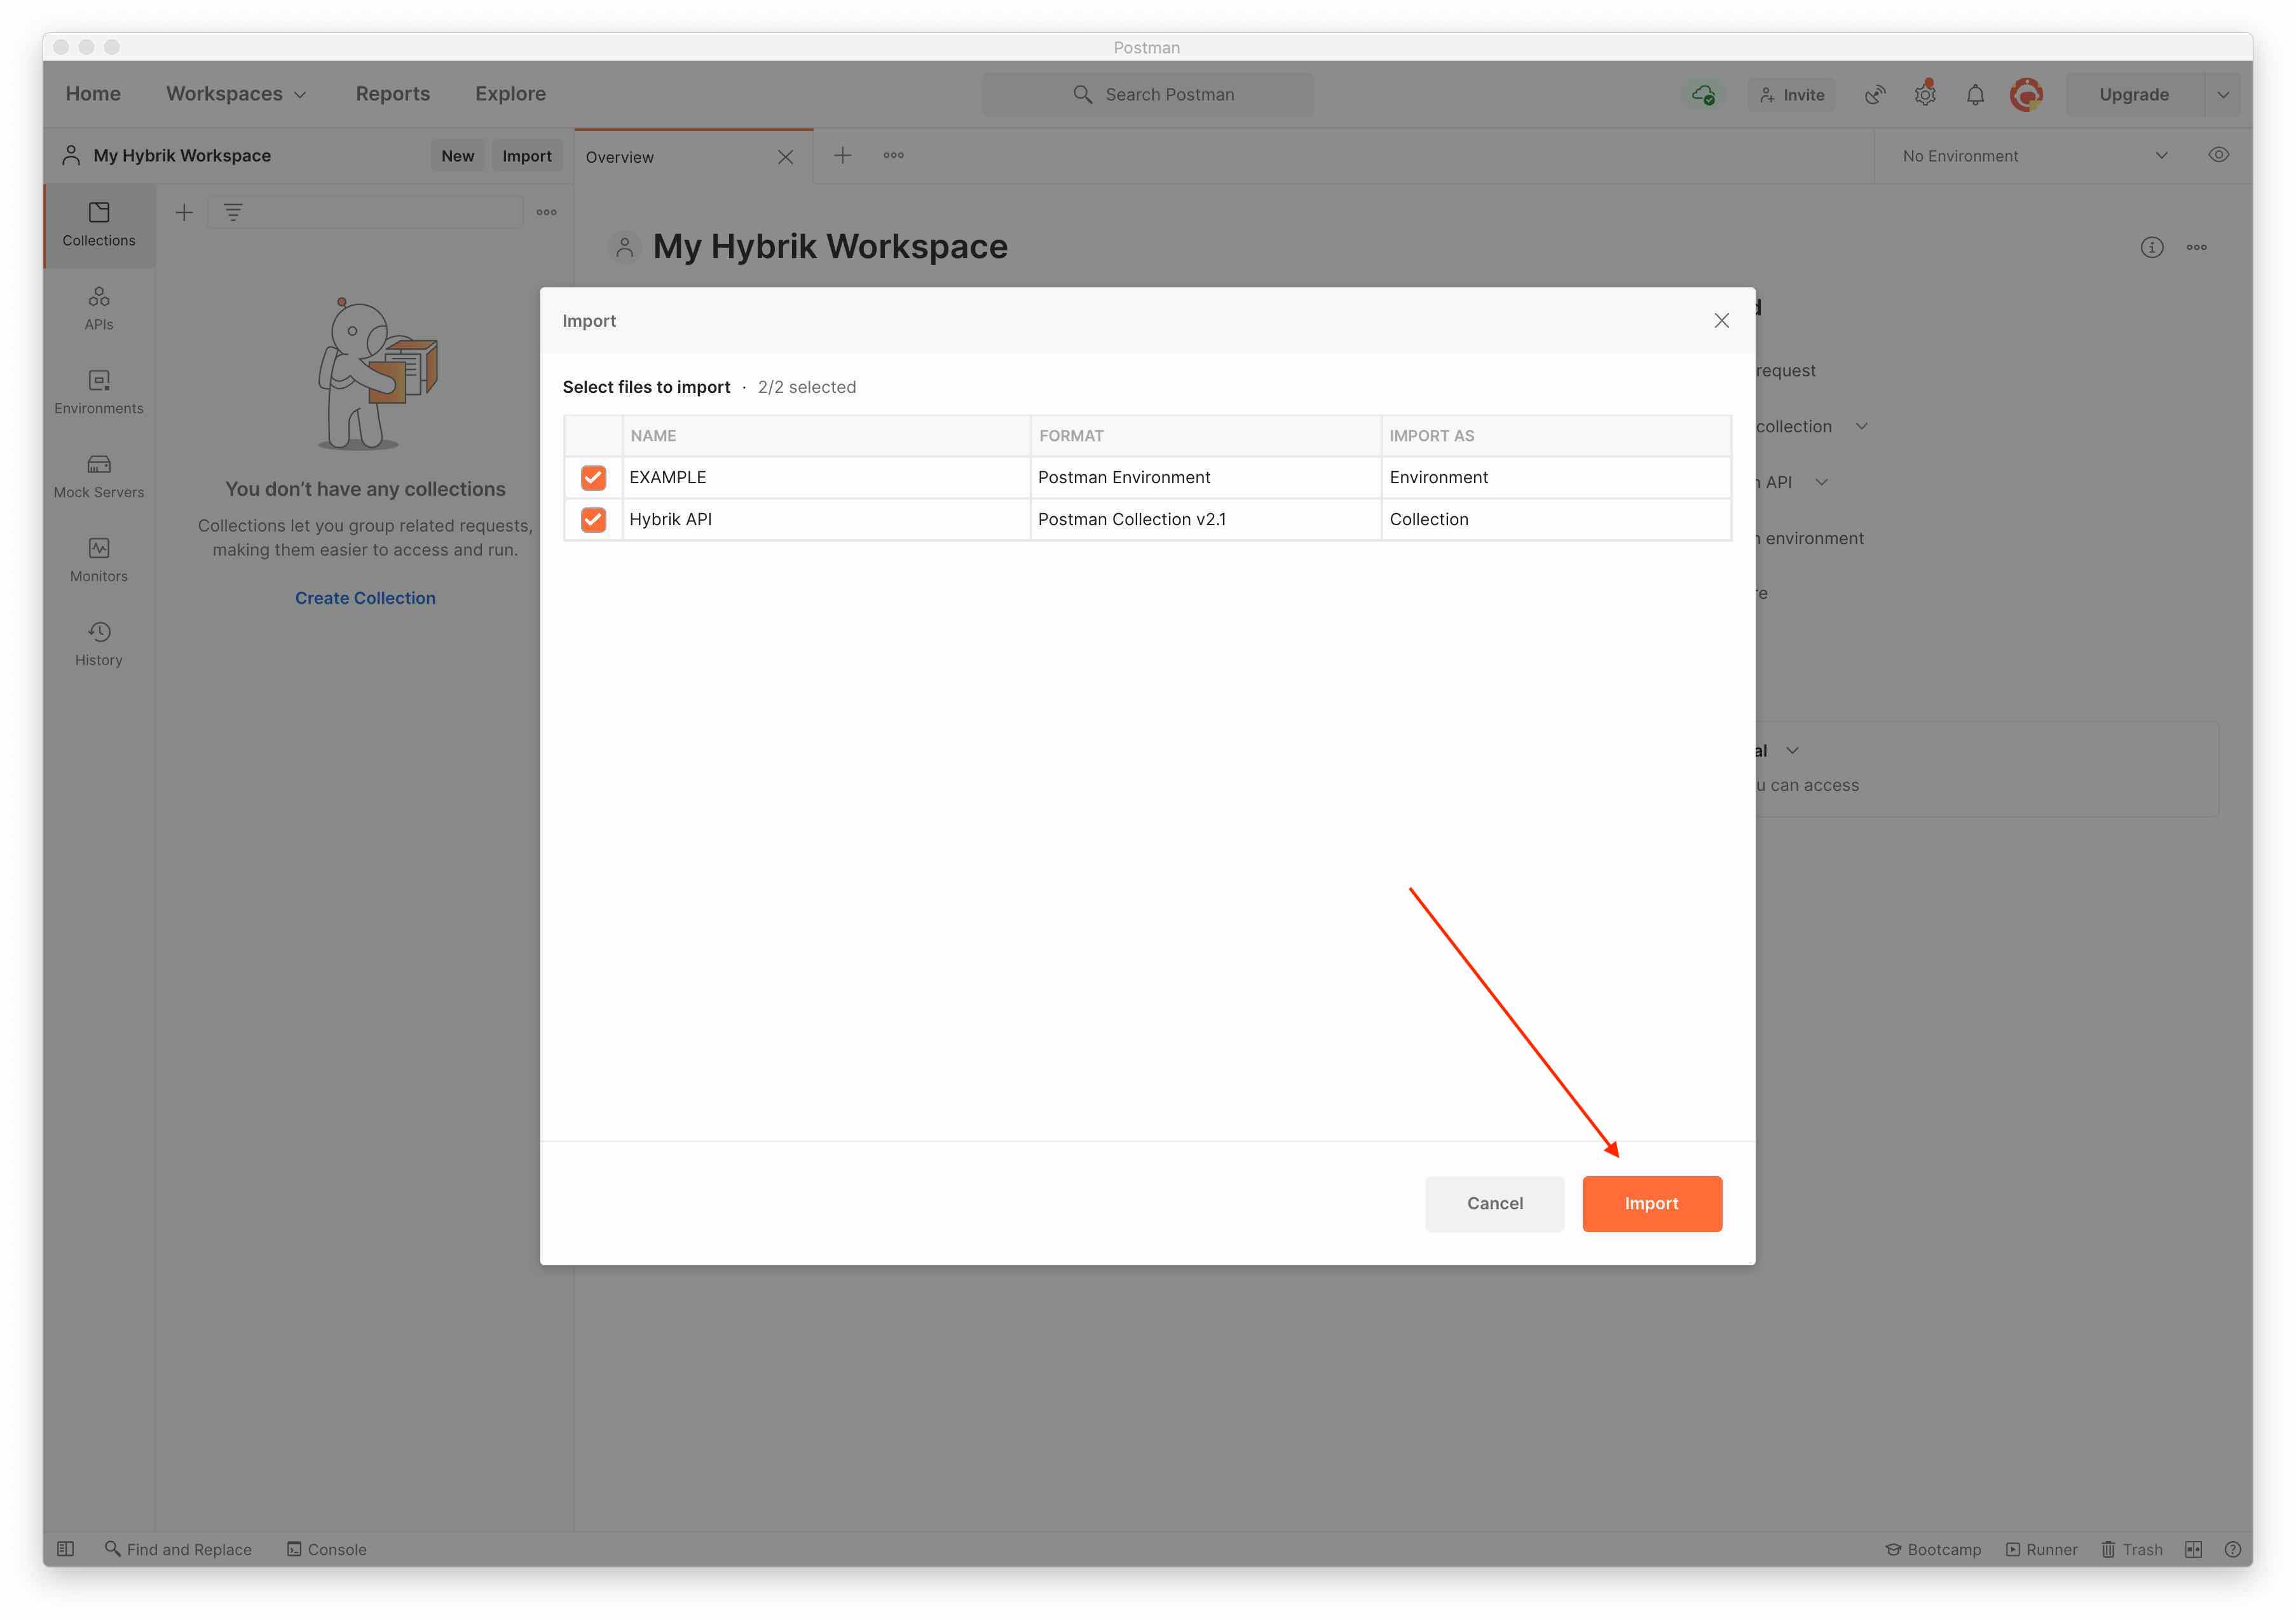
- Select the Hybrik API Collection JSON json file and the Environment JSON json file.
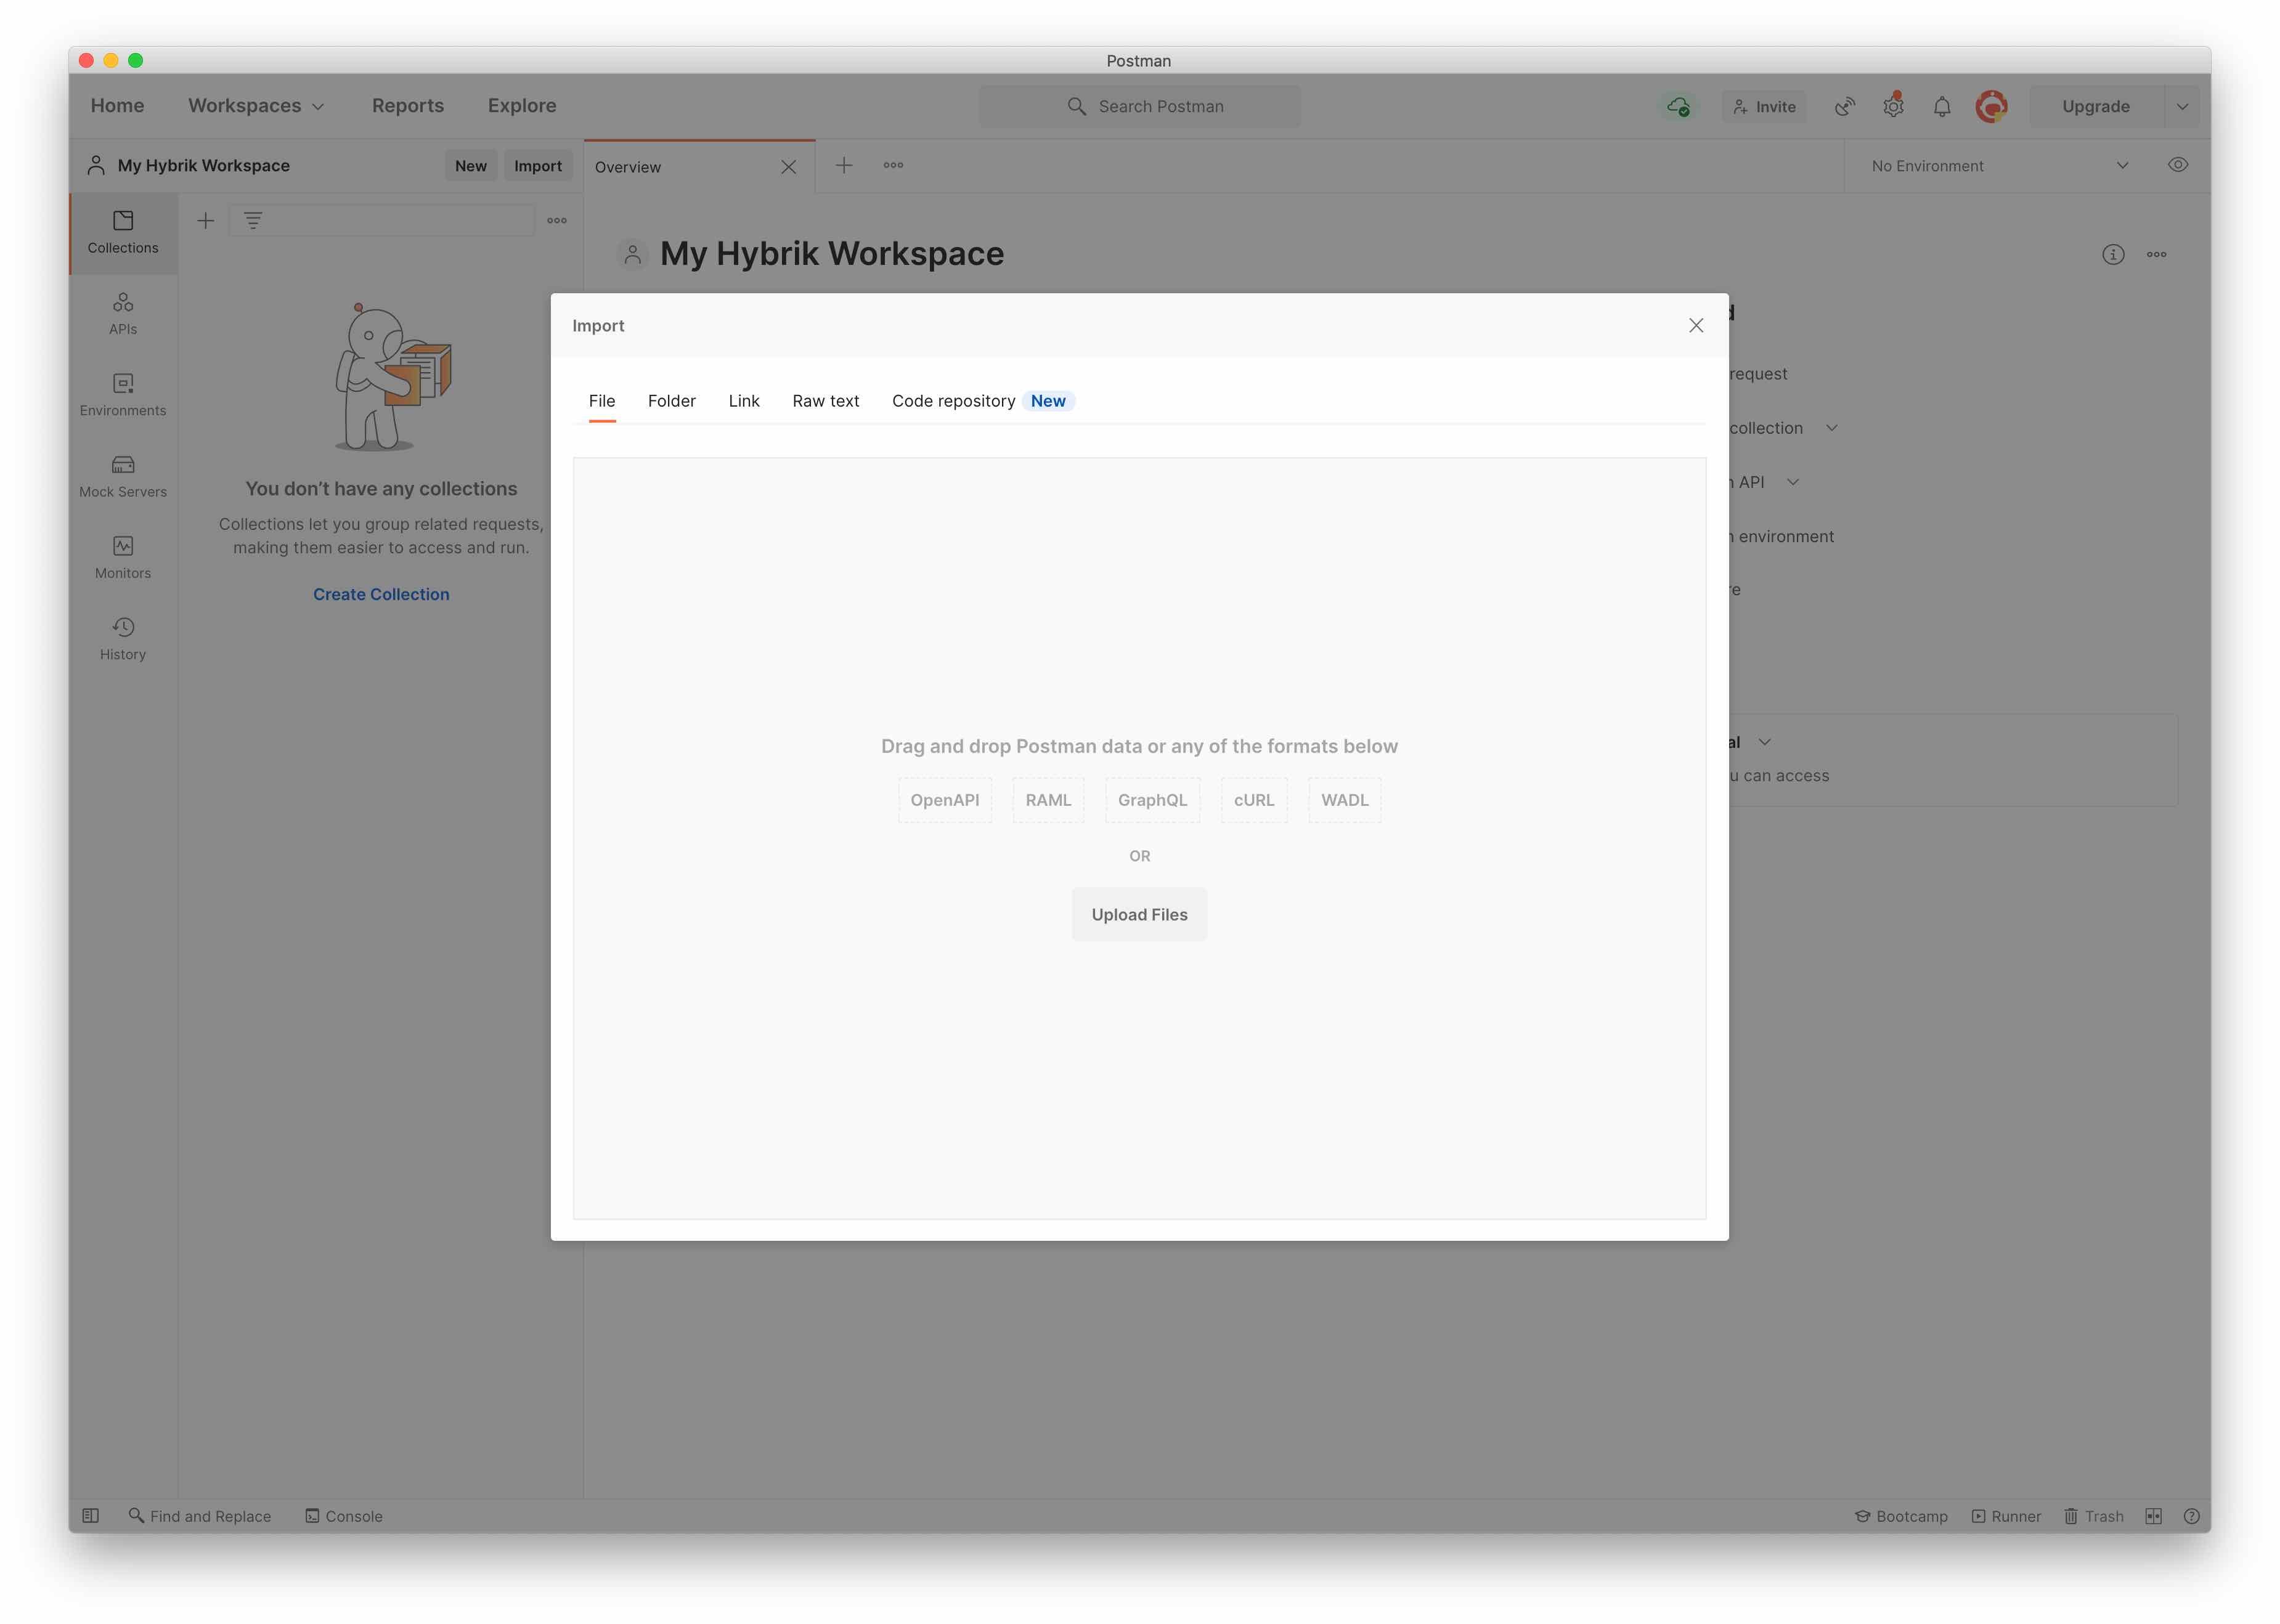
- Once you have selected the files, choose the Import button.
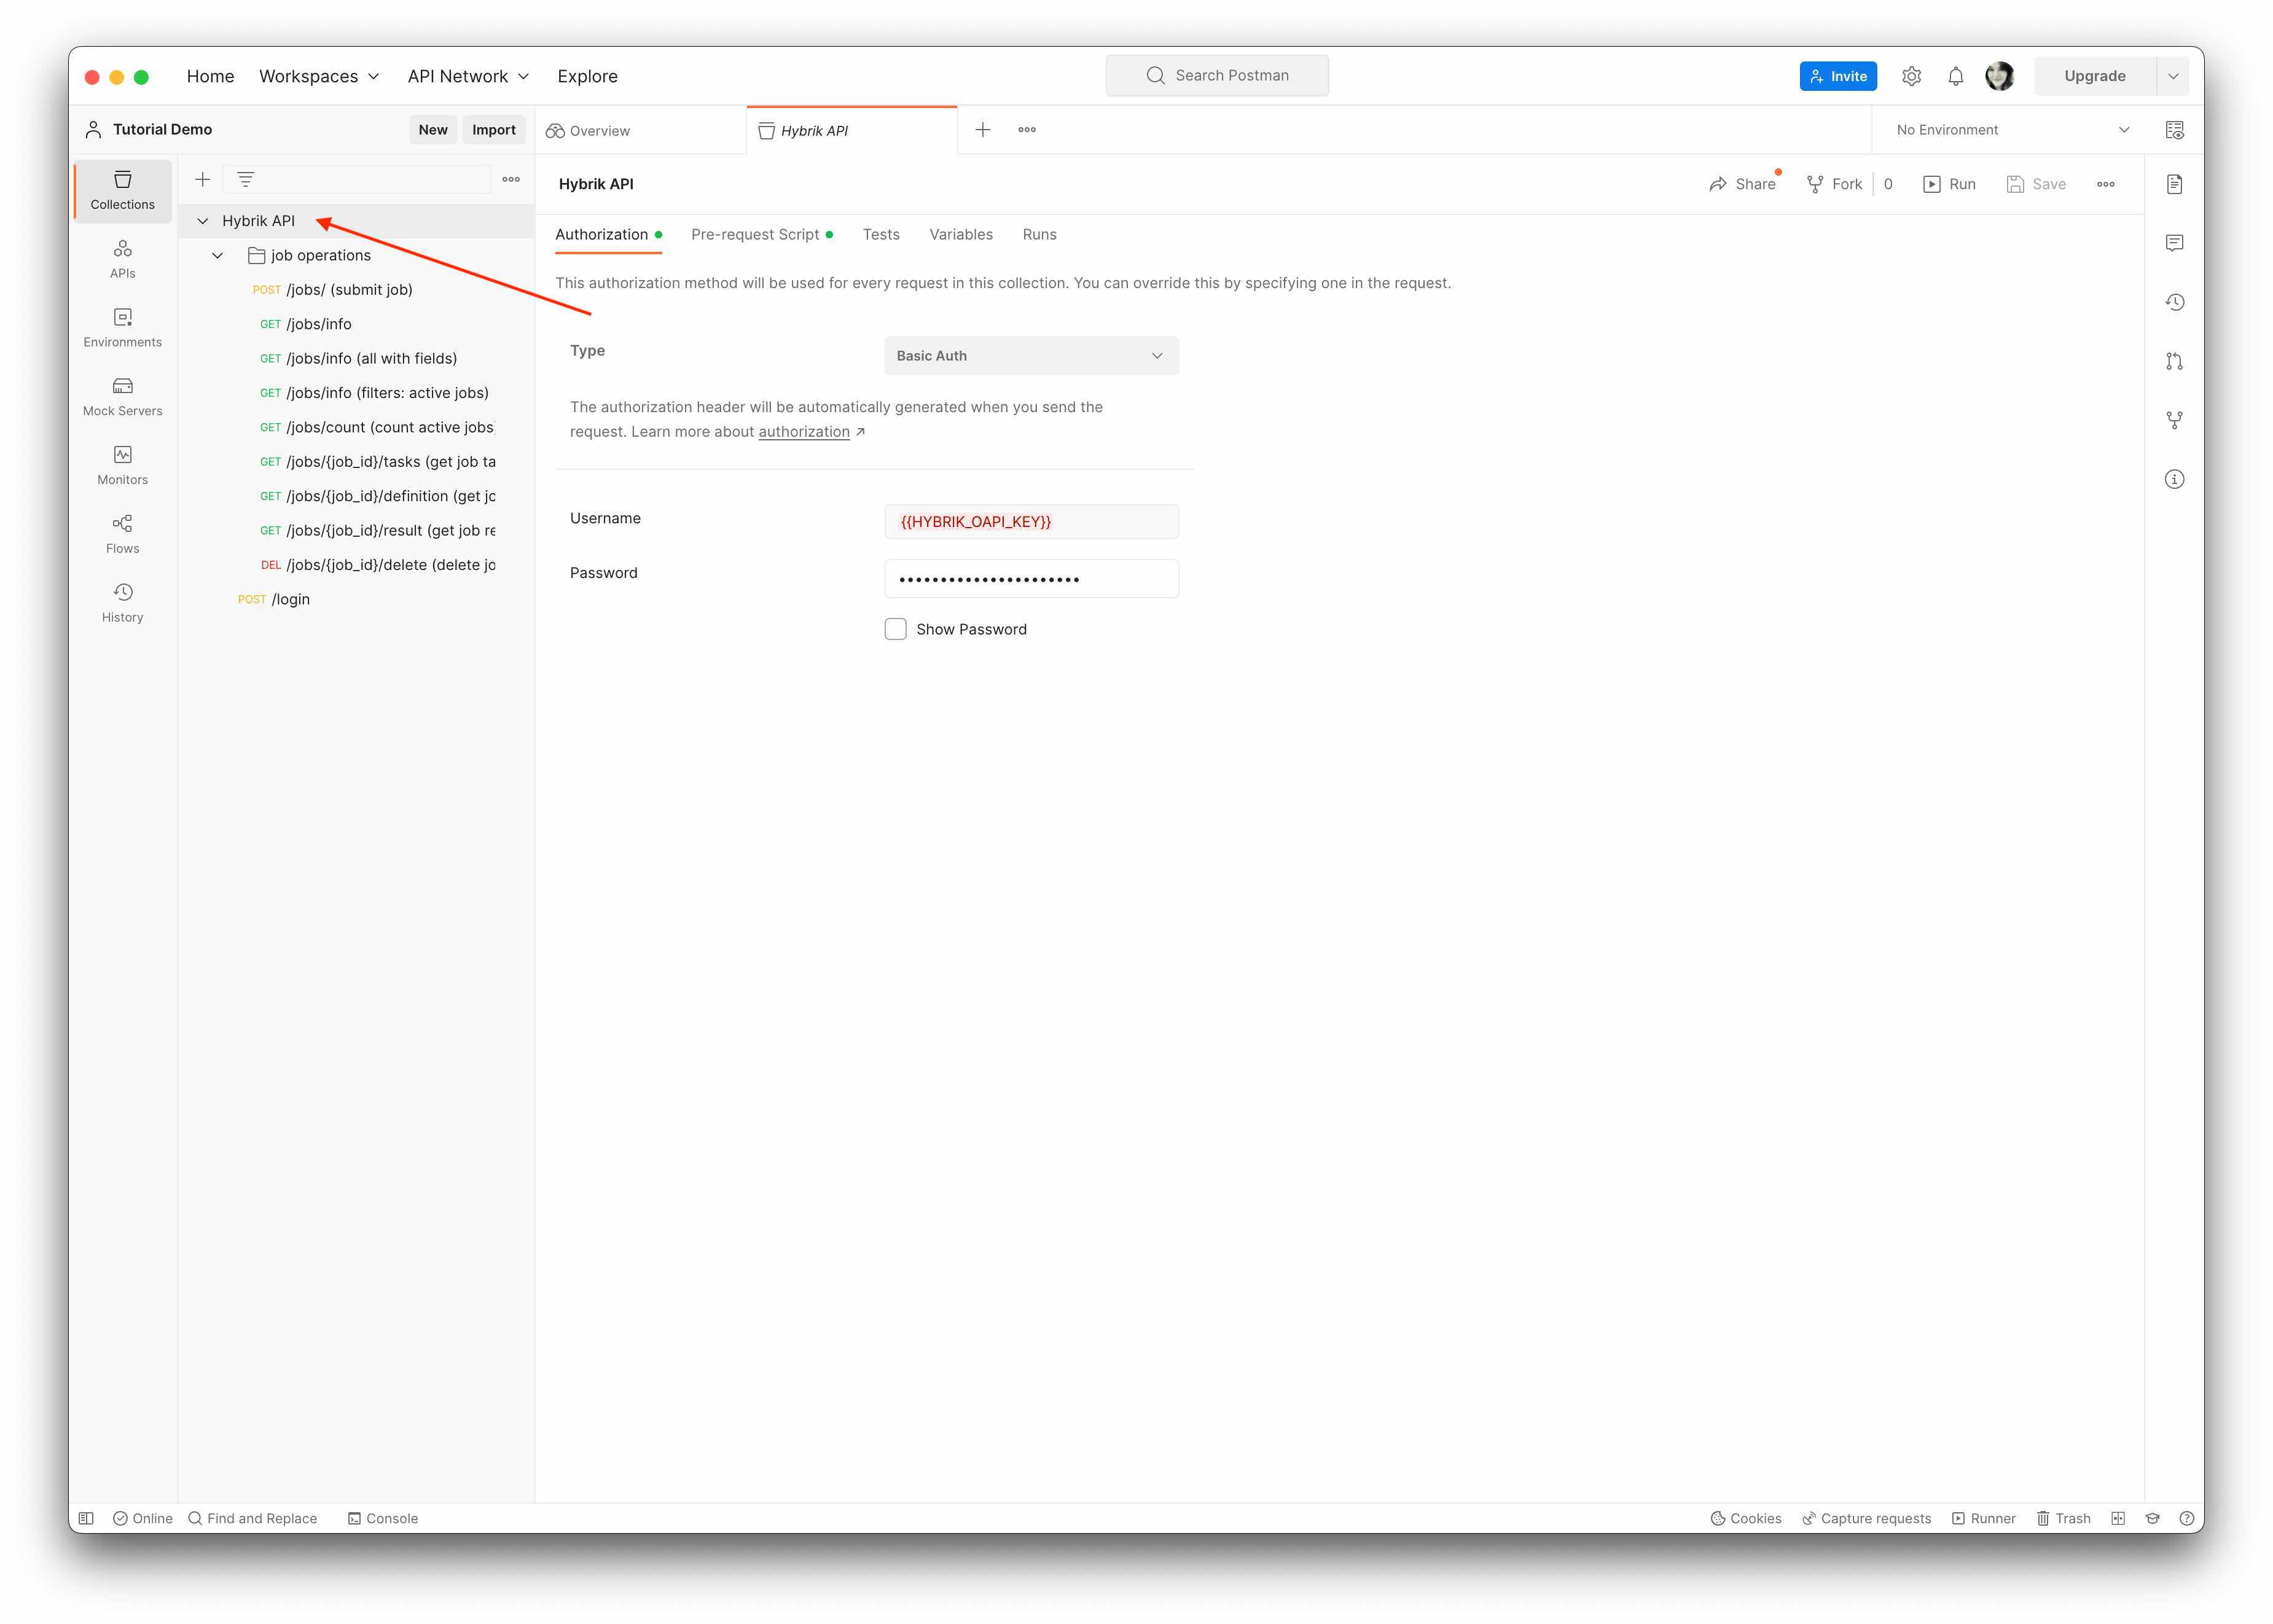
- Now that you have imported the files, you can expand the Hybrik API in the Collections tab. We have configured a bunch of variables and scripts to make getting started easy.
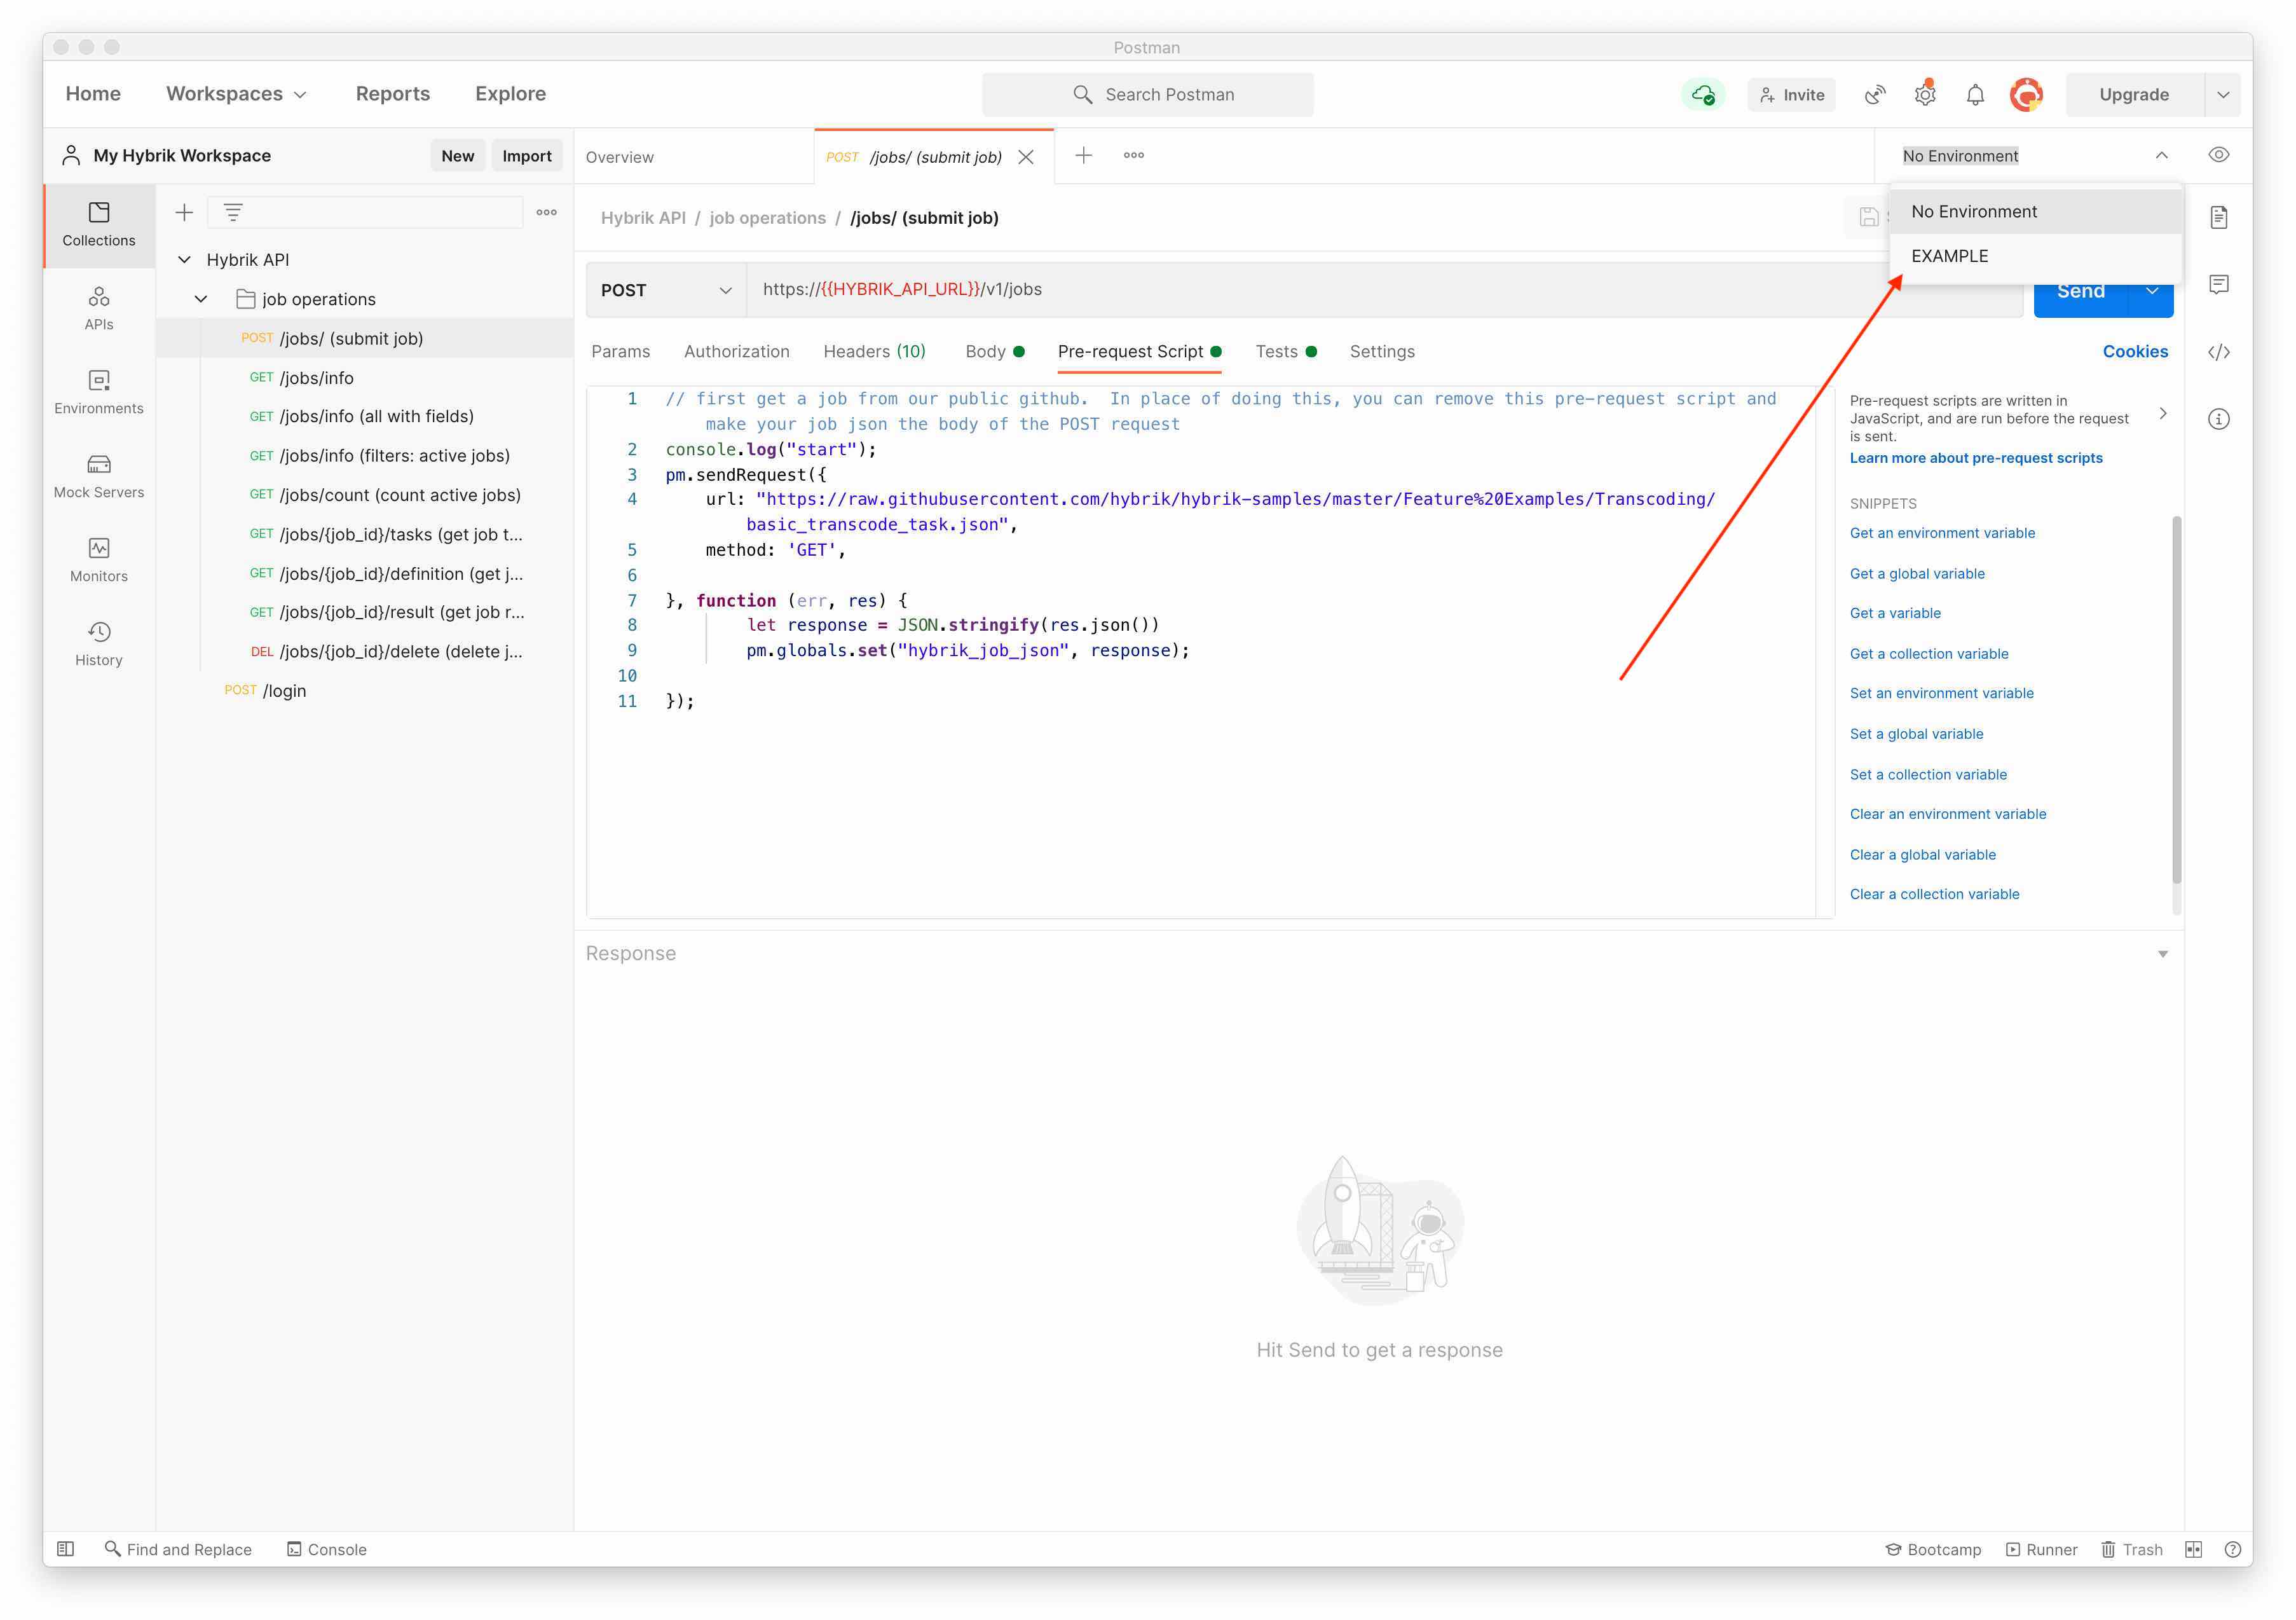
- Before you submit a job or make any API calls, however, you will need to replace the Environment from the top-right of Postman and update all of the credentials with the information from your account. You will need your API Endpoint, and an API user. Read our REST API Tutorial for how to get this information.
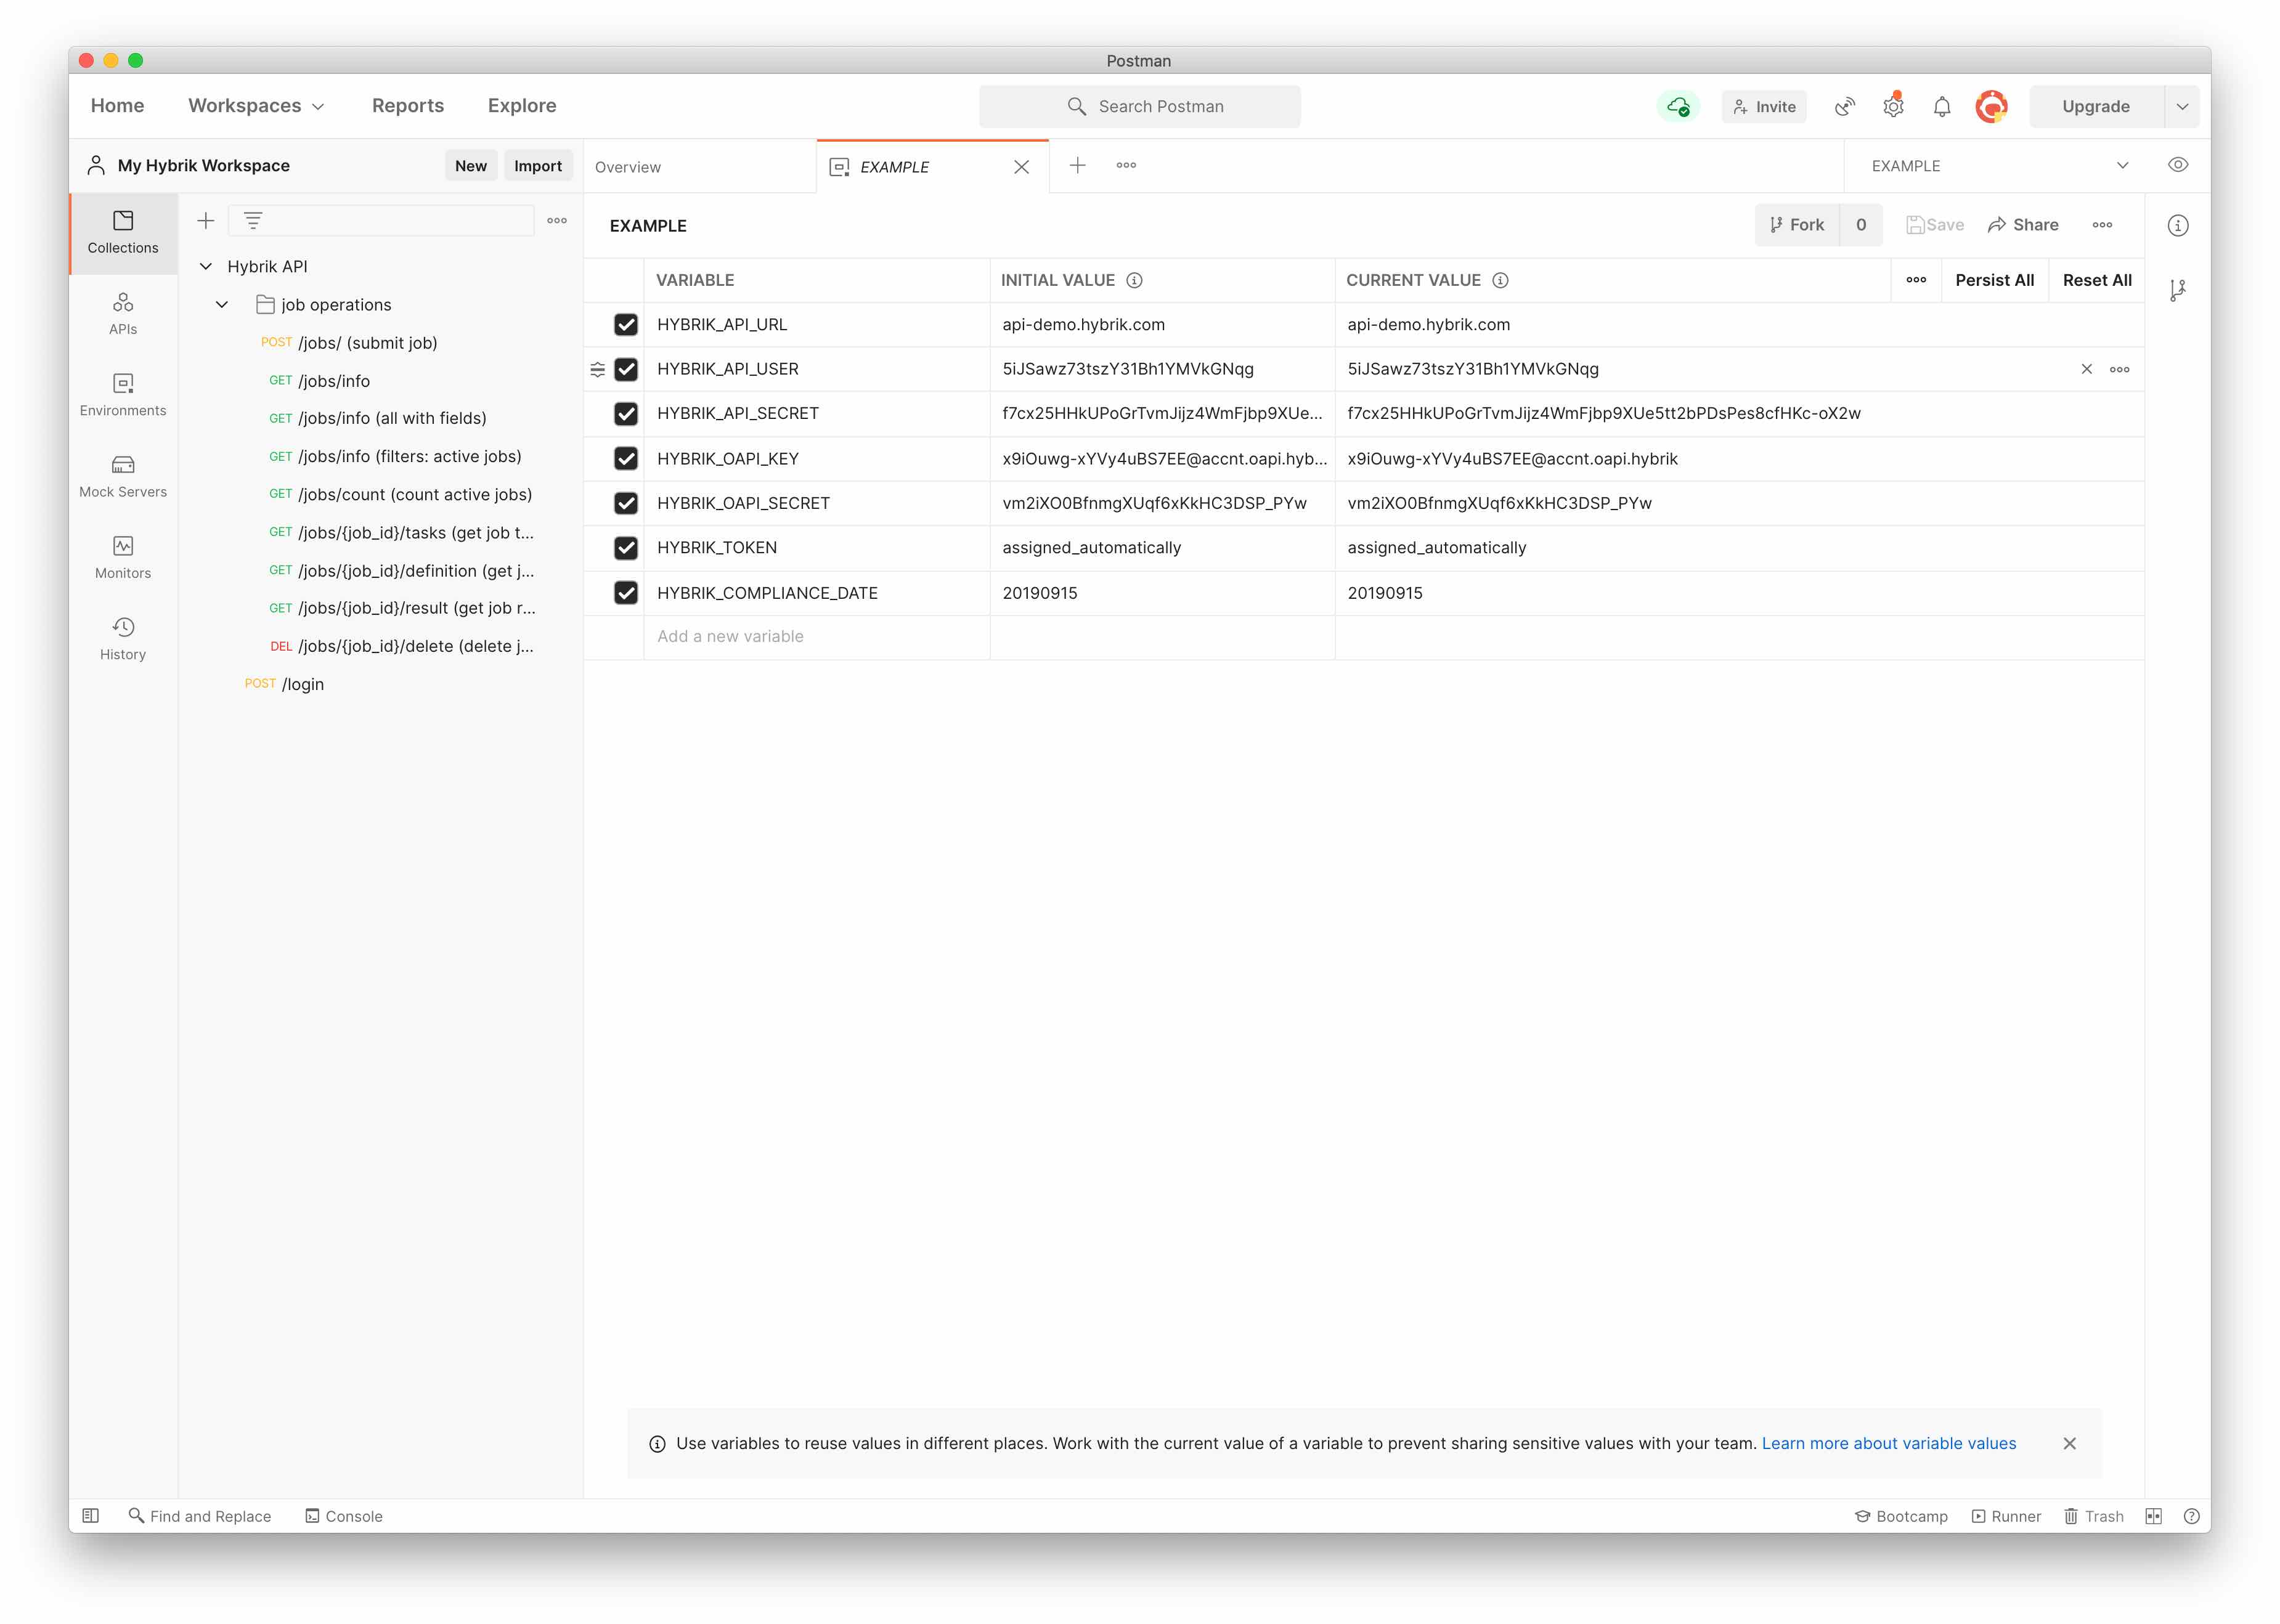
- Next, click on the eyeball button next to the environment and click the Edit button.
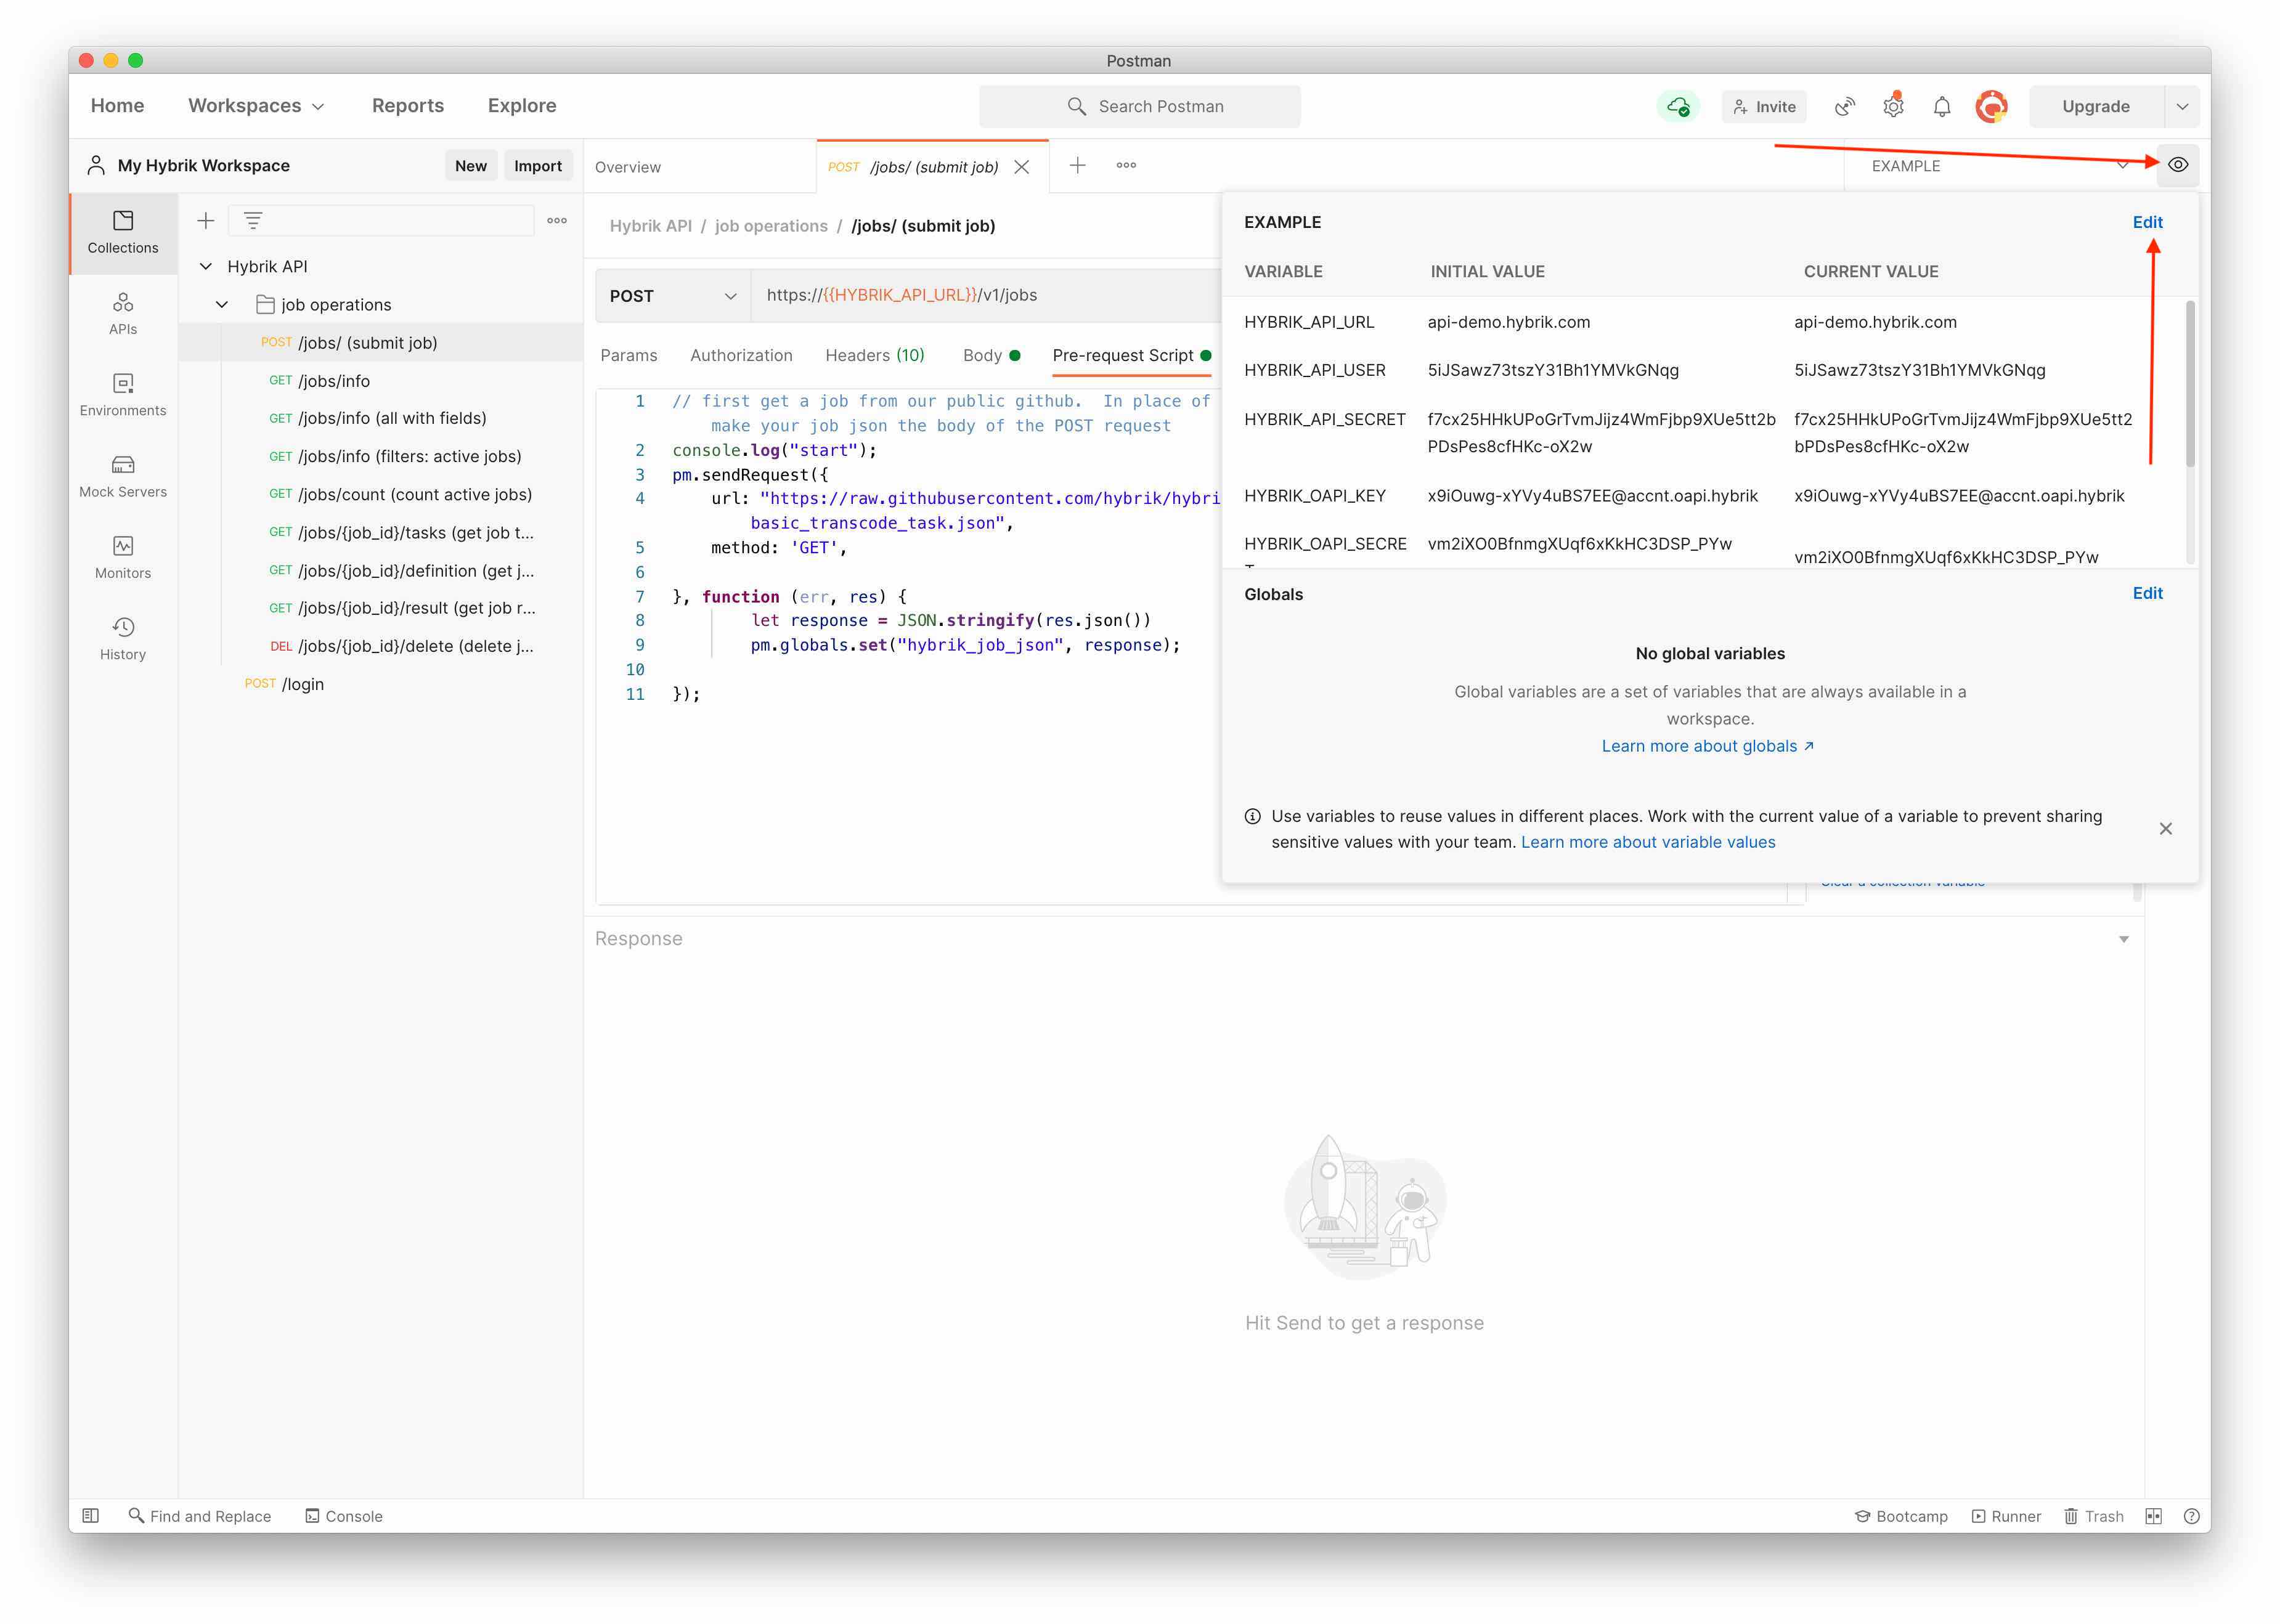
- You can now replace the dummy placeholders with your own account information. Postman will set the initial and current values from the imported environment file. You only need to update the current values but updating both will work too to reduce confusion. The initial values are used if you export your environment. For more information on where to find these credentials, refer to our REST API Tutorial.
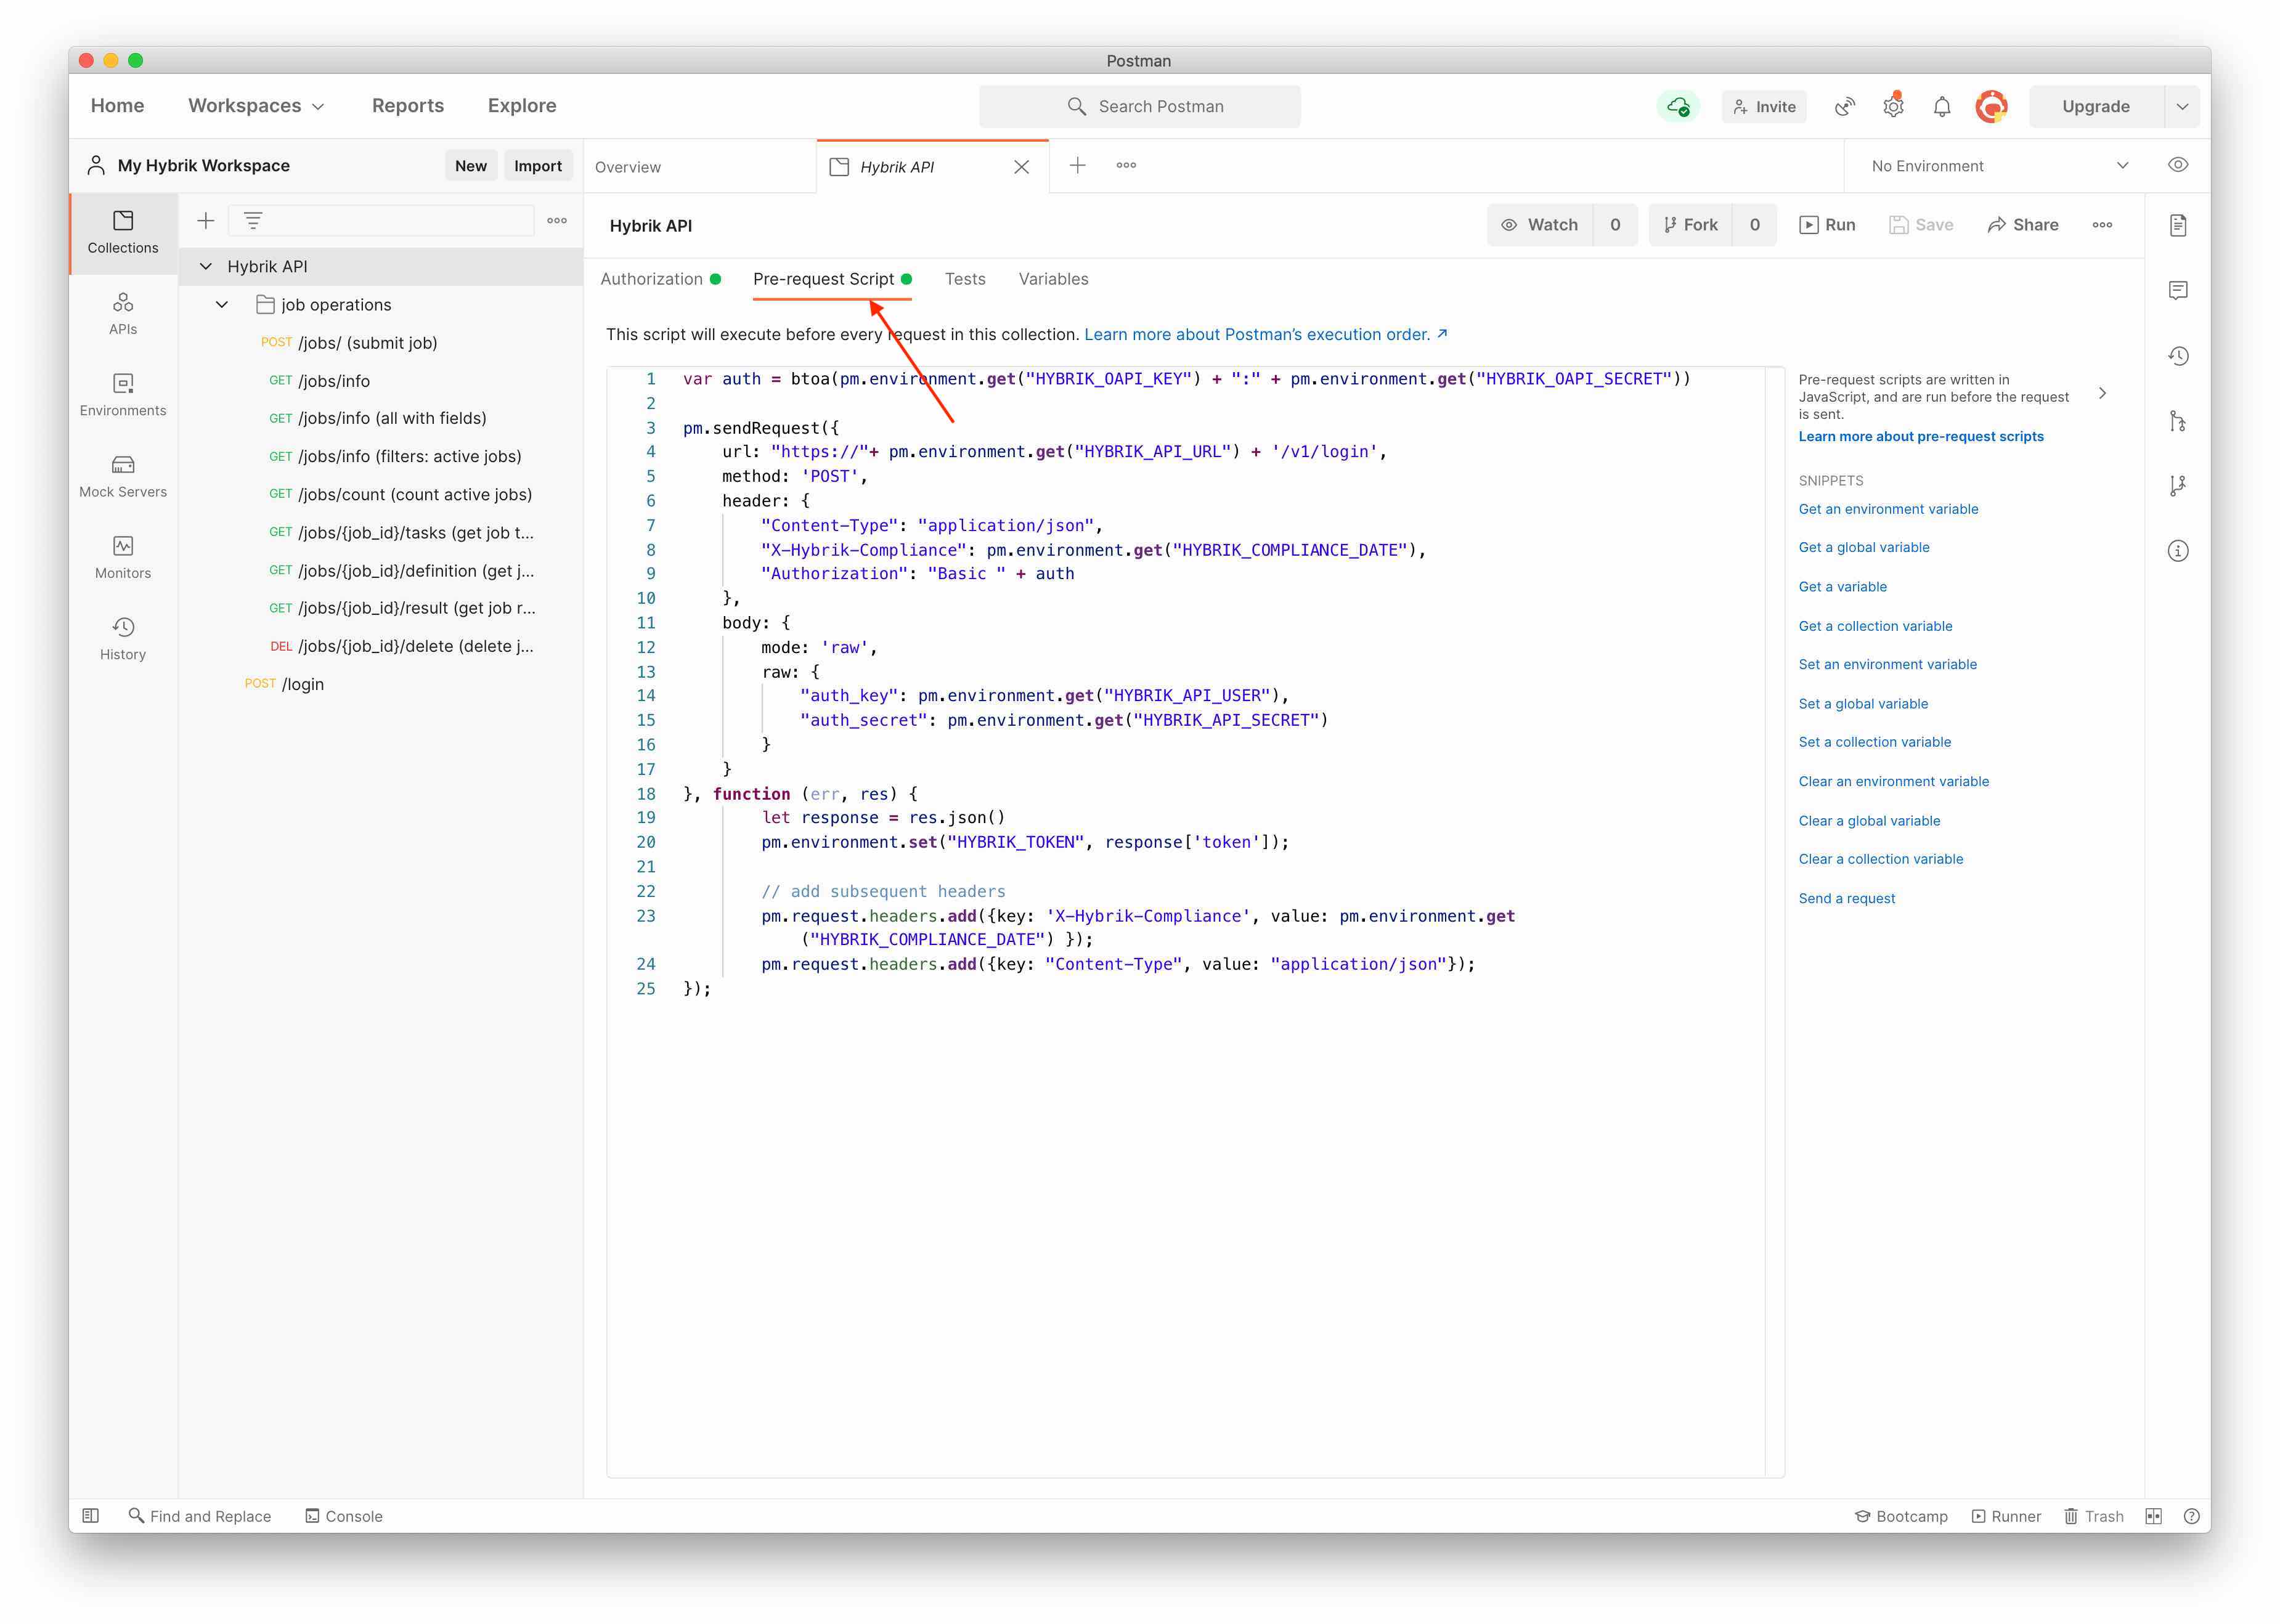
- If you click on the Hybrik API folder and choose Pre-request Script, you will see the authorization call that we make to get a token ahead of each api request. In building automation, this step isn’t necessary with every call but we do it here to ensure that we don’t get an authorization error.
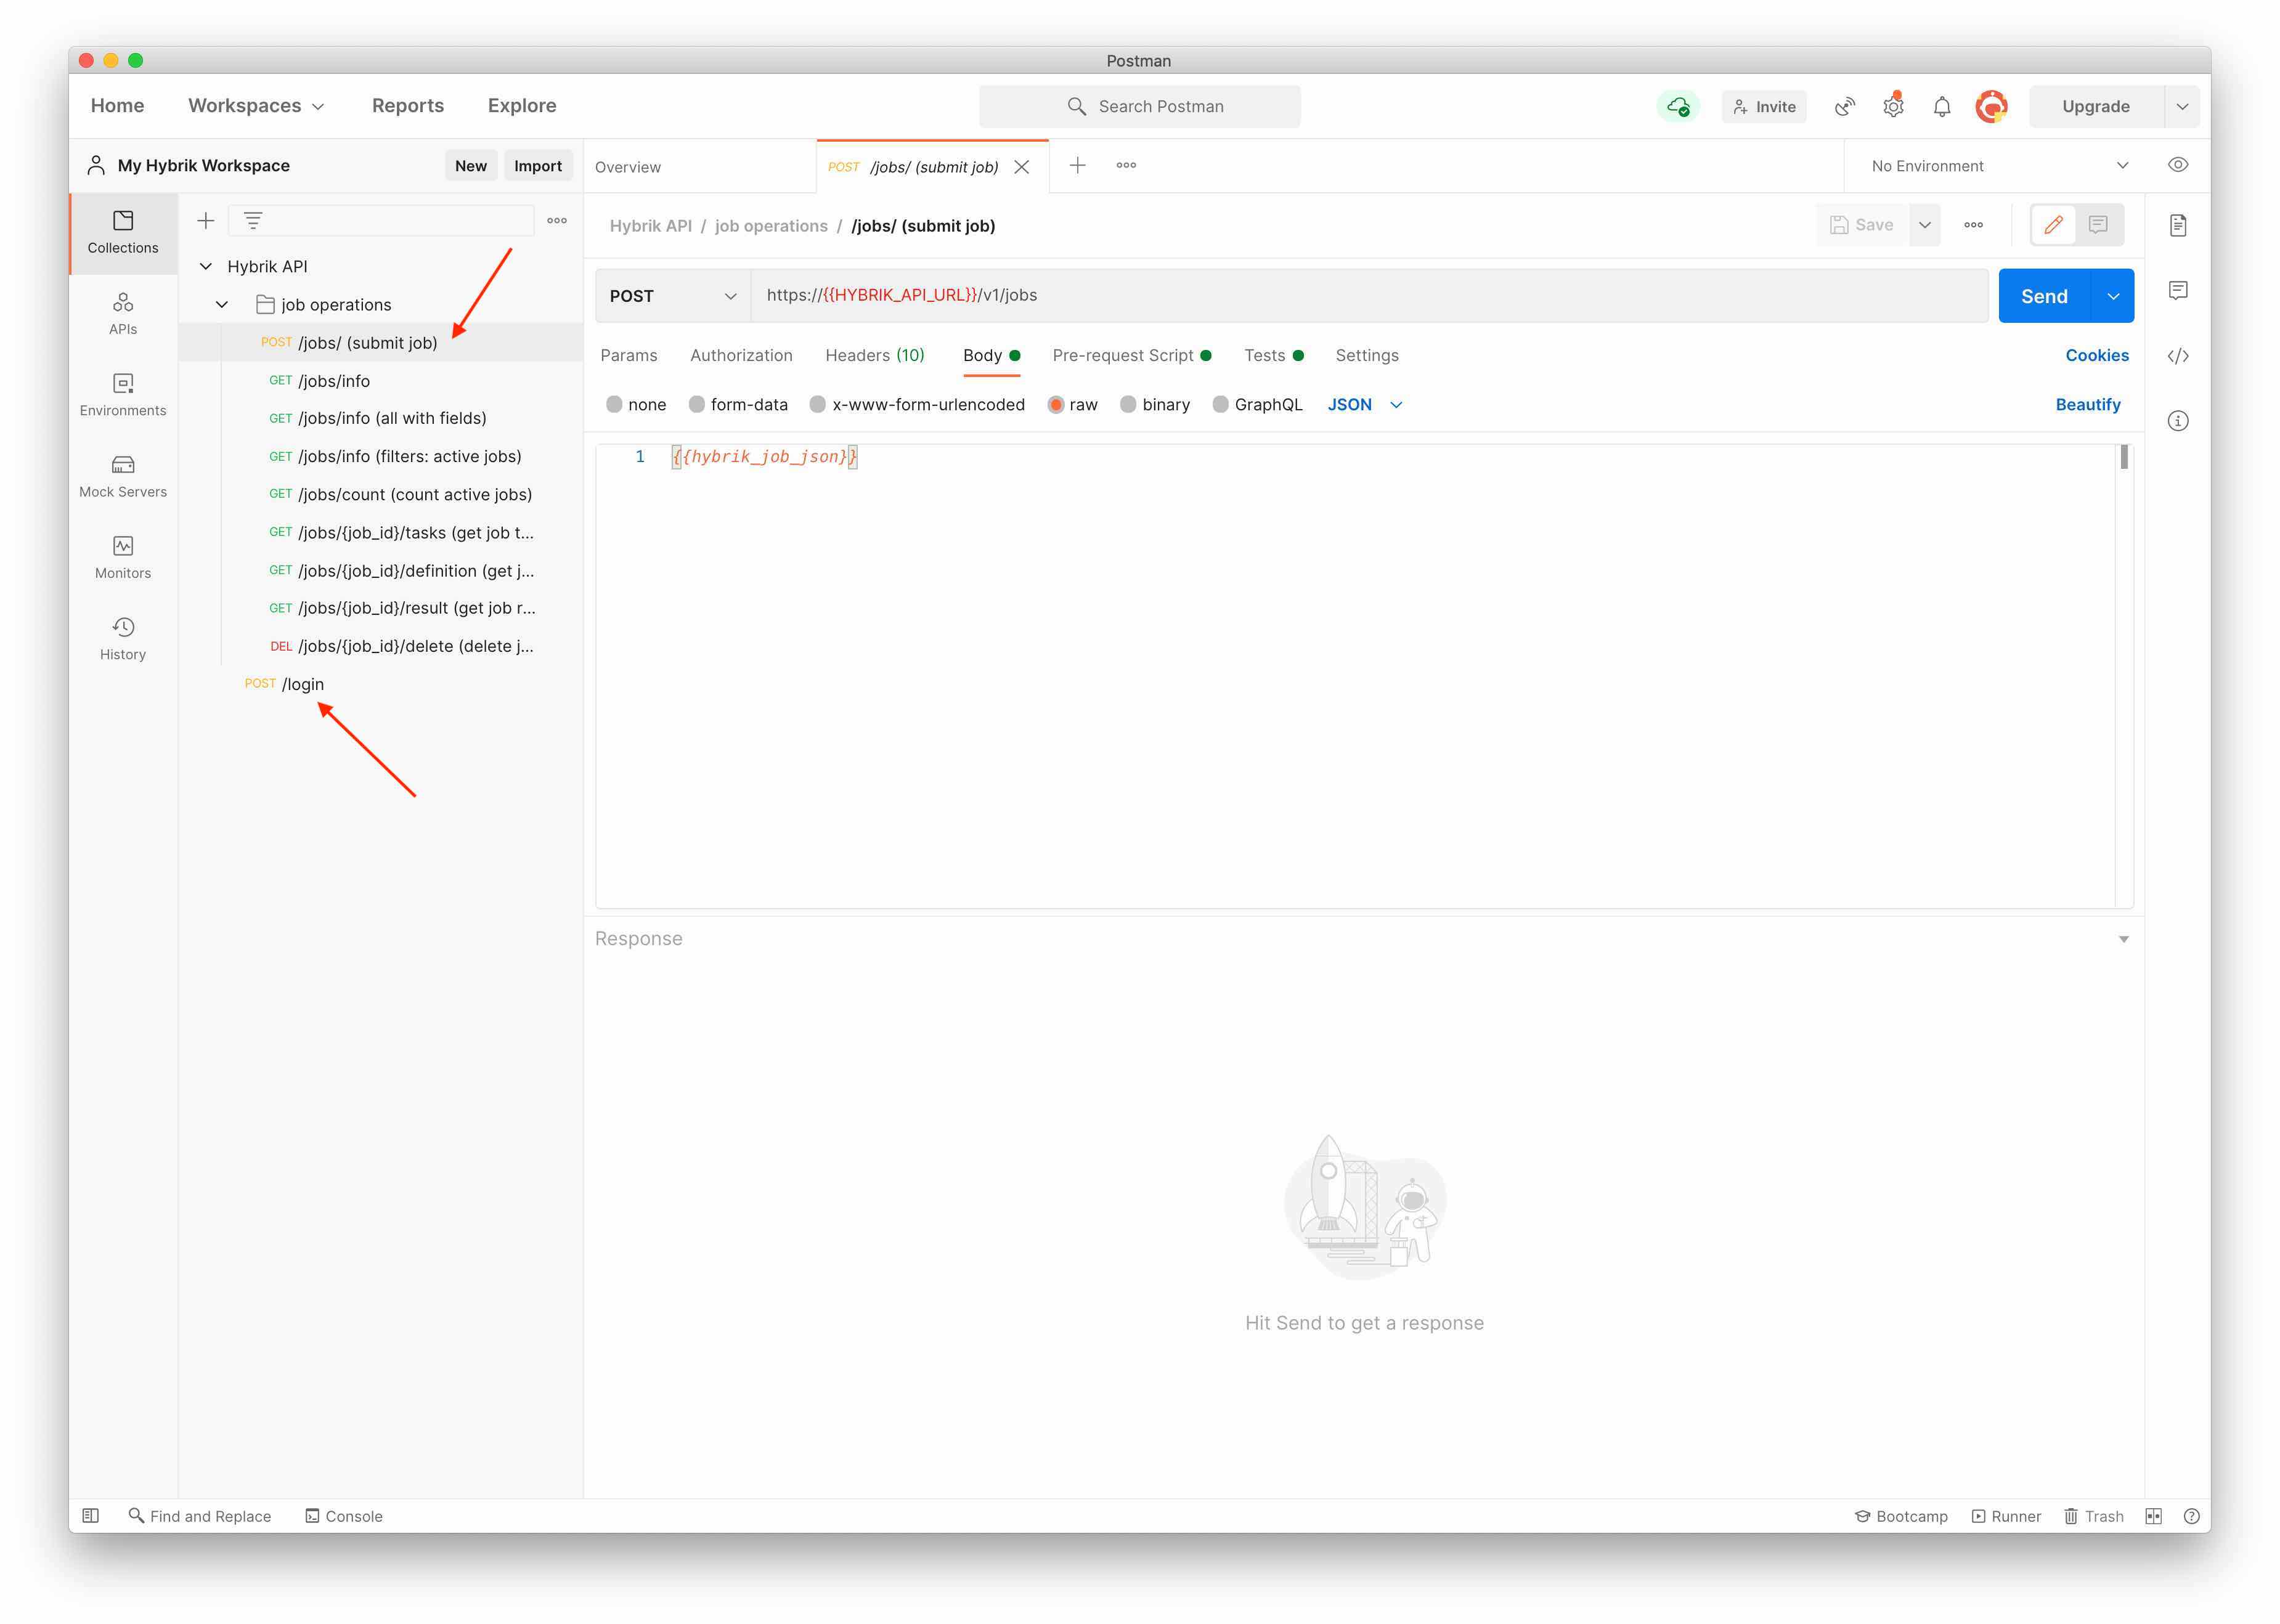
- The first call in our job operations list is to submit a job. All of the authorization is handled for you but if you want to see a specific call to get authorization, see the POST /login request at the bottom of the list.
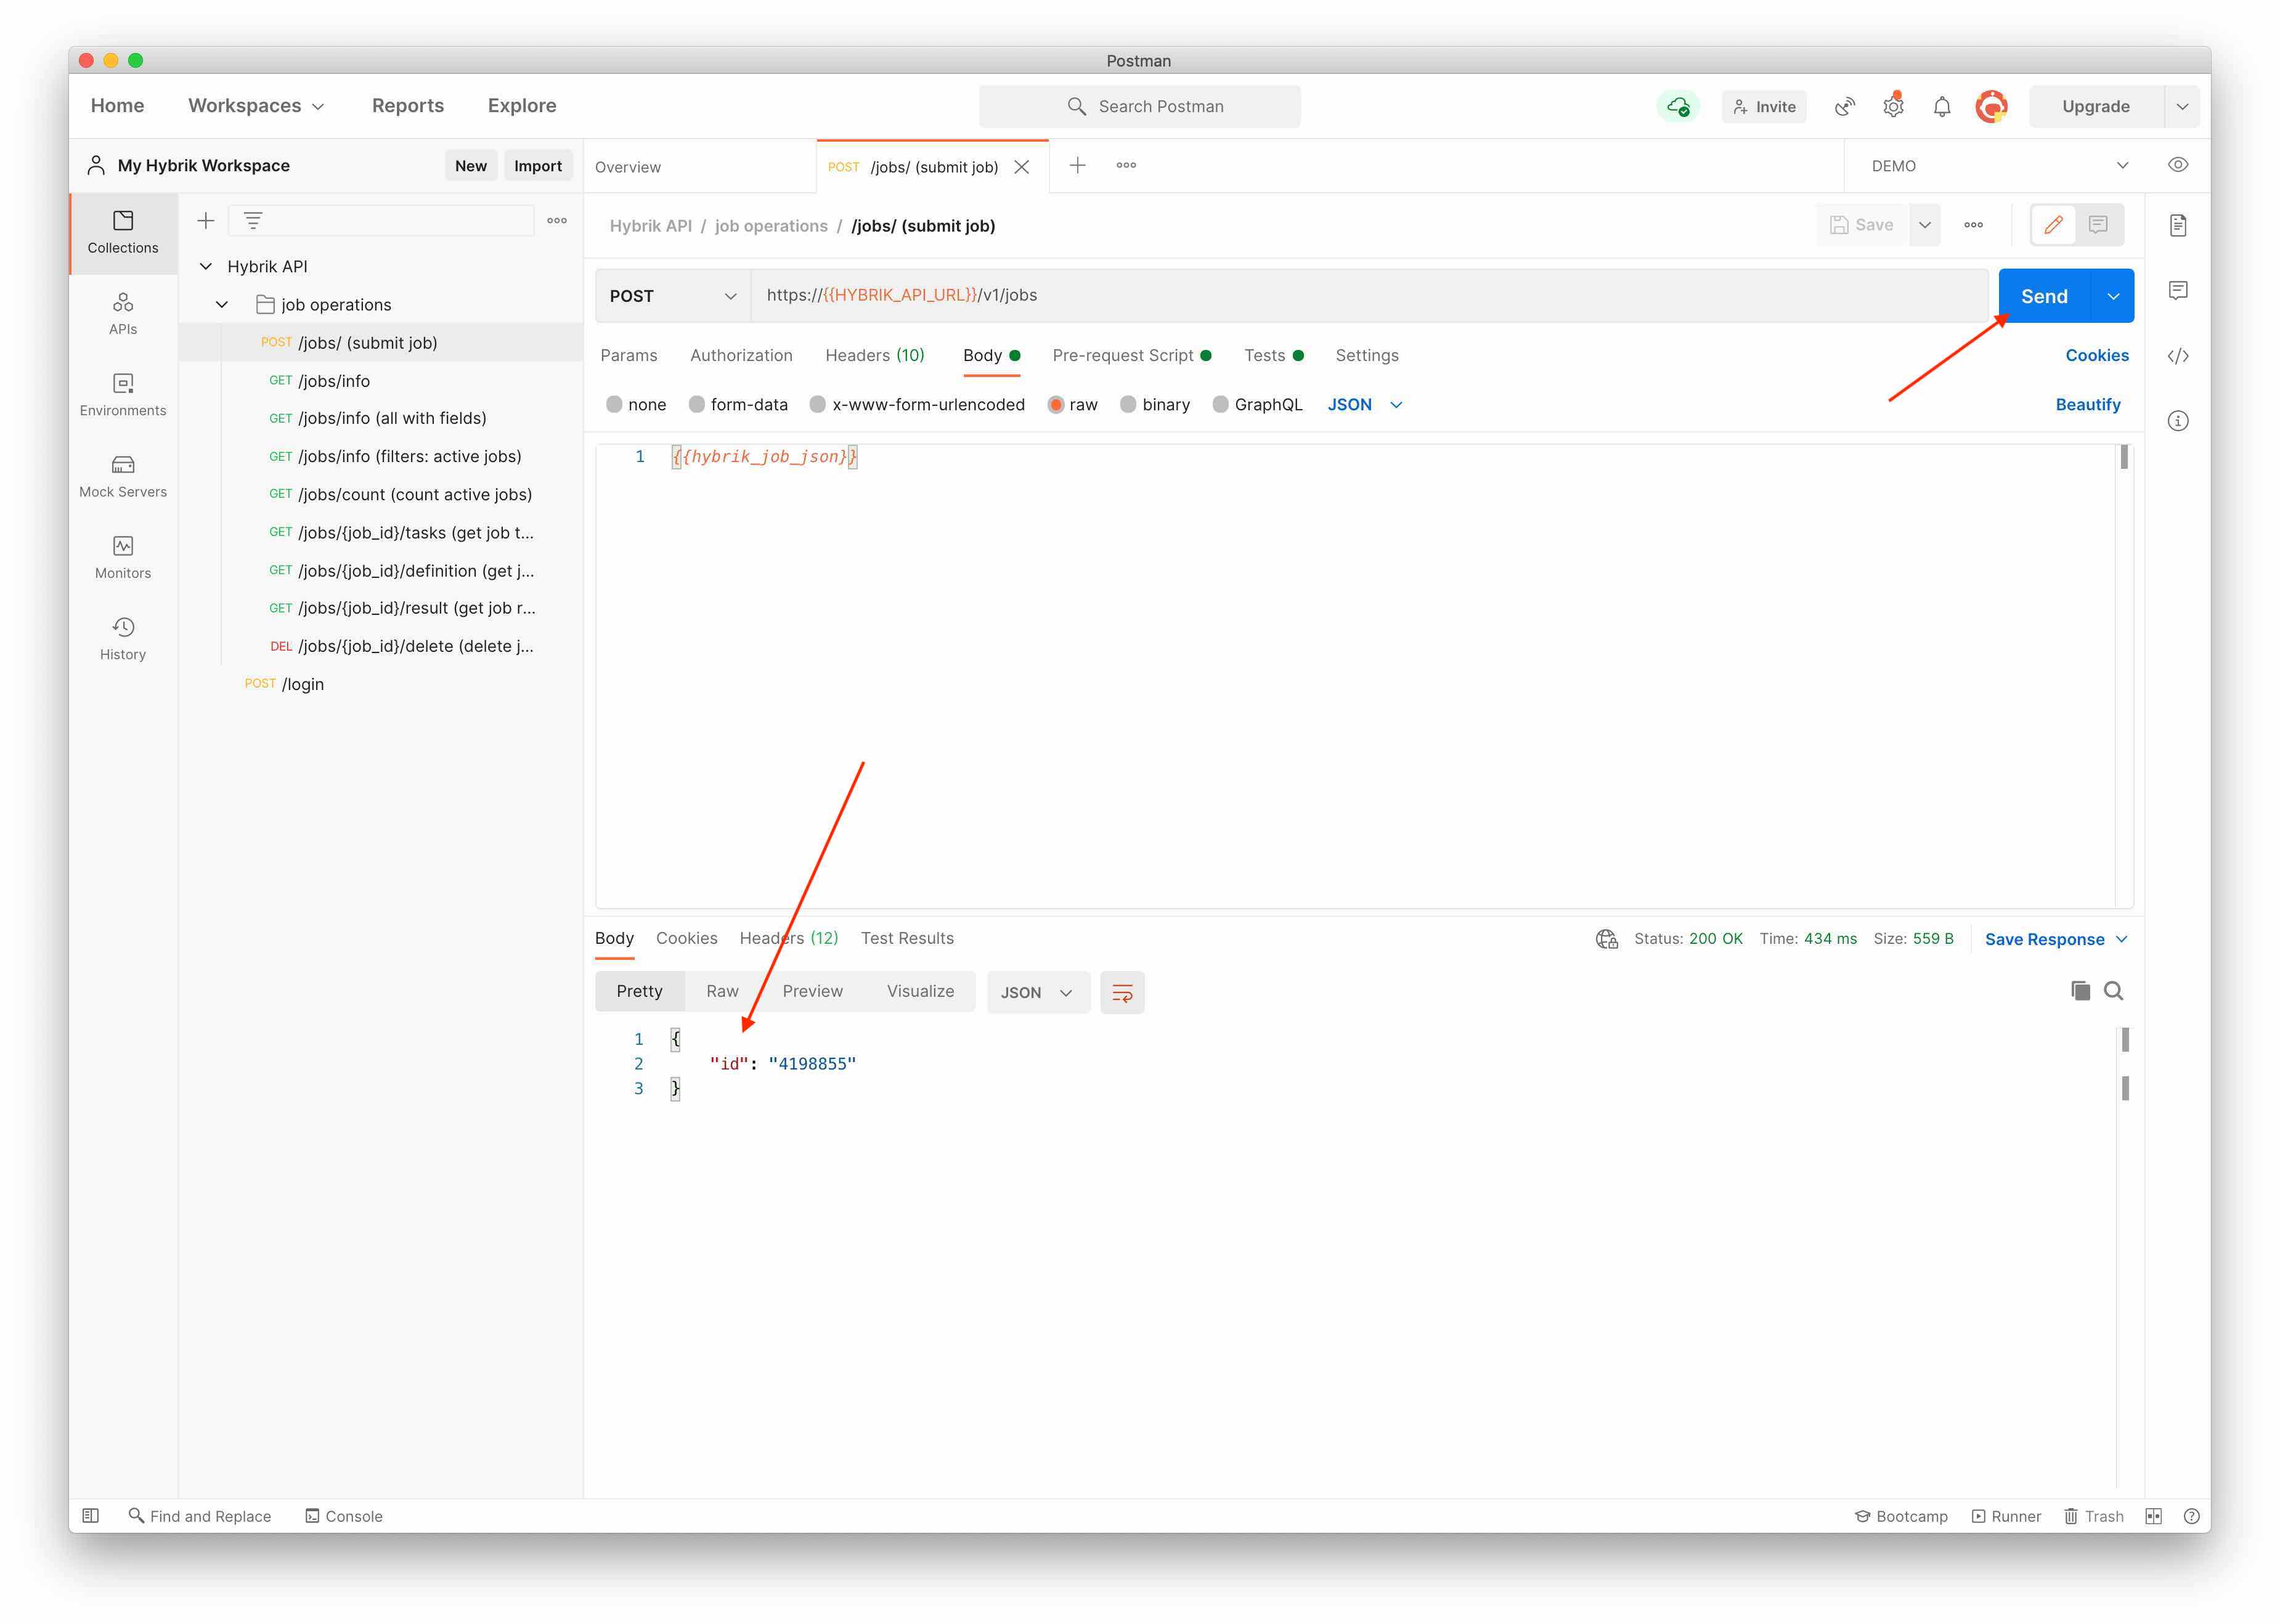
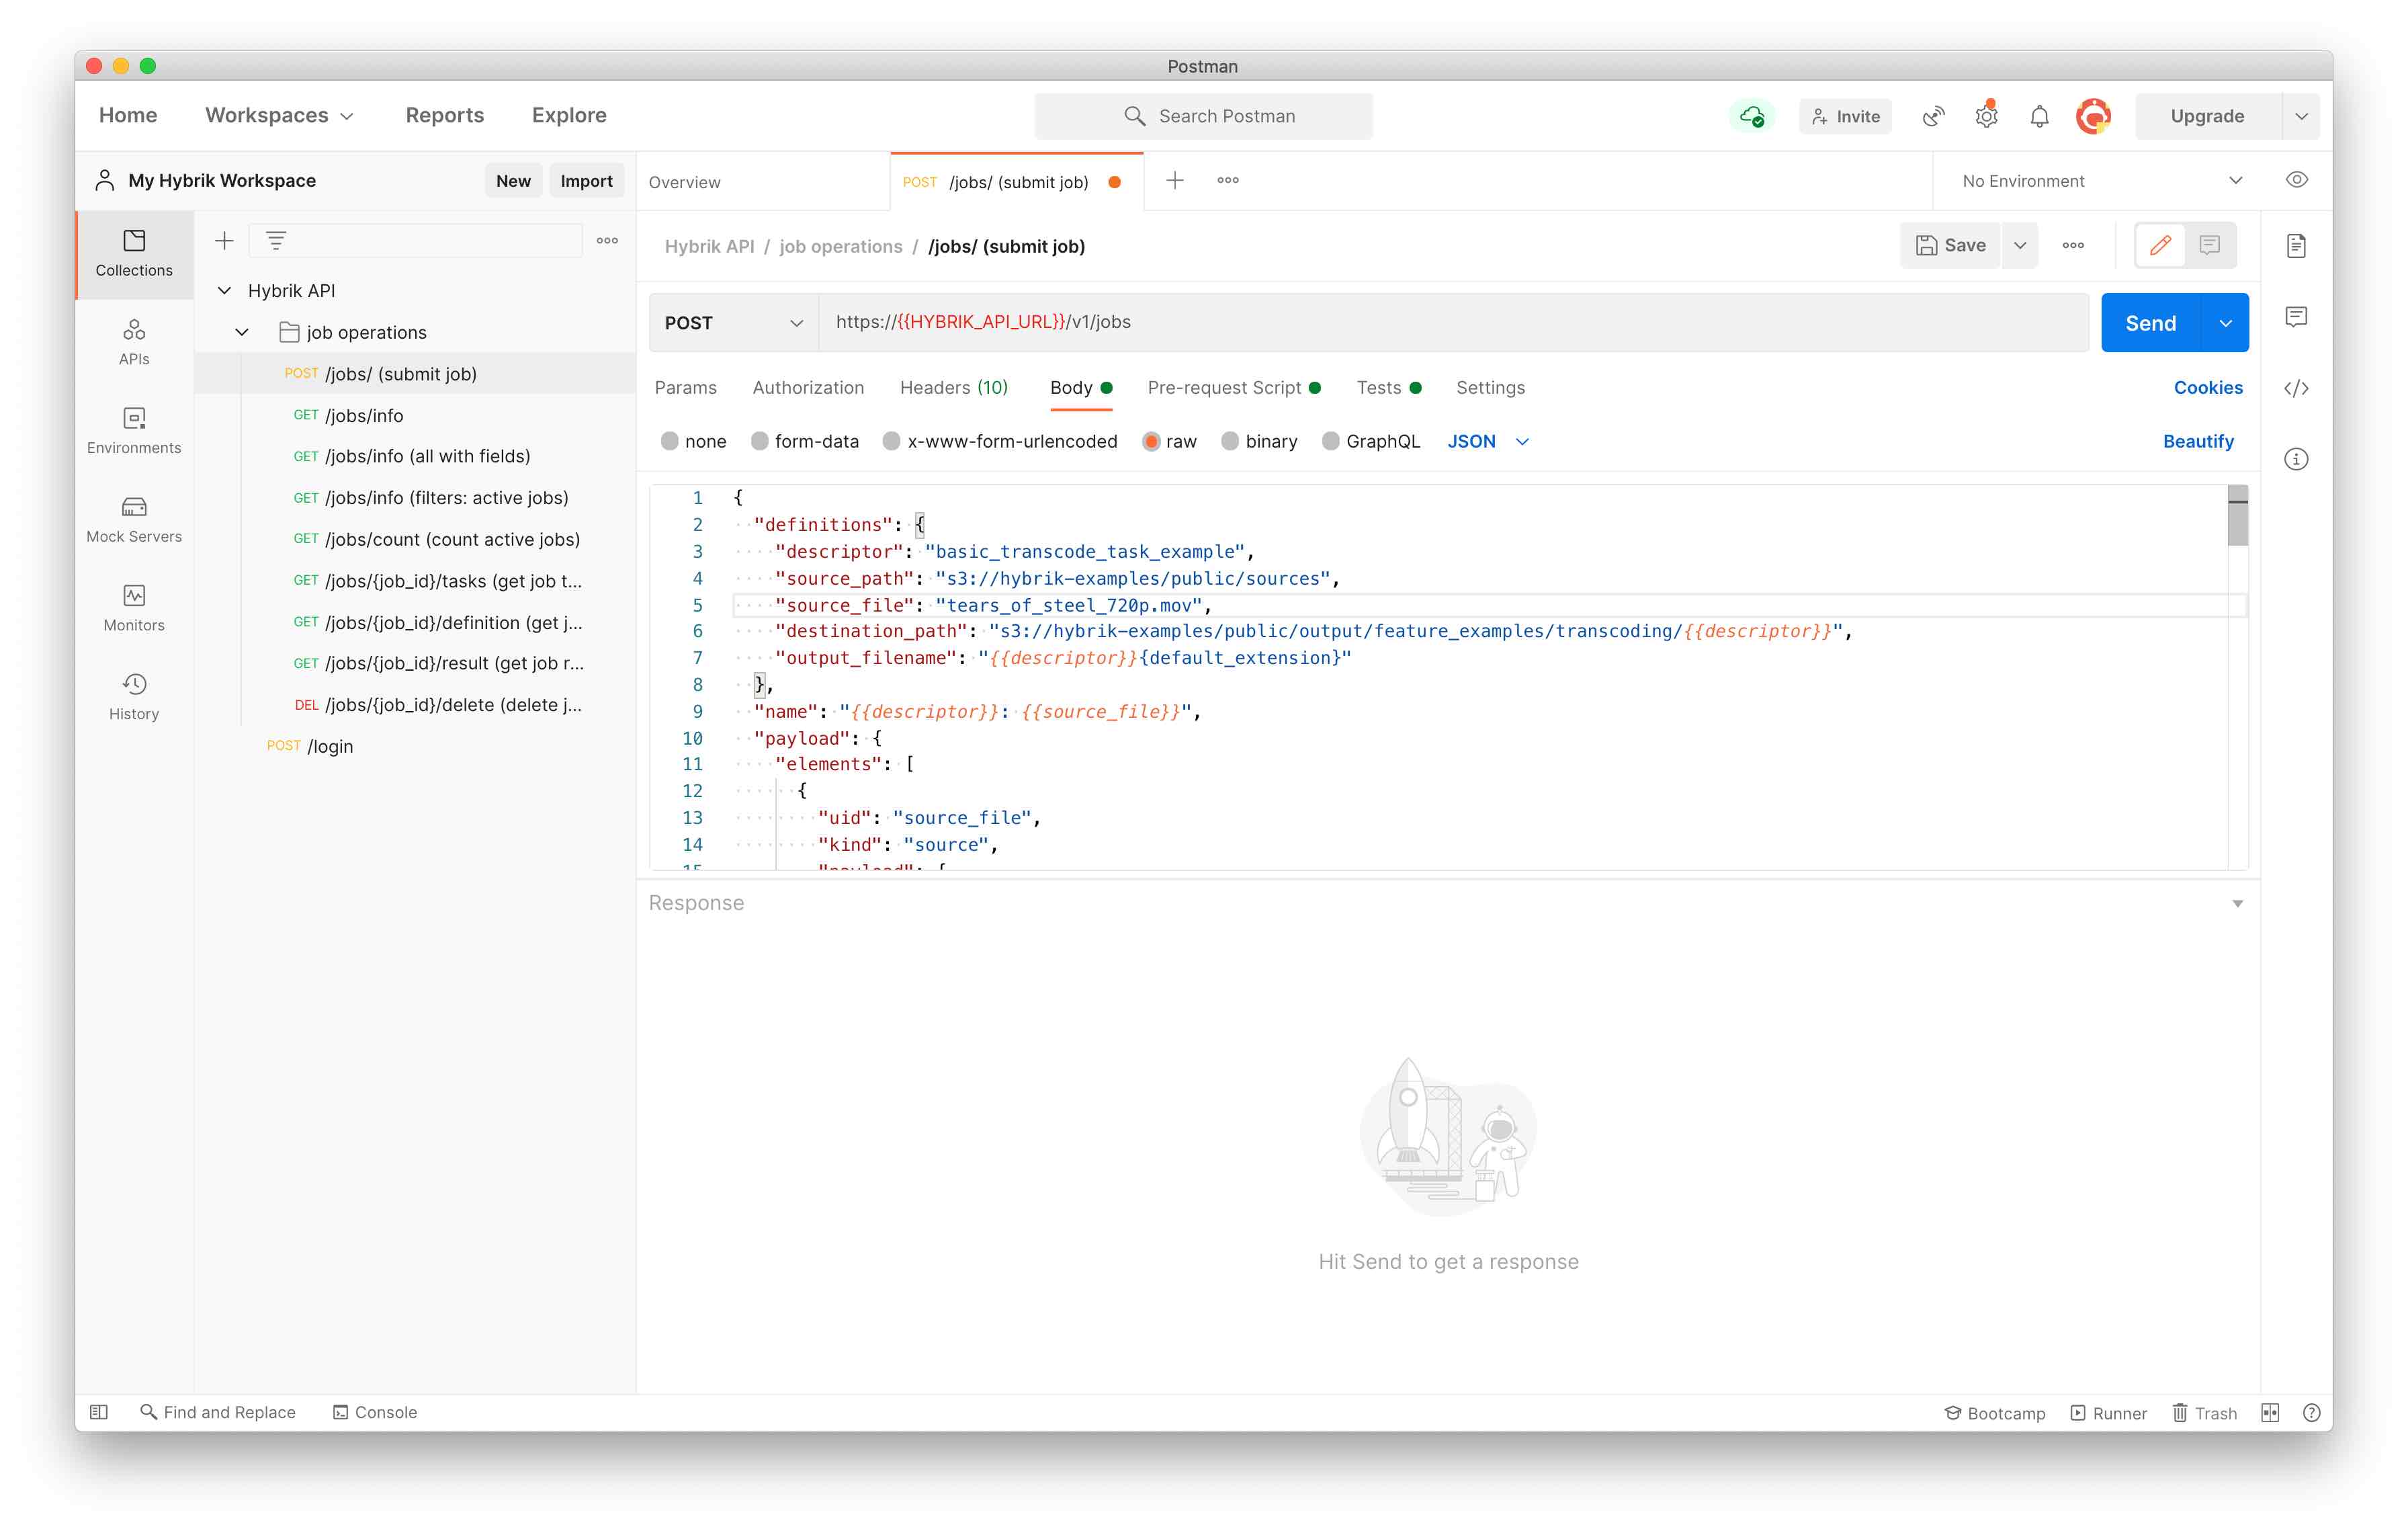
- Now that you have your environment setup, all of the API calls will use your environment variables for authentication. One note is that on our submit job request, we grab a public example and insert it as the body of our request.
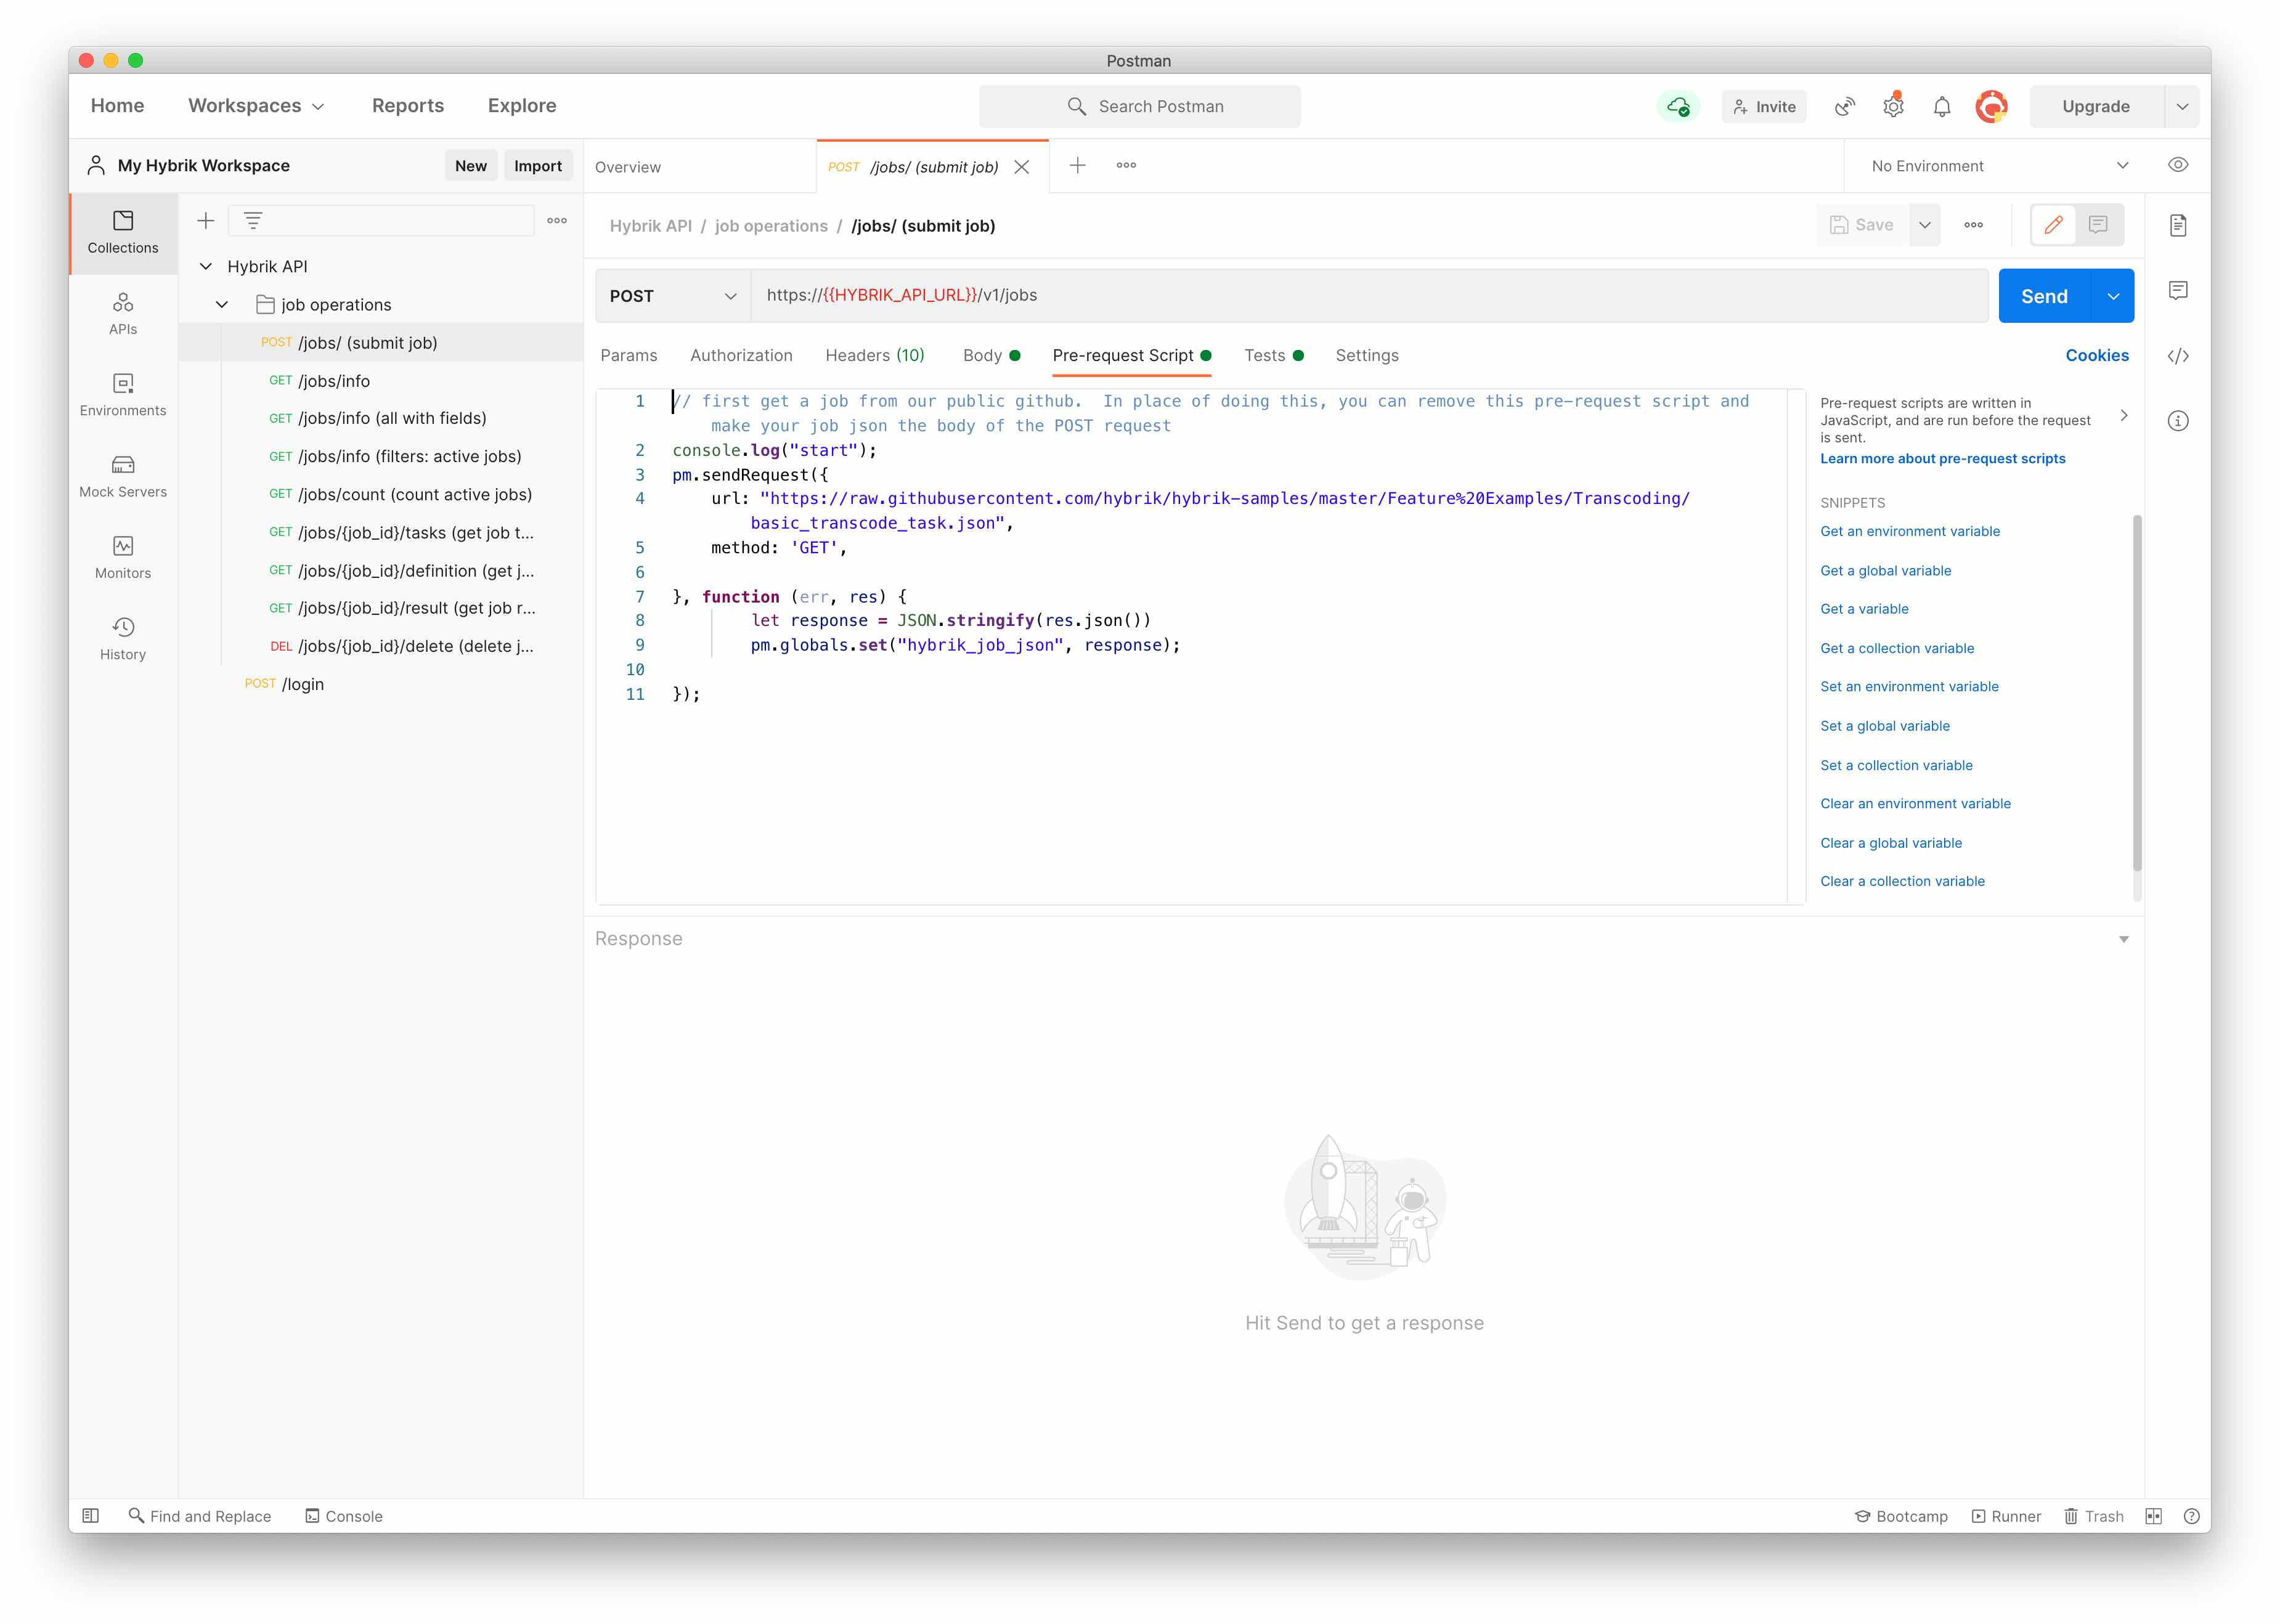
- Once you hit the big blue Send button, you should see a Hybrik Job ID returned in the response area in the bottom panel.
- Note that if you want to submit your own job, you can simply replace the {{hybrik_job_json}} of the submit job request.
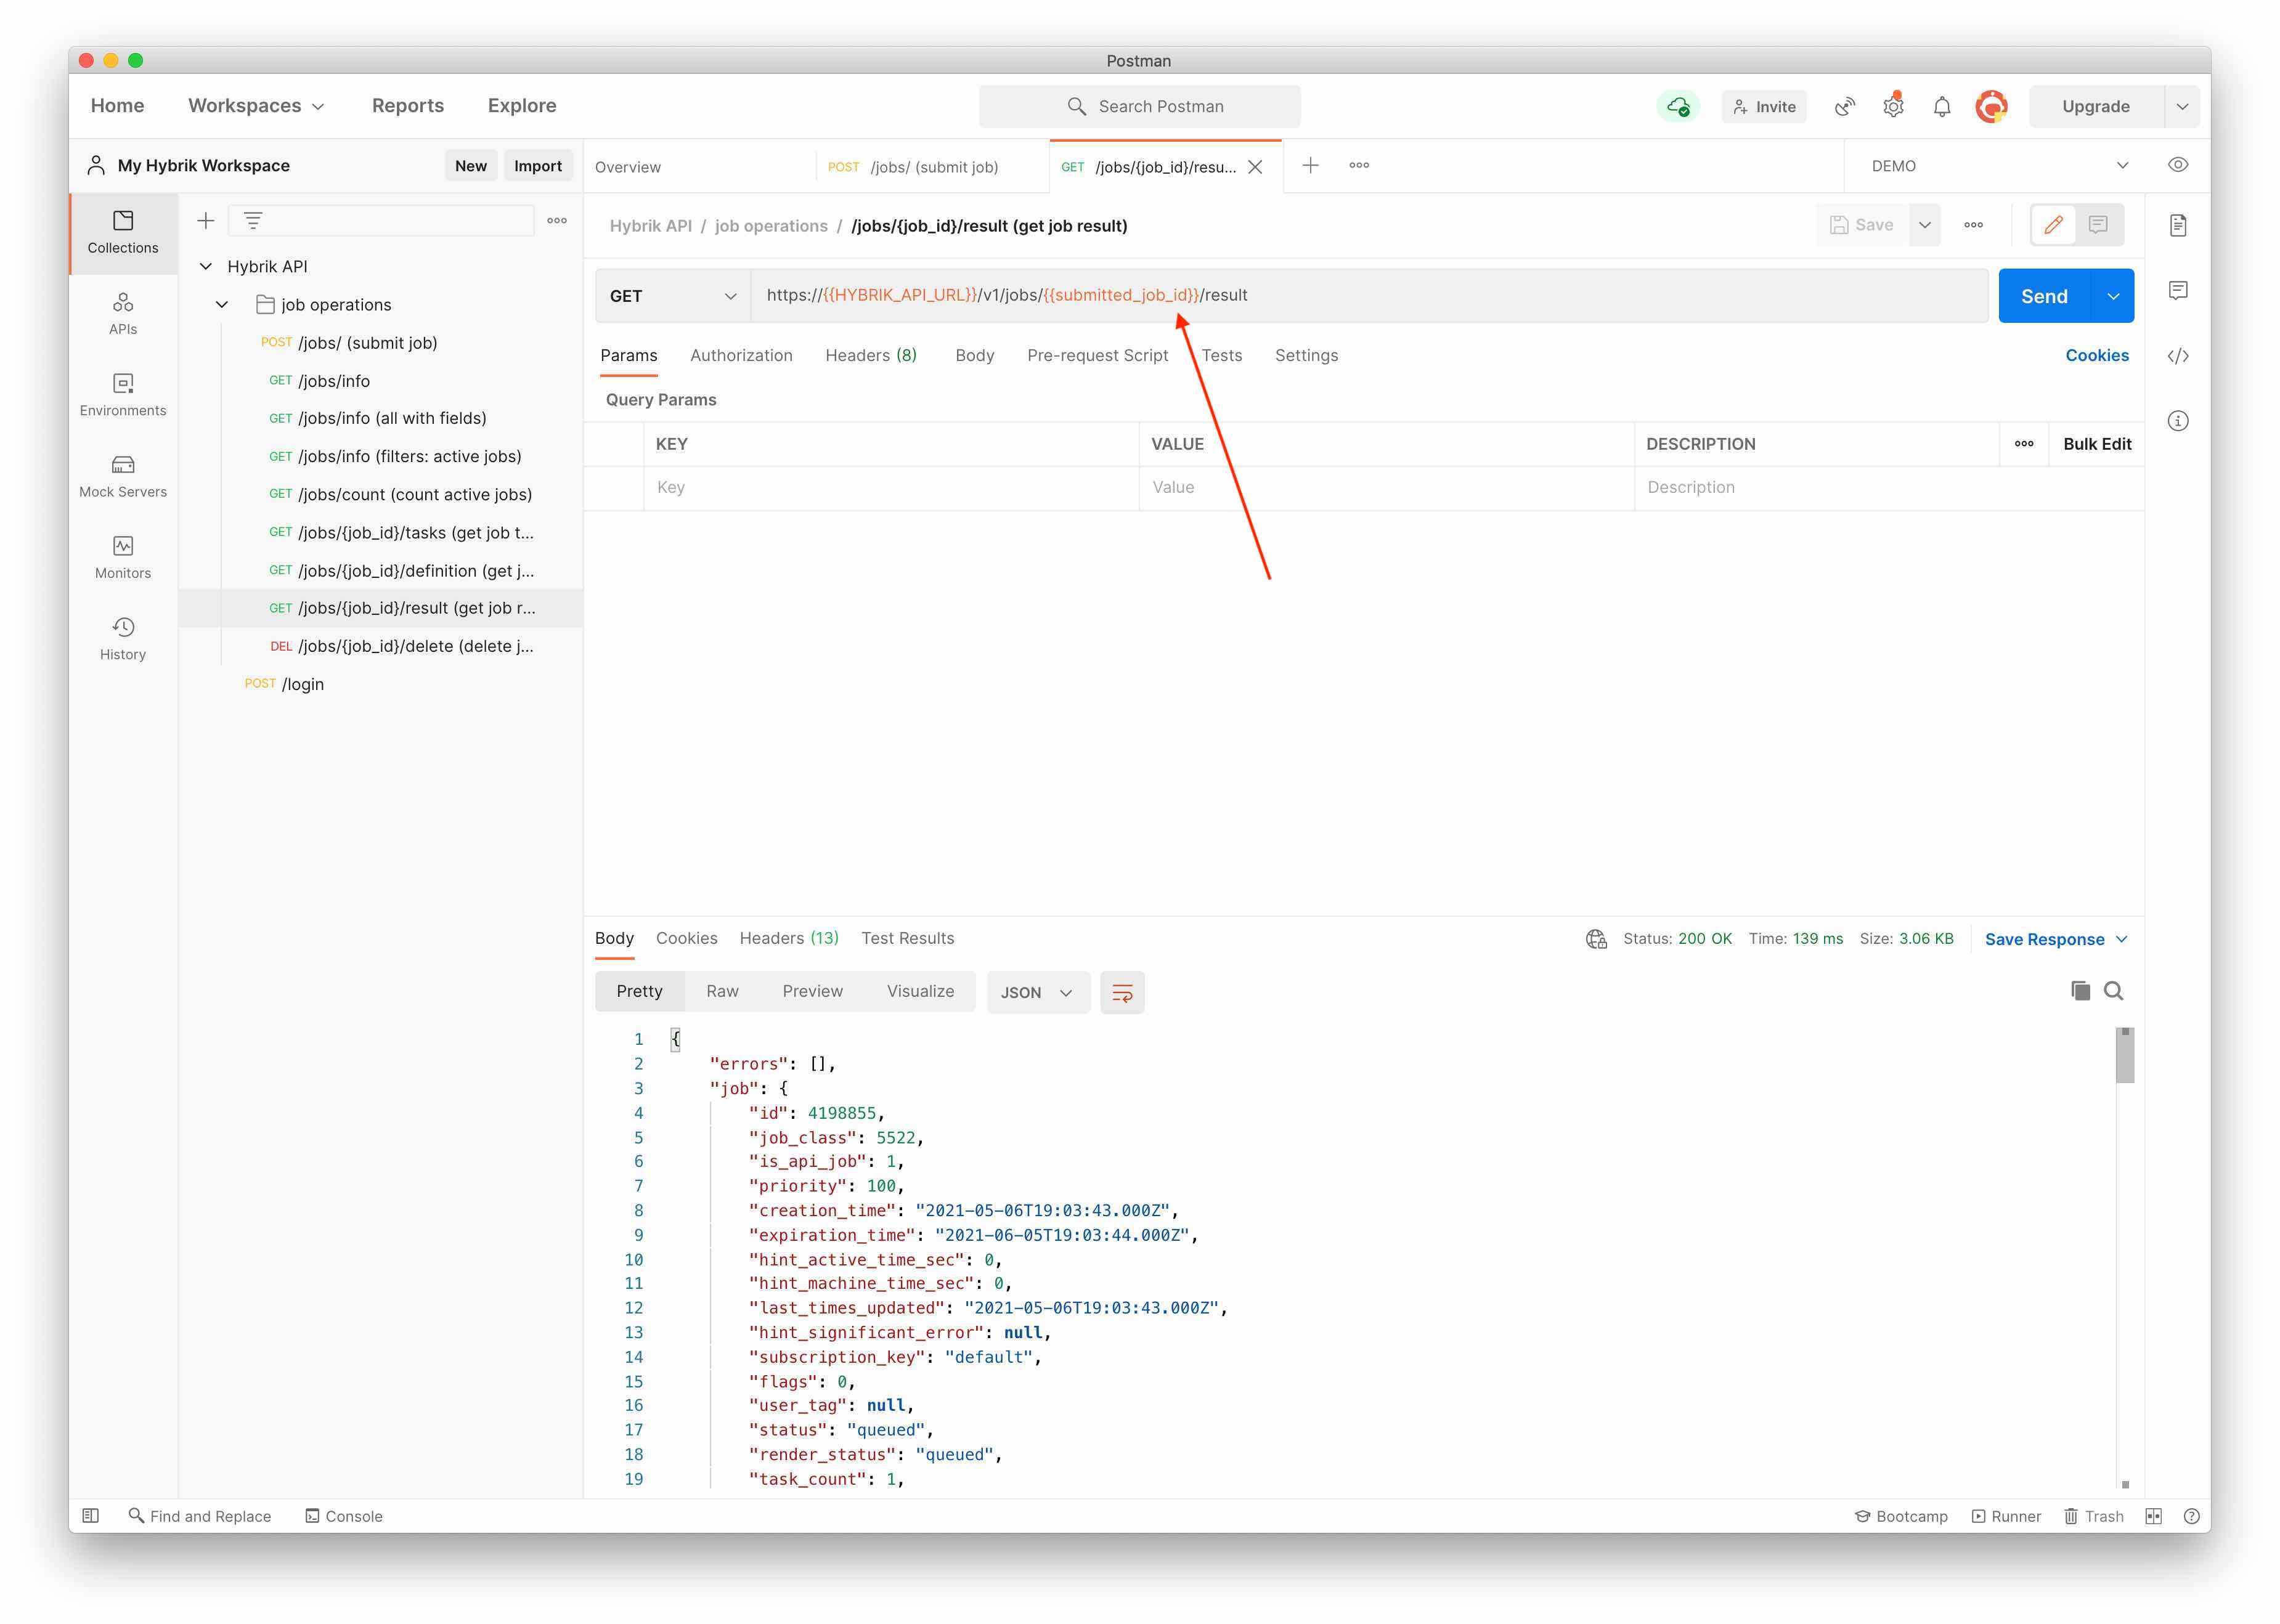
- For all of the other sample requests that require a Hybrik Job ID, the post-request script saves the job ID returned from the Hybrik API as a variable so it is used for the other examples.
The examples in this collection show how to do some of our basic API operations. You can easily clone a request and modify it as you need.