Amazon IAM Tutorial
In order to control access to your Amazon AWS account, AWS supports a feature called IAM (Identity and Access Management). This feature allows you to create different “users” in your AWS account and to give them different permissions. This is critically important when managing a professional AWS-based operation. Each user that you create has permissions that allow them to create (or delete) content and to launch machines. By having separate users, you can control who has access to certain areas. You can also track usage and access. In this case, the “users” do not have to be different people – they can just be different services that you wish to grant different permissions to. If you are not familiar with IAM on AWS, please take a moment to read about it here: https://aws.amazon.com/iam/
IAM Users
It is good practice to create a new IAM user that you will use with your Hybrik account. When you create a new IAM user for Hybrik, you will need to give that account permissions in order to launch machines in your account and to access S3 files. These permissions can be fine-tuned to match specific input and output locations if you wish. Here are the basic steps to create a new IAM user and give it the required access permissions. In this scenario, we are giving the new IAM user full access to both S3 (storage) and EC2 (computing). If you desire, you can restrict the S3 access to a specific bucket or buckets by editing the policies directly.
Creating An IAM User
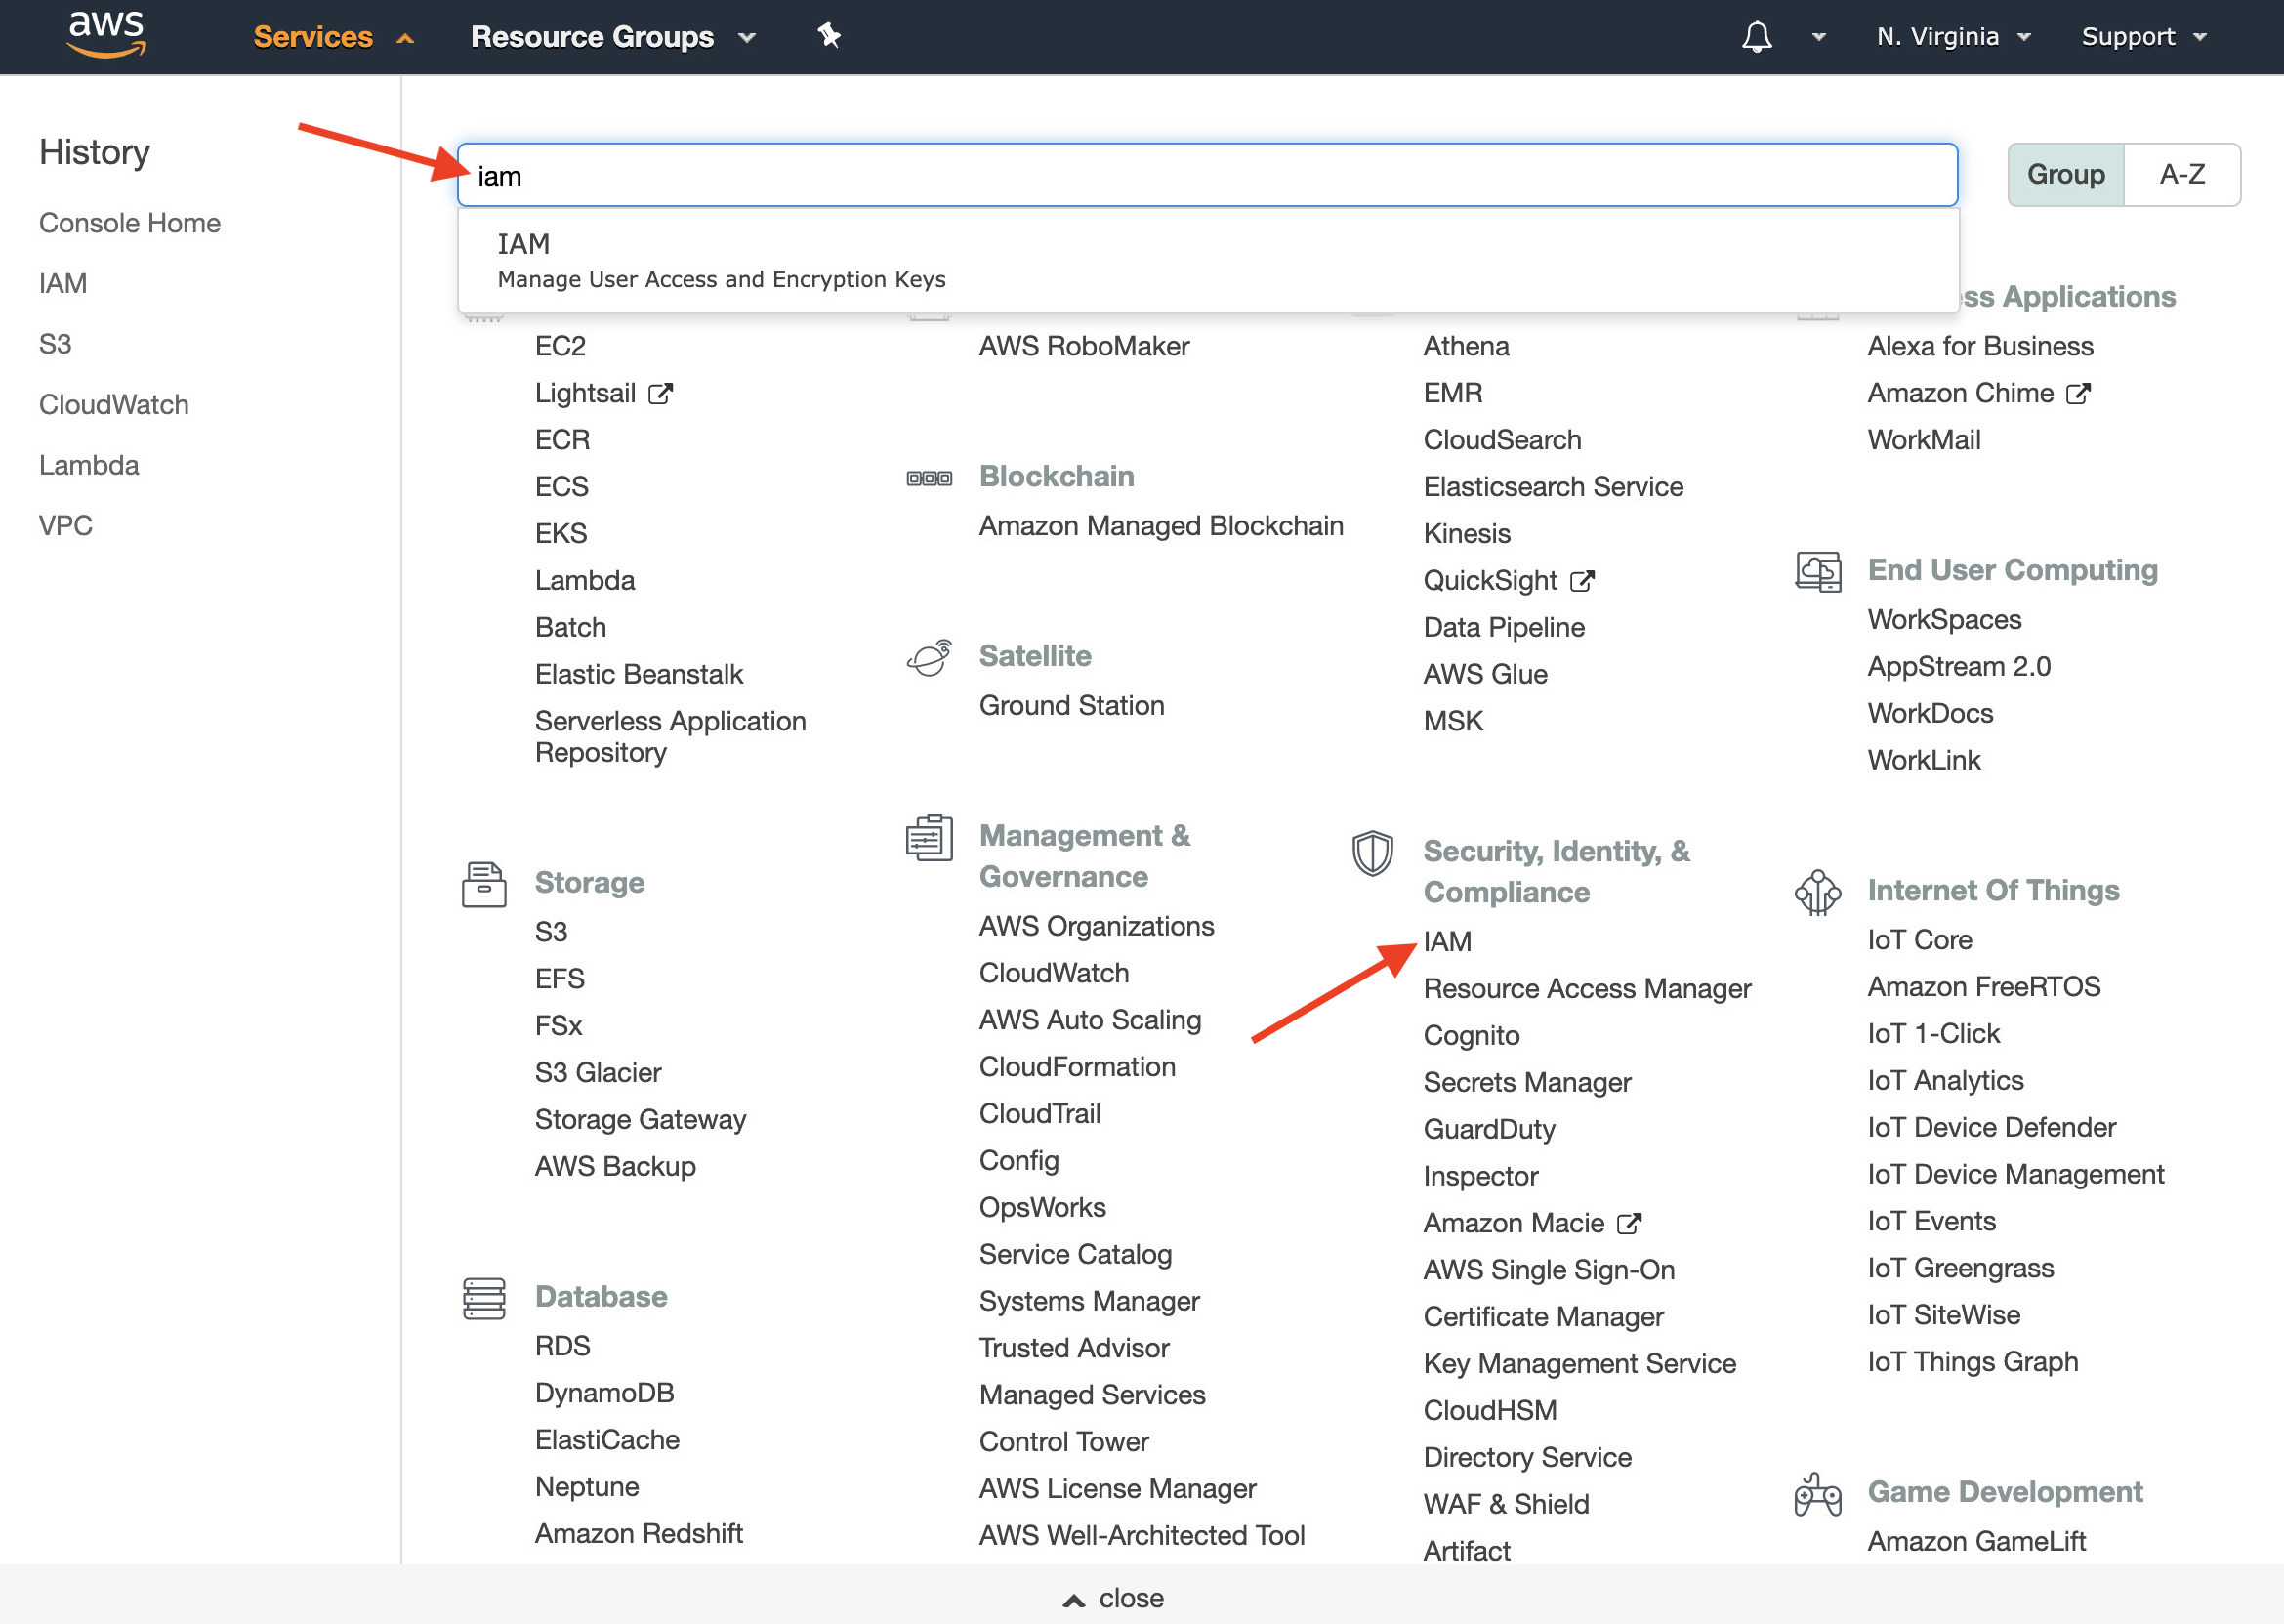
- Log into your AWS Console page. In the list of AWS Services is a section called Security, Identity & Compliance. The first item under that section is IAM. Or you can search in the search box for iam.
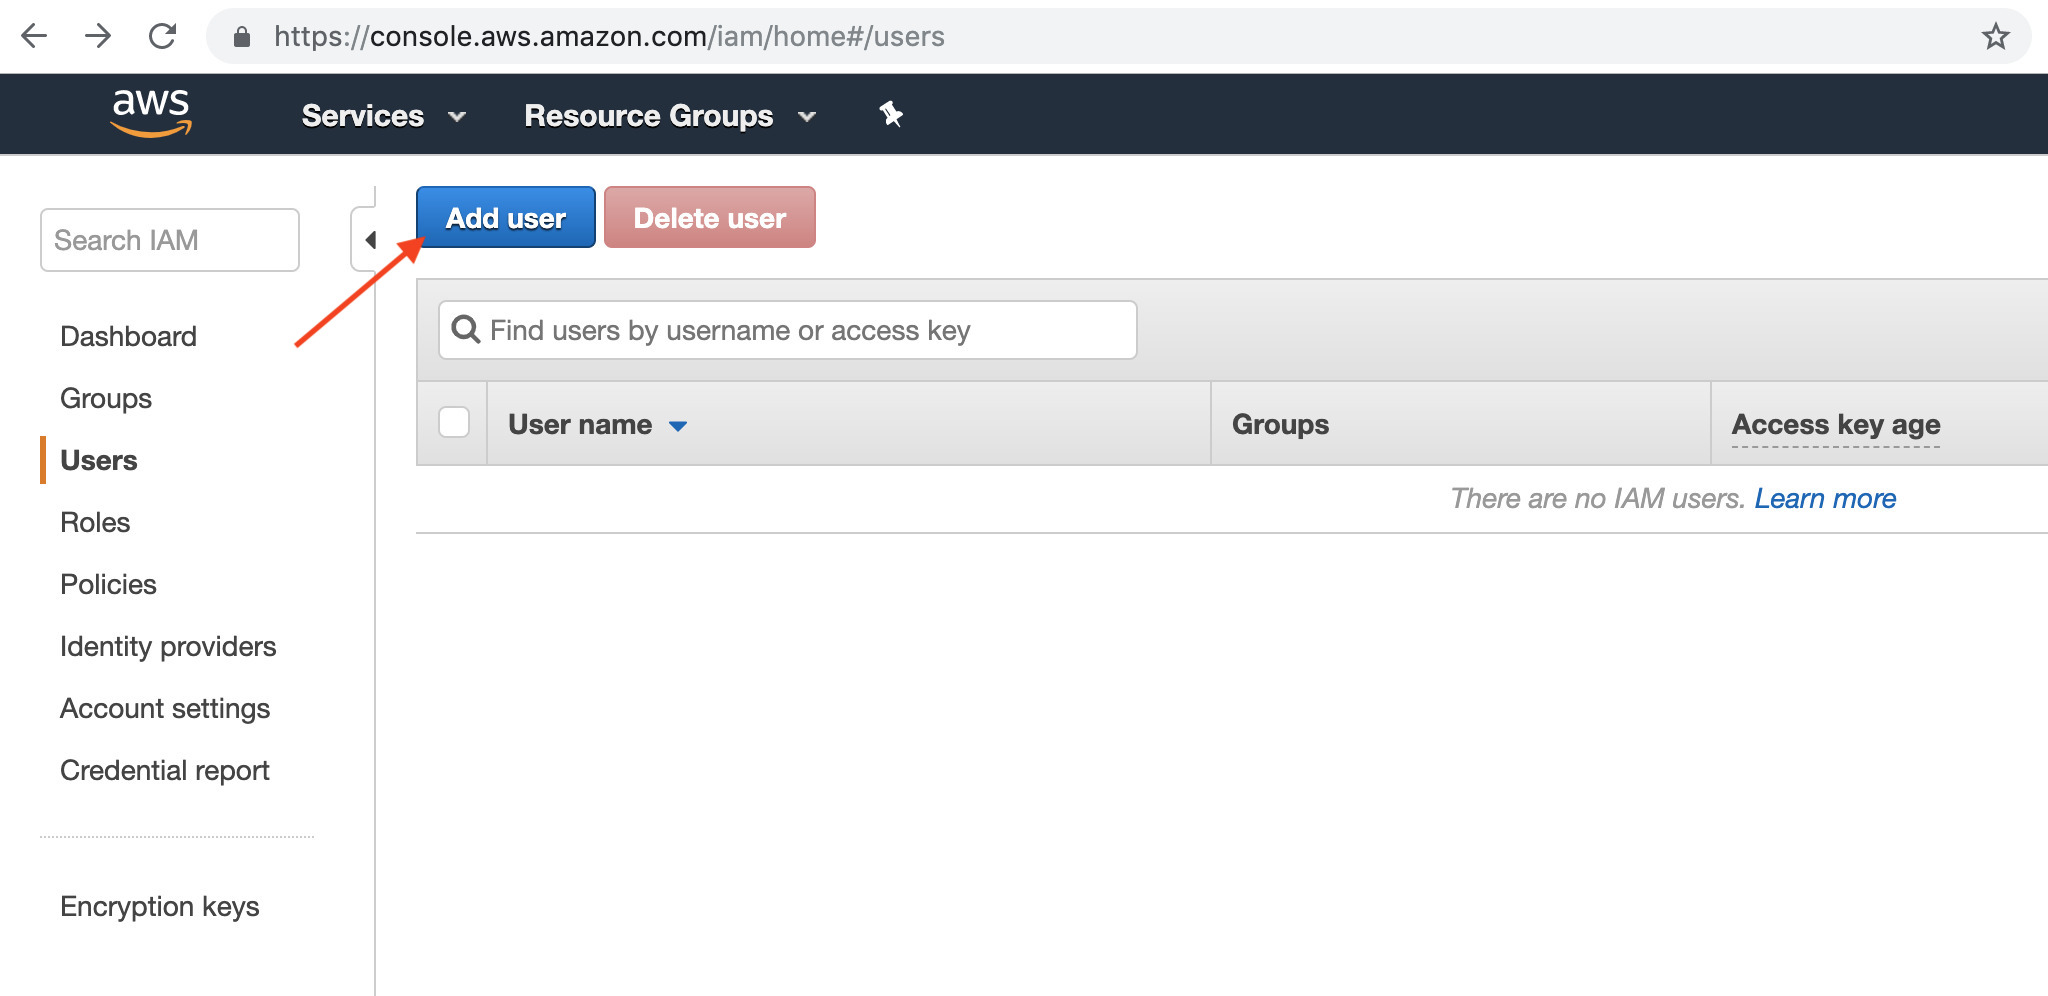
- On the left hand side of the IAM page is a item called Users. Select that, and then click the “Add user” button at the top.
- Give the user a name such as
Hybrik-User. Select programmatic access for this user. This will allow you to create an access key that Hybrik will use to launch machines and access storage. Click Next: Permissions.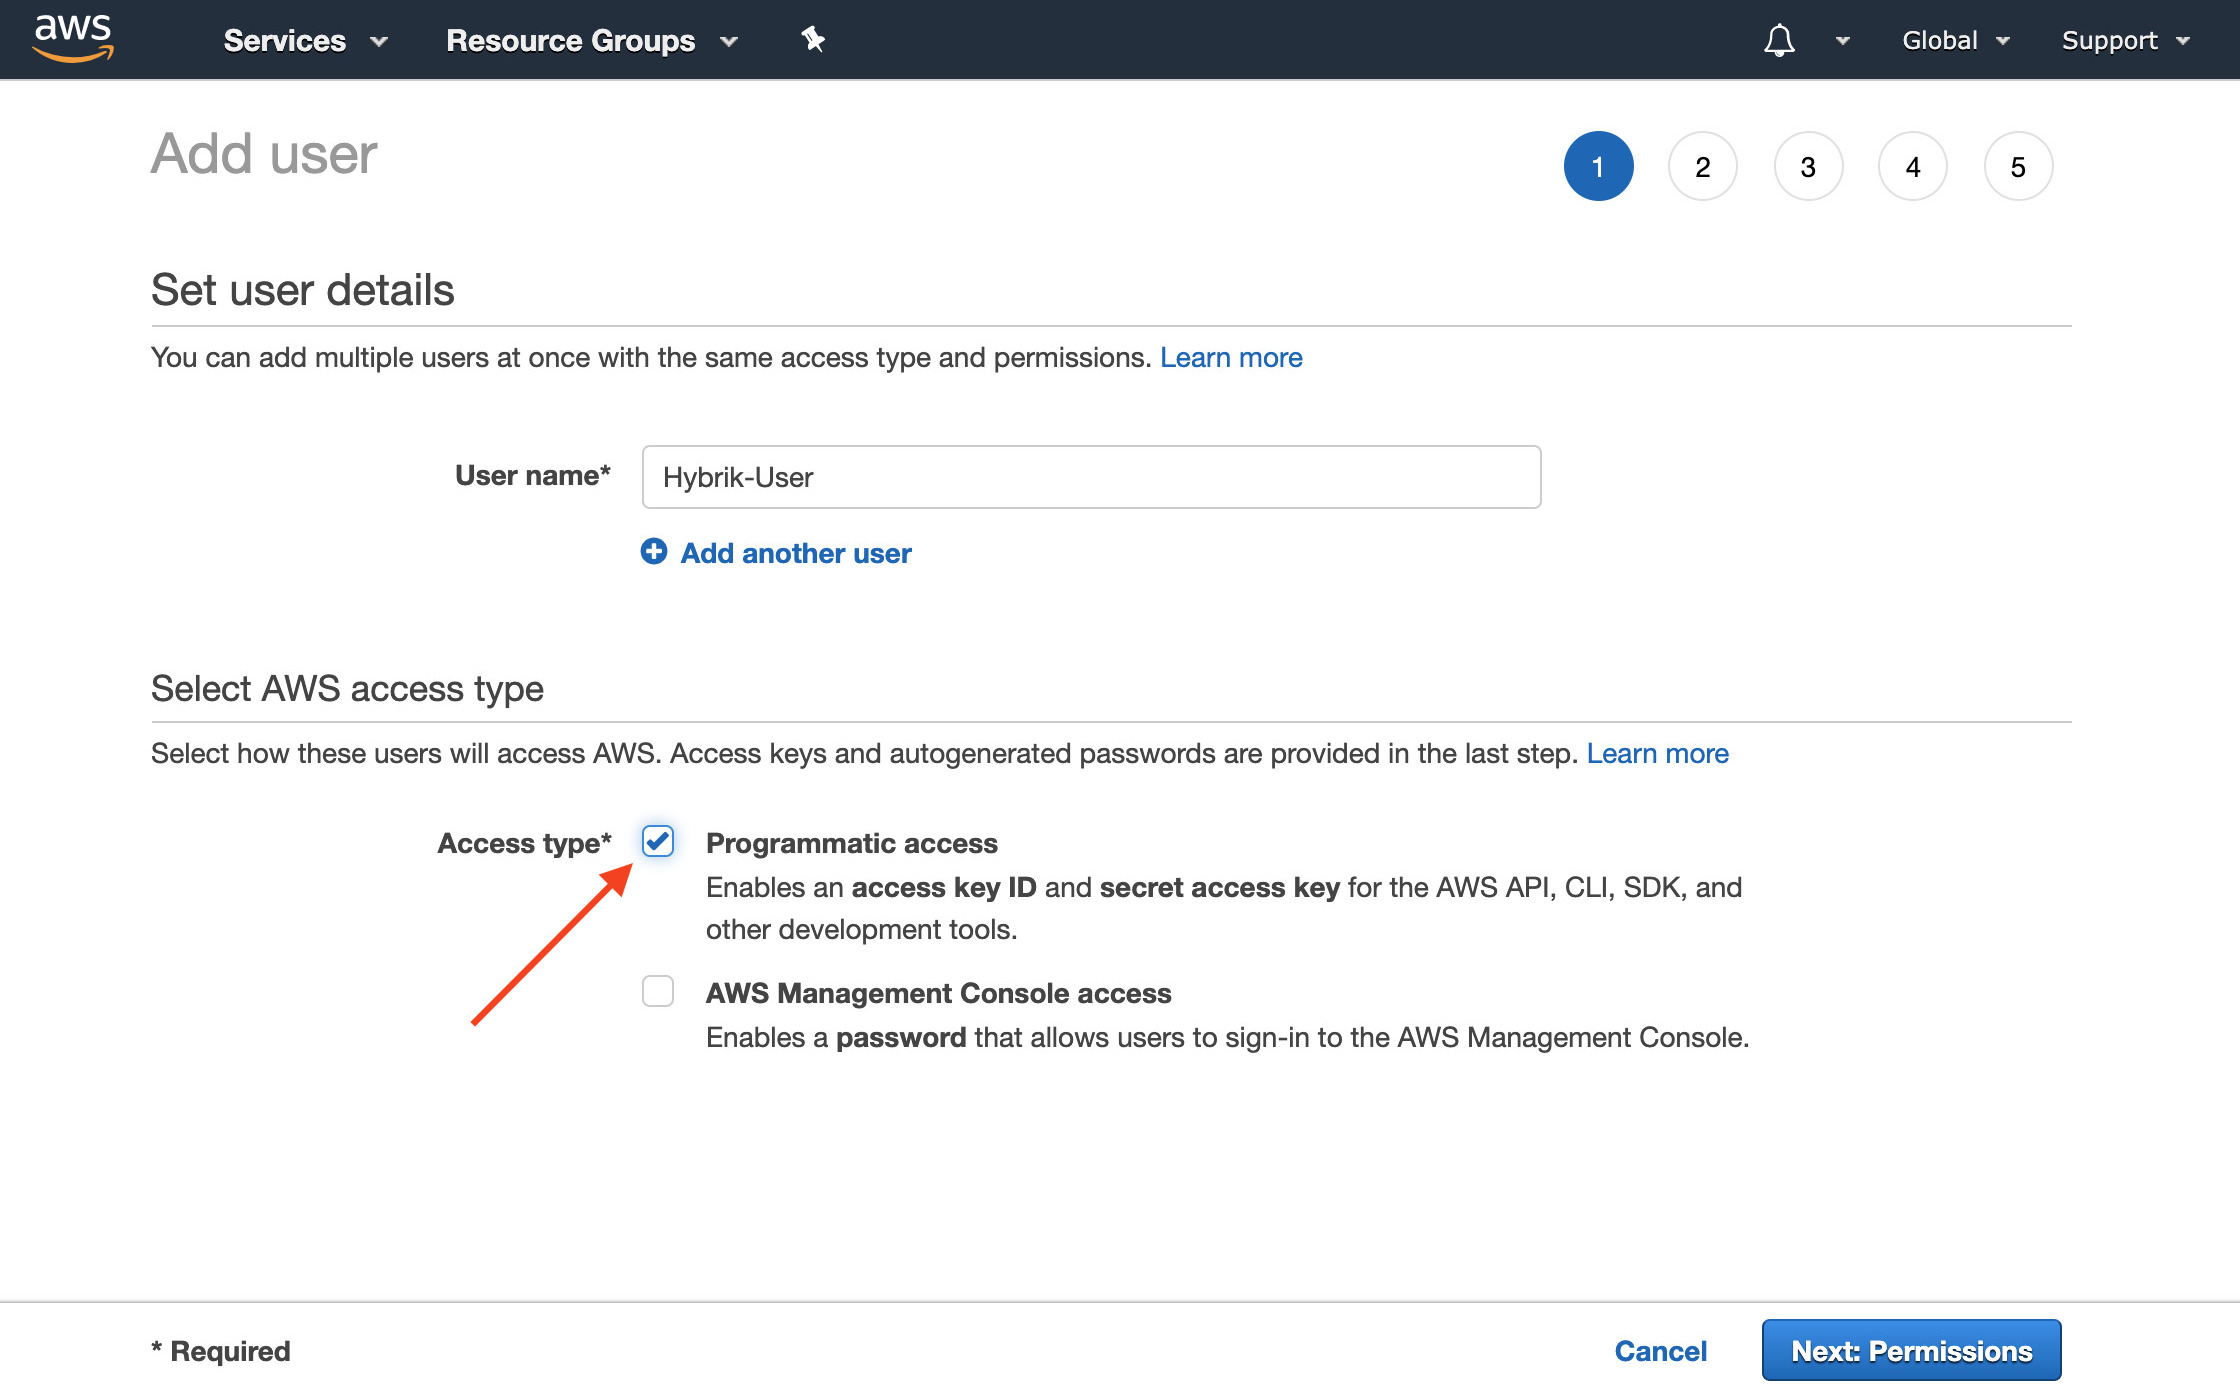
- Select Attach existing policies directly at the top. This will give you a list of about 250 different permissions that are possible to select. There is a filter box that allows you to filter these down to specific policies. Type
s3into this box to see just the permissions related to S3 access. Check the policy calledAmazonS3FullAccess.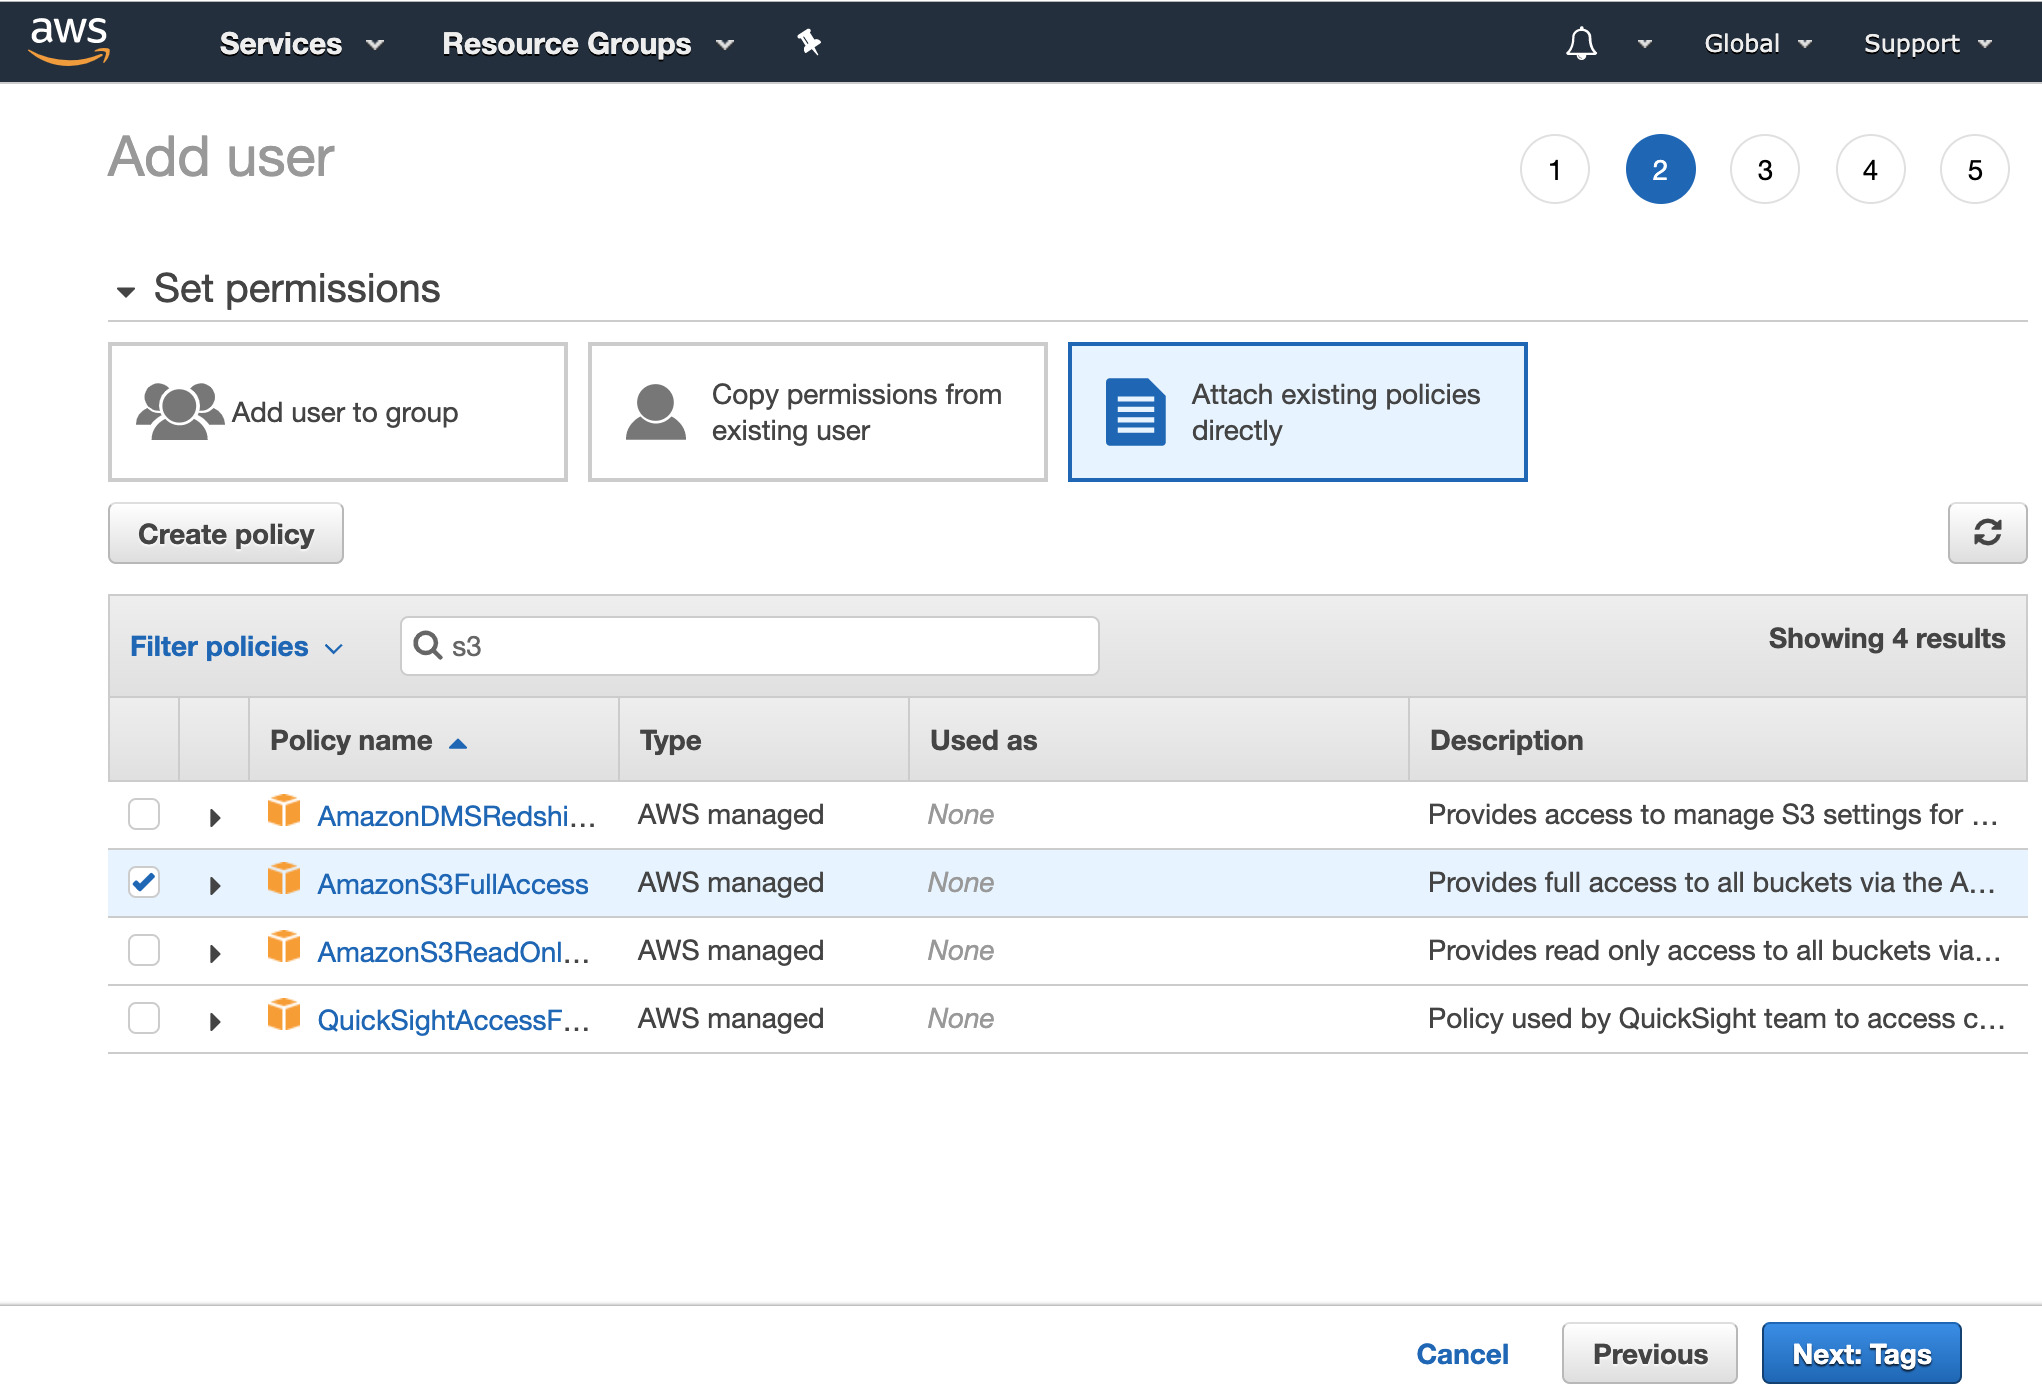
- Change the filter to
ec2, and select the policy calledAmazonEC2FullAccess.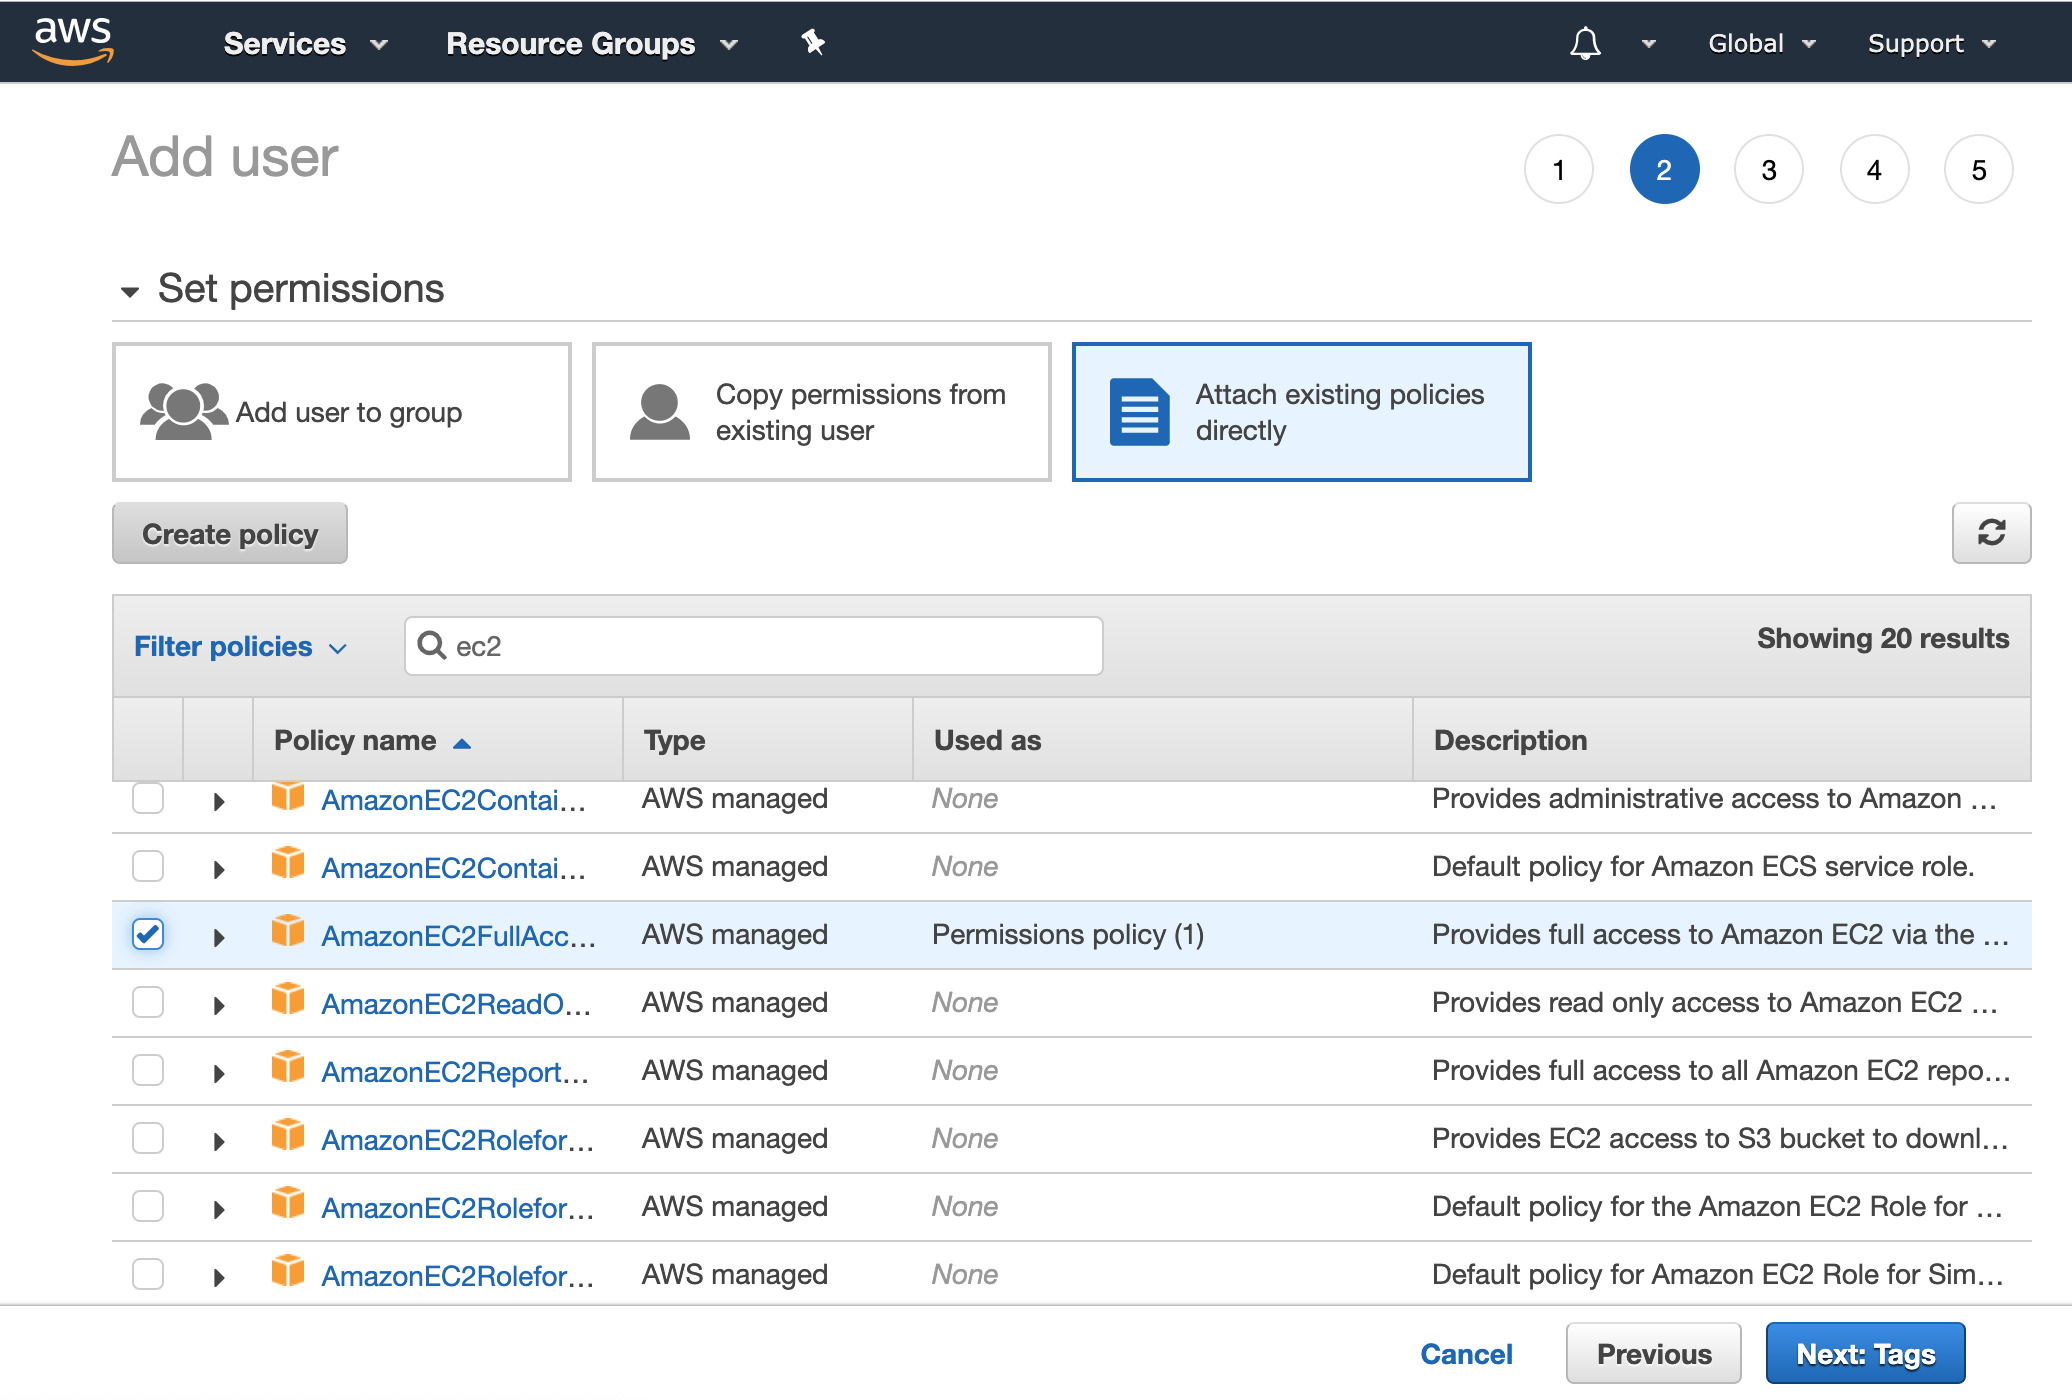 Click the Next: Tags button at the bottom. You can optionally add tags if you like. Then click the Next: Review button.
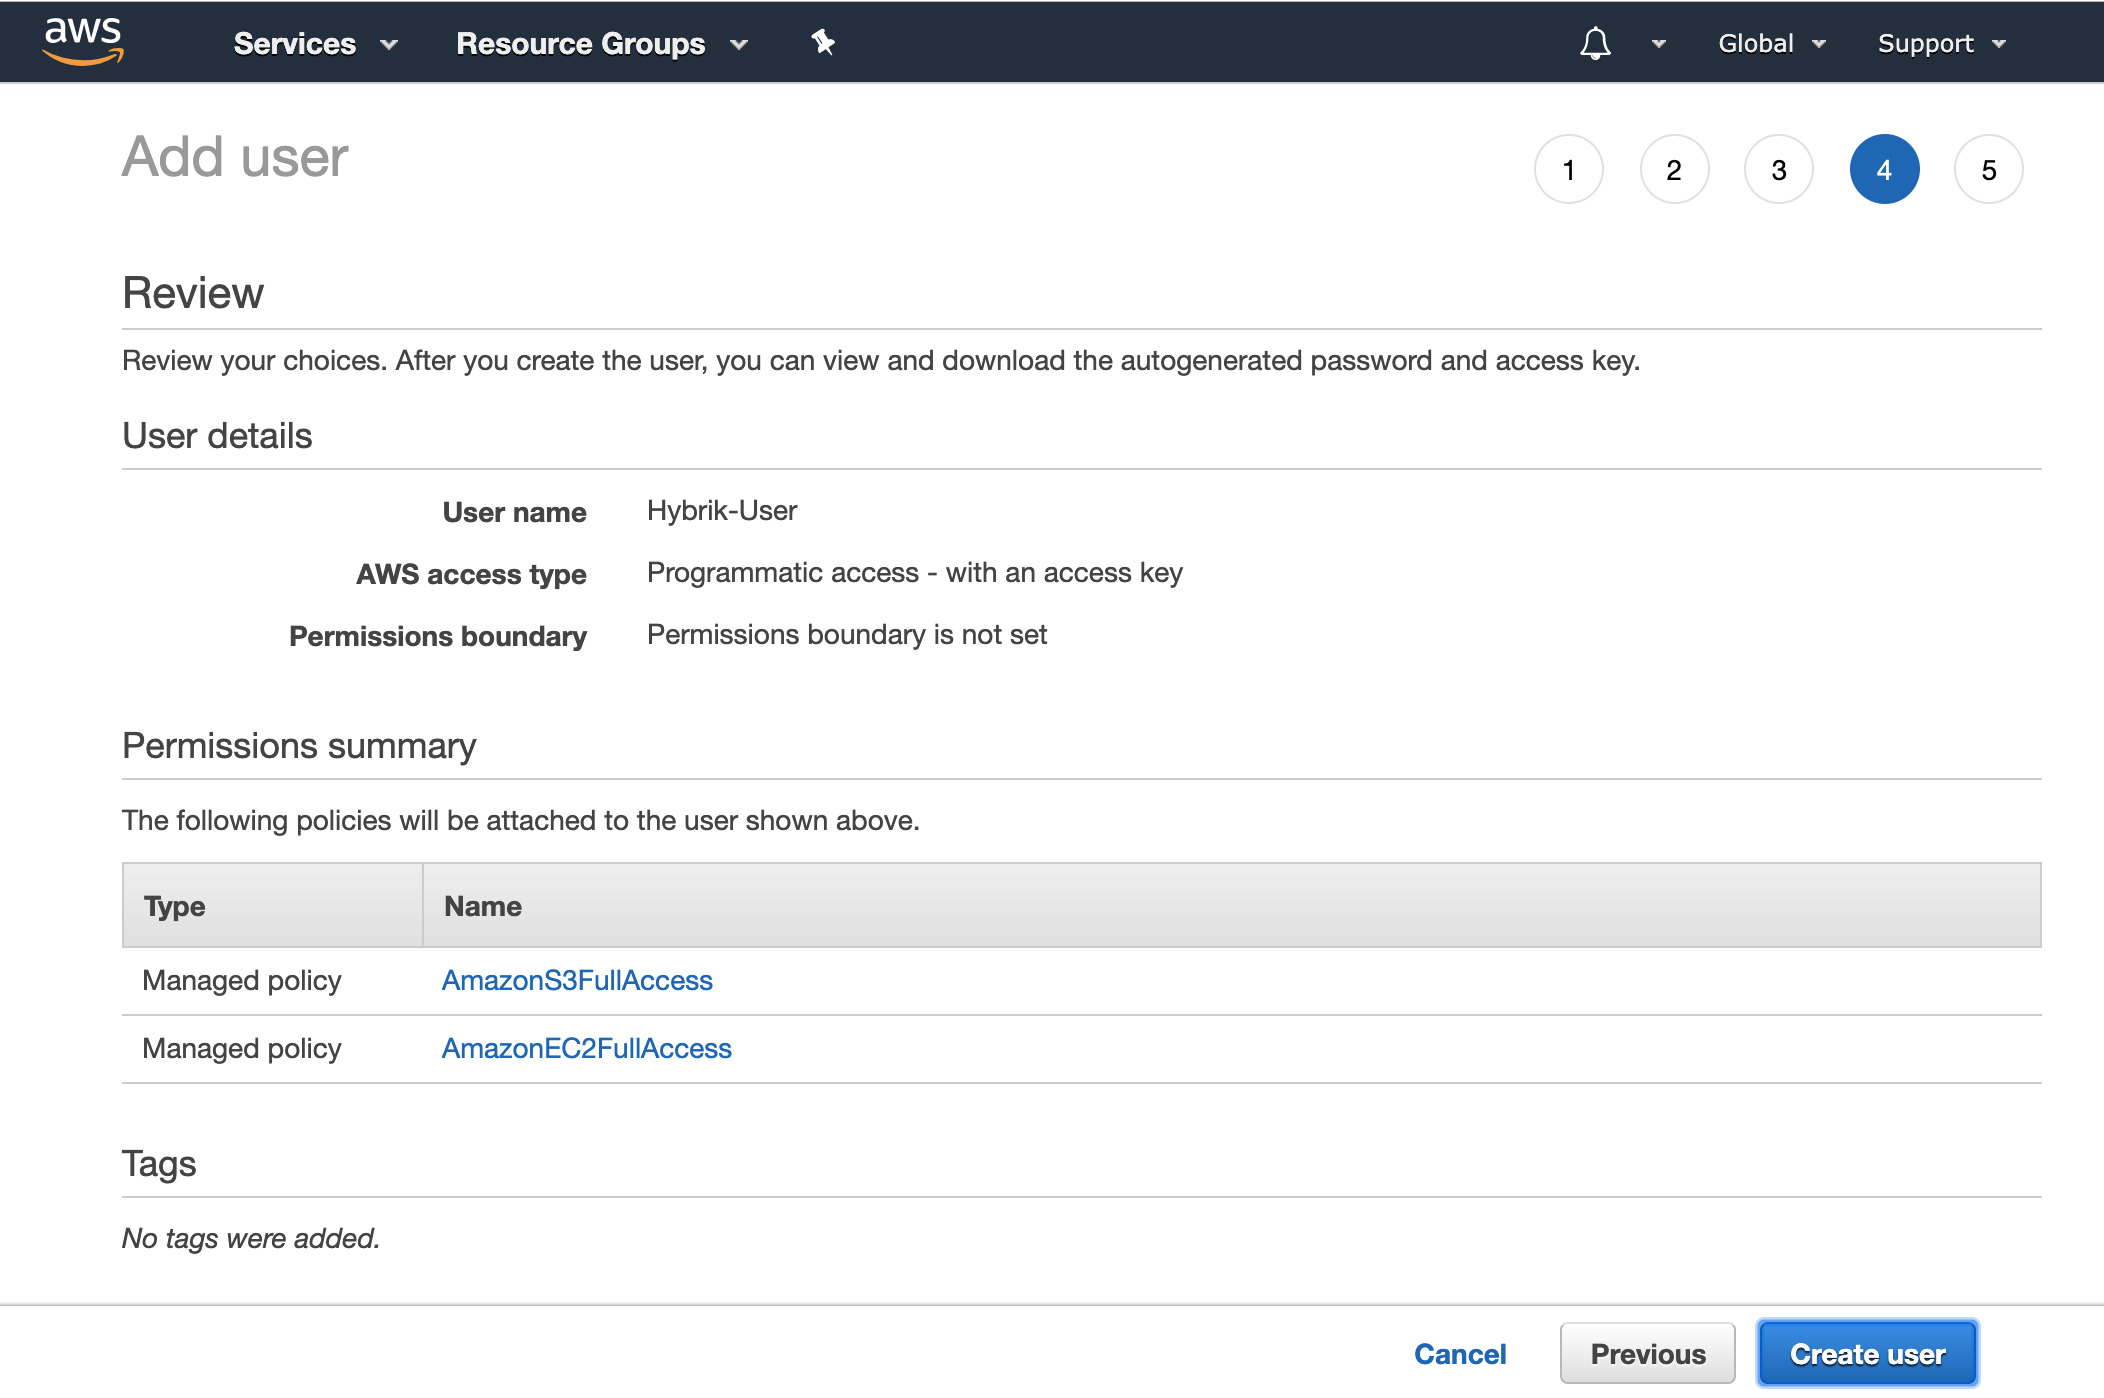
 - Verify that you have the two permission policies attached to the user, and then click the “Create user” button.
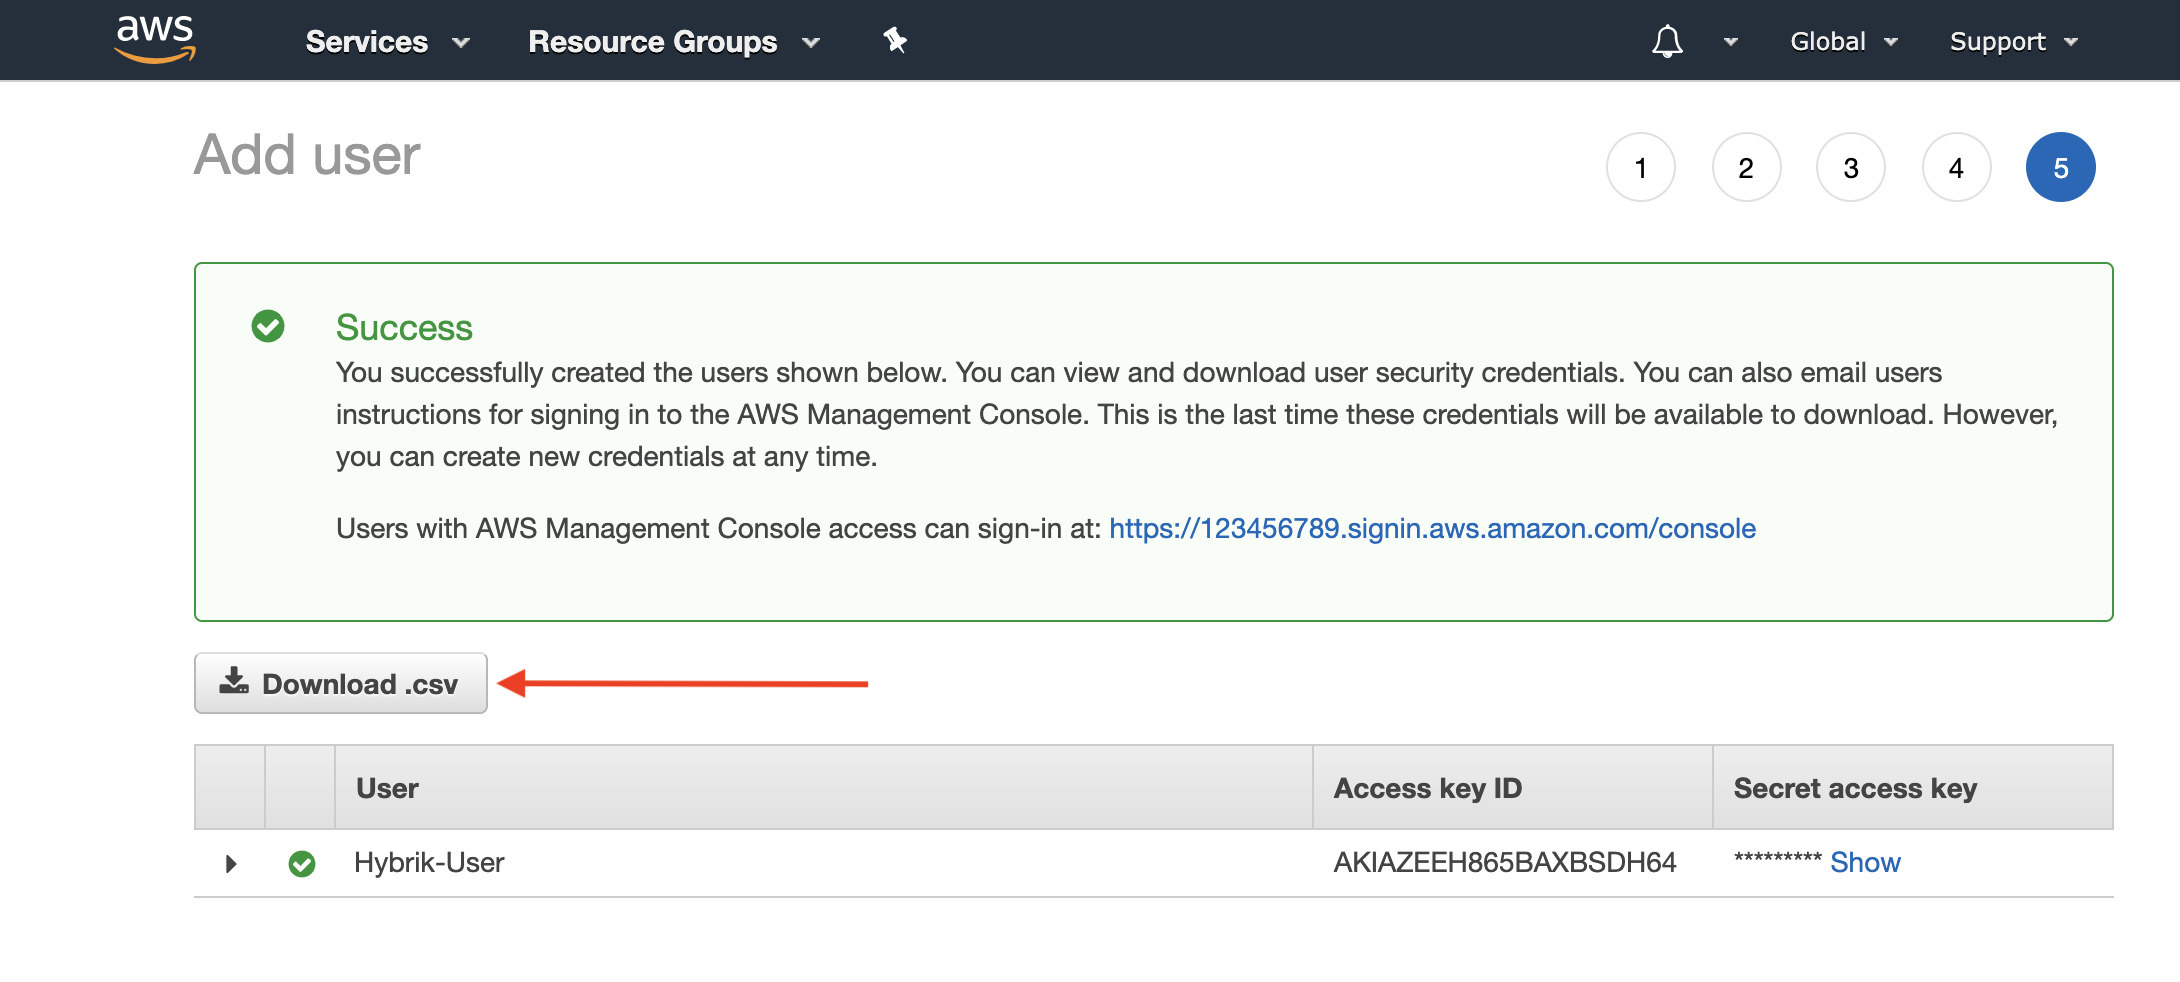
- VERY IMPORTANT - This is your only chance to download (or see) the secret access key associated with this user. If you skip this step, you will have to create a new set of keys. Click Download .csv to download the Access Key ID and Secret Access Key. Store this data securely and do not share with anyone outside your organization.
Custom IAM Policies
IAM allows you to create custom access policies. In this way, you could create an IAM user that only has access to specific buckets for reading and writing. If you are creating a custom access policy, you will need to use our examples below as a starting point. They list the specific actions that your EC2 machines will need to have in order to access the S3 data correctly. For example, for the bucket that is being written to, your Hybrik machine will need access to not only put and get objects, but also to create and abort mulit-part uploads. You first create the policy, and then attach it to the IAM user you are creating. In these examples, the SOURCE_BUCKET_NAME and OUTPUT_BUCKET_NAME would need to be changed to your specific buckets. The source and output buckets can be the same bucket.
Source bucket access policy
{
  "Version":"2012-10-17",
  "Statement":[
    {
      "Action":[
        "s3:GetBucketLocation",
        "s3:ListAllMyBuckets"
      ],
      "Resource":[
        "arn:aws:s3:::*"
      ],
      "Effect":"Allow"
    },
    {
      "Action":[
        "s3:GetBucketLocation",
        "s3:ListBucket",
        "s3:ListAllMyBuckets"
      ],
      "Resource":[
        "arn:aws:s3:::SOURCE_BUCKET_NAME"
      ],
      "Effect":"Allow"
    },
    {
      "Action":[
        "s3:GetObject",
        "s3:GetObjectAcl"
      ],
      "Resource":[
        "arn:aws:s3:::SOURCE_BUCKET_NAME/*"
      ],
      "Effect":"Allow"
    }
  ]
}
Destination bucket access policy
{
  "Version":"2012-10-17",
  "Statement":[
    {
      "Action":[
        "s3:GetBucketLocation",
        "s3:ListAllMyBuckets"
      ],
      "Resource":[
        "arn:aws:s3:::*"
      ],
      "Effect":"Allow"
    },
    {
      "Action":[
        "s3:ListBucket",
        "s3:ListBucketMultipartUploads"
      ],
      "Resource":[
        "arn:aws:s3:::OUTPUT_BUCKET_NAME"
      ],
      "Effect":"Allow"
    },
    {
      "Action":[
        "s3:GetObject",
        "s3:AbortMultipartUpload",
        "s3:ListMultipartUploadParts",
        "s3:DeleteObject",
        "s3:PutObject",
        "s3:GetObjectAcl",
        "s3:PutObjectAcl"
      ],
      "Resource":[
        "arn:aws:s3:::OUTPUT_BUCKET_NAME/*"
      ],
      "Effect":"Allow"
    }
  ]
}
Next Steps
Now that you have an IAM user, you can use those credentials to setup a Computing Group within the Hybrik interface. As a general security practice, you should have a policy of key rotation, where on a regular basis you invalidate existing keys and generate new ones to be used by your services.